Dell OptiPlex GX100 Service Manual - Page 30
System Power Supply, Expansion-Card Cage
 |
View all Dell OptiPlex GX100 manuals
Add to My Manuals
Save this manual to your list of manuals |
Page 30 highlights
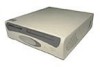
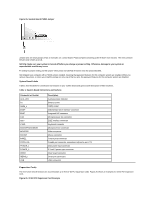
11. If the drive you just installed is the primary drive, insert a bootable diskette (such as the Dell Diagnostics Diskette) into drive A. 12. Turn on the computer system. 13. Enter System Setup and update the appropriate Primary Drive option, 0 or 1 (see the online System User's Guide for complete information on System Setup). 14. After you update the System Setup settings, reboot the system. 15. Partition and logically format your drive before you proceed to the next step. See the documentation for your operating system for instructions. NOTE: On systems with hard-disk drives larger than 2 GB, create a primary partition of 2 GB and divide the remaining capacity into partitions of 2 GB or less. For example, a system with a 2.5-GB hard-disk drive would have a primary partition of 2 GB (drive C) and a second partition of 500 MB (drive D). Hard-disk drives must be partitioned this way because MSDOS®-based operating systems (including Microsoft® Windows NT®, when using a FAT16 file system) do not support drive partitions larger than 2 GB. 16. Test the hard-disk drive by running the Dell Diagnostics (see the online System User's Guide for complete information. 17. If the drive you just installed is the primary drive, install your operating system on the hard-disk drive. For instructions, refer to the documentation that came with your operating system. System Power Supply Figure 20. Power Supply Removal 1 AC power cable 2 AC power receptacle 3 Power supply cradle 4 DC power cables 5 Securing tab To remove the system power supply, perform the following steps: 1. Disconnect the AC power cable from the back of the power supply. 2. Free the system power supply from the securing tab labeled "RELEASE ->" and rotate it upward until it locks. 3. Disconnect the DC power cables from the system board and the drives. Note the routing of the DC power cables underneath the tabs in the chassis as you remove them from the system board and drives. It is important to route these cables properly when you replace them to prevent them from being pinched or crimped. 4. Remove the screw above the AC power receptacle. 5. Lift up on the power supply cradle tab to release the power supply from the cradle and slide the power supply toward the front of the computer approximately 1 inch. 6. Lower the power supply down and away from the computer. Expansion-Card Cage NOTICE: Use a wrist grounding strap as explained in "Precautionary Measures."
-
 1
1 -
2
-
3
-
4
-
5
-
6
-
7
-
8
-
9
-
10
-
11
-
12
-
13
-
14
-
15
-
16
-
17
-
18
-
19
-
20
-
21
-
22
-
23
-
24
-
 25
25 -
 26
26 -
 27
27 -
 28
28 -
 29
29 -
 30
30 -
 31
31 -
 32
32 -
 33
33 -
 34
34 -
 35
35 -
36
-
37
-
38
-
39
-
40
-
41
-
42
-
43
-
44
-
45
-
46
-
47
-
48
-
49
-
50
-
51
-
52
-
53
-
54
-
55
-
56
-
57
-
58
-
59
 |
 |
