Dell OptiPlex Gn Reference and Installation Guide (.pdf) - Page 55
Windows NT 3.5x NIC Driver, Click Yes in the Network Settings Change win
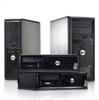 |
View all Dell OptiPlex Gn manuals
Add to My Manuals
Save this manual to your list of manuals |
Page 55 highlights
3. Verify that the NIC is enabled in the System Setup program. See "NIC" in Chapter 2 for more information. 4. Start the Windows NT operating system, and log in as user Administrator or as a user with Administrator privileges. For information on administrative users and privileges, see your Windows NT documentation. 5. Double-click My Computer, double-click Control Panel, and then double-click the Network icon. NOTE: If you are installing networking on your system for the first time, the Windows NT operating system displays a message asking if you want to install networking. Click Yes, and refer to your Windows NT documentation for instructions. 6. Click the Adapters tab in the Network Control Panel, and then click Add to access the Select Network Adapter window. 7. Click Have Disk. Insert the NIC driver diskette 3 into drive A, type a:\, and then click OK. The Select OEM Option dialog box appears. 8. Select 3Com Fast EtherLink XL NIC (3C905) for the 10/100-Mbps NIC, and then click OK. 9. When the operating system has finished copying files from the NIC driver diskette 3, click Close in the Windows Welcome screen. Then click Close in the Network window. 10. If you are prompted, enter information about your specific network. See your network administrator for information. 11. Click Yes in the Network Settings Change window to restart your system. Windows NT 3.5x NIC Driver To connect your system to and configure it for use on an Ethernet network, you must complete the following steps: 1. Use the Program Diskette Maker (in the Dell Accessories program group) to make a diskette copy of the NIC drivers installed on your harddisk drive. 2. Connect the network cable to the back of your computer. See "Network Cable Requirements" found earlier in this chapter for detailed instructions. 3. Verify that the NIC is enabled in the System Setup program. See "NIC" in Chapter 2 for more information. 4. Start the Windows NT operating system, and log in as user Administrator or as a user with Administrator privileges. For information on administrative users and privileges, see your Windows NT documentation. 5. Double-click the Program Manager, double-click the Main group, and then double-click the Control Panel icon. 6. From the Control Panel, double-click the Network icon. The Network Settings window appears. 7. From the Installed Adapters group, select the existing 3Com driver and click Remove. 8. Click Yes in the Network Settings dialog box. 9. Click Add Adapter in the Network Settings window. Then scroll to Requires Disk From Manufacturer, and click Continue. 10. Insert the NIC driver diskette 2 into drive A, type a:\, and then click OK. The Select OEM Option dialog box appears. 11. Select 3Com Fast EtherLink XL NIC (3C905) for the 10/100-Mbps NIC, and then click OK. 12. When the operating system has finished copying files from the NIC driver diskette 2, click Close in the Windows Welcome screen. Then click Close again in the Network window. 13. If you are prompted, enter information about your specific network. See your network administrator for information. 14. Click Yes in the Network Settings Change window to restart your system. Using Integrated Devices 4-3
-
 1
1 -
2
-
3
-
4
-
5
-
6
-
7
-
8
-
9
-
10
-
11
-
12
-
13
-
14
-
15
-
16
-
17
-
18
-
19
-
20
-
21
-
22
-
23
-
24
-
25
-
26
-
27
-
28
-
29
-
30
-
31
-
32
-
33
-
34
-
35
-
36
-
37
-
38
-
39
-
40
-
41
-
42
-
43
-
44
-
45
-
46
-
47
-
48
-
49
-
 50
50 -
 51
51 -
 52
52 -
 53
53 -
 54
54 -
 55
55 -
 56
56 -
 57
57 -
 58
58 -
 59
59 -
 60
60 -
61
-
62
-
63
-
64
-
65
-
66
-
67
-
68
-
69
-
70
-
71
-
72
-
73
-
74
-
75
-
76
-
77
-
78
-
79
-
80
-
81
-
82
-
83
-
84
-
85
-
86
-
87
-
88
-
89
-
90
-
91
-
92
-
93
-
94
-
95
-
96
-
97
-
98
-
99
-
100
-
101
-
102
-
103
-
104
-
105
-
106
-
107
-
108
-
109
-
110
-
111
-
112
-
113
-
114
-
115
-
116
-
117
-
118
-
119
-
120
-
121
-
122
-
123
-
124
-
125
-
126
 |
 |
