Dell PowerConnect W-3600 Installation Guide - Page 13
Installation in a Telecom Rack
 |
View all Dell PowerConnect W-3600 manuals
Add to My Manuals
Save this manual to your list of manuals |
Page 13 highlights
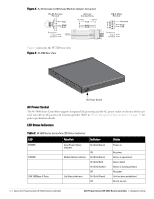
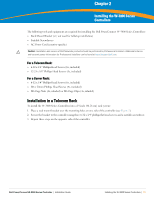
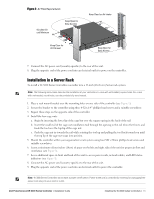
Chapter 2 Installing the W-3000 Series Controllers The following tools and equipment are required for installing the Dell PowerConnect W-3000 Series Controllers: z Rack Mount Bracket (x2, not used for tabletop installation) z Suitable Screwdrivers z AC Power Cord (country-specific) Caution: Installation and service of Dell Networks products should be performed by Professional Installers. Additional antenna and transmit power information for Professional Installers can be found at https://support.dell.com. For a Telecom Rack: z 6-32 x 1/4" Phillips Head Screws (6x, included) z 12-24 x 5/8" Phillips Head Screws (4x, included) For a Server Rack: z 6-32 x 1/4" Phillips Head Screws (6x, included) z M6 x 20mm Phillips Head Screws (4x, included) z M6 Cage Nuts (4x, inluded) or M6 Cage Clips (4x, inluded) Installation in a Telecom Rack To install the W-3000 Series Controllers into a 19-inch (48.26 cm) rack system: 1. Place a rack mount bracket over the mounting holes on one side of the controller (see Figure 1). 2. Secure the bracket to the controller using three 6-32 x 1/4" phillips flat head screws and a suitable screwdriver. 3. Repeat these steps on the opposite side of the controller. Dell PowerConnect W-3000 Series Controller | Installation Guide Installing the W-3000 Series Controllers | 13
-
 1
1 -
2
-
3
-
4
-
5
-
6
-
7
-
 8
8 -
 9
9 -
 10
10 -
 11
11 -
 12
12 -
 13
13 -
 14
14 -
 15
15 -
 16
16 -
 17
17 -
 18
18 -
19
-
20
 |
 |
