Dell PowerVault 200S Dell PowerVault 2xxS Storage Systems SCSI Backplane Board - Page 3
Keylock and Swing-out Lock Bar Silver, Keylock and Removable Lock Bar Black - configuration
 |
View all Dell PowerVault 200S manuals
Add to My Manuals
Save this manual to your list of manuals |
Page 3 highlights
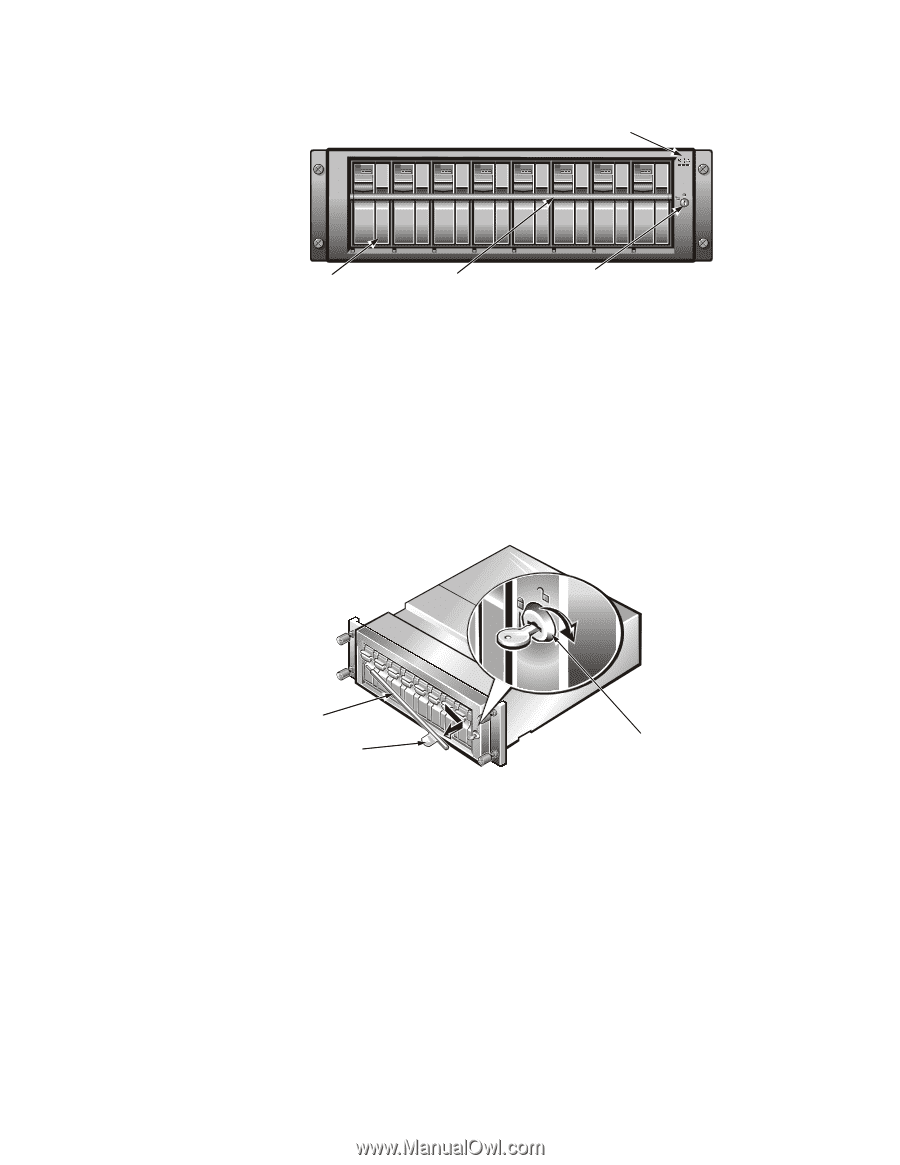
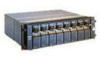
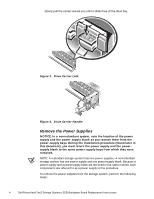
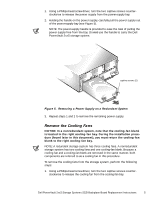
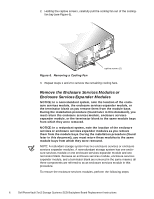
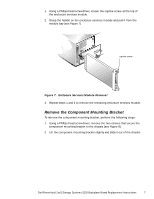
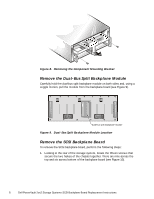
If the storage system is in a stand-alone configuration, tap the bar to the left. The lock bar springs out. Swing the lock bar to the right of the drive bays. enclosure status indicators drive bays lock bar keylock Figure 1. Keylock and Swing-out Lock Bar (Silver) NOTICE: To avoid damage, do not pull the tab handle of the black, removable lock bar out too far. Figure 2 shows the lock bar at an exaggerated angle (after it is completely out of its hole). For a storage system with the black, removable lock bar: a. Grasp the tab handle on the lock bar and gently pull it toward you, about 1/2-inch away from the unlocked keylock. b. Slide the left end of the lock bar to the right to remove it from its hole (see Figure 2). lock bar tab handle key lock Figure 2. Keylock and Removable Lock Bar (Black) 3. Remove the hard-disk drives. NOTICE: Handle the hard-disk drives with care. The carriers provide some protection, but the hard-disk drives can be damaged by rough handling. When removing the hard-disk drives from the storage system, place them on a padded surface. Never drop the hard-disk drives. Release the hard-disk drive carrier by pressing down on the hard-disk drive carrier lock (see Figure 3) and swing the carrier handle down (see Figure 4). Dell PowerVault 2xxS Storage Systems SCSI Backplane Board Replacement Instructions 3
-
 1
1 -
 2
2 -
 3
3 -
 4
4 -
 5
5 -
 6
6 -
 7
7 -
 8
8 -
 9
9 -
10
-
11
-
12
-
13
-
14
 |
 |