Dell PowerVault 530F Upgrading Your System Software to Version 1.35 - Page 9
Applications-> QLogic Config Utility.
 |
View all Dell PowerVault 530F manuals
Add to My Manuals
Save this manual to your list of manuals |
Page 9 highlights
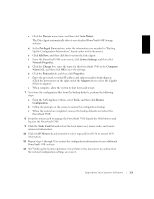
255.255.255.0. For information about setting up the VNC connection, see "Getting Started" in the PowerVault 530F System Administrator's Guide. 6 If you have PowerVault 660F storage systems attached to a PowerVault 530F, perform the following steps to restore the primary and failover path information: a Access the SAN Appliance Menu from an attached keyboard/video/mouse or a VNC connection. b From the main menu, click Applications-> QLogic Config Utility. c From the QL-Config menu, click Connect. d When connected, click Machine Configuration. e Restore the primary and failover paths you recorded in step 2. (Right-click a path entry to select its role.) 7 If you have PowerVault 650F storage units attached to a PowerVault 530F, perform the following steps to perform a low-level configuration: a Access the SAN Appliance Menu from an attached keyboard/video/mouse. b From the main menu, click Applications-> Data Agent. c Click the Devices menu item, and then click Auto Detect. The Data Agent automatically detects any attached PowerVault 650F storage units. d In the Privileged Users section, enter the previously recorded Privileged Users information. e Click File/Save to save the configuration, and then click Yes to restart the Data Agent. f From the PowerVault 530F main menu, click System Settings-> Network Properties. g Click the Change box, enter the Computer Name for this PowerVault 530F, and click OK to save. h Click the Protocols tab, and then click Properties. i Enter the previously recorded IP address and subnet mask for both adapters. (Click the down arrow on the right end of the Adapters box to select the Gigabit Ethernet adapter.) j When complete, the system shuts down and restarts. U p g ra d i n g Yo u r S ys te m S o f t war e 1-7
-
 1
1 -
2
-
3
-
 4
4 -
 5
5 -
 6
6 -
 7
7 -
 8
8 -
 9
9 -
 10
10 -
 11
11 -
 12
12
 |
 |
