Dell PowerVault 530F Rack Installation Guide - Page 27
Reversing the Cable-Management Arm Installation
 |
View all Dell PowerVault 530F manuals
Add to My Manuals
Save this manual to your list of manuals |
Page 27 highlights
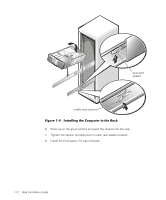
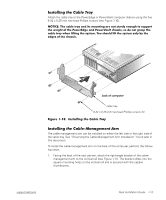
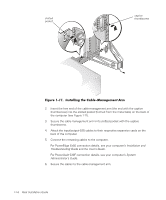
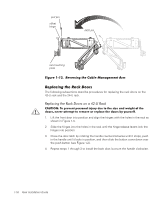
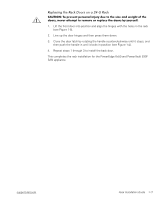
Attach the cable tray to the PowerEdge or PowerVault computer chassis using the five 6-32 x 0.25-inch hex-head Phillips screws (see Figure 1-10). back of computer cable tray 6-32 x 0.25-inch hex-head Phillips screws (5) The cable management arm can be installed on either the left side or the right side of the cable tray. See "Reversing the Cable-Management Arm Installation" found later in this document. To install the cable-management arm on the back of the computer, perform the following steps: 1. Facing the back of the rack cabinet, attach the right-angle bracket of the cable- management arm to the vertical rail (see Figure 1-11). The bracket slides into the square mounting holes on the vertical rail and is secured with the captive thumbscrew. support.dell.com Rack Installation Guide 1-13
-
 1
1 -
2
-
3
-
4
-
5
-
6
-
7
-
8
-
9
-
10
-
11
-
12
-
13
-
14
-
15
-
16
-
17
-
18
-
19
-
20
-
21
-
 22
22 -
 23
23 -
 24
24 -
 25
25 -
 26
26 -
 27
27 -
 28
28 -
 29
29 -
 30
30 -
 31
31 -
 32
32 -
33
-
34
 |
 |
