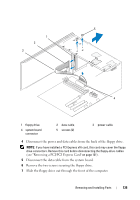
Dell System 200 Owner's Manual - Page 139
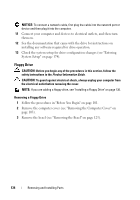
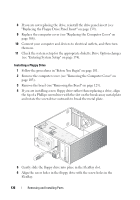
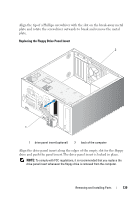
Replacing the Floppy Drive Panel Insert
 |
View all Dell System 200 manuals
Add to My Manuals
Save this manual to your list of manuals |
Page 139 highlights
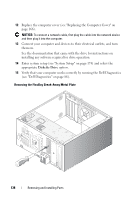
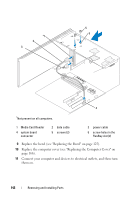
Align the tip of a Phillips screwdriver with the slot on the break-away metal plate and rotate the screwdriver outwards to break and remove the metal plate. Replacing the Floppy Drive Panel Insert 2 1 1 drive panel insert (optional) 2 back of the computer Align the drive panel insert along the edges of the empty slot for the floppy drive and push the panel insert.The drive panel insert is locked in place. NOTE: To comply with FCC regulations, it is recommended that you replace the drive panel insert whenever the floppy drive is removed from the computer. Removing and Installing Parts 139
-
 1
1 -
2
-
3
-
4
-
5
-
6
-
7
-
8
-
9
-
10
-
11
-
12
-
13
-
14
-
15
-
16
-
17
-
18
-
19
-
20
-
21
-
22
-
23
-
24
-
25
-
26
-
27
-
28
-
29
-
30
-
31
-
32
-
33
-
34
-
35
-
36
-
37
-
38
-
39
-
40
-
41
-
42
-
43
-
44
-
45
-
46
-
47
-
48
-
49
-
50
-
51
-
52
-
53
-
54
-
55
-
56
-
57
-
58
-
59
-
60
-
61
-
62
-
63
-
64
-
65
-
66
-
67
-
68
-
69
-
70
-
71
-
72
-
73
-
74
-
75
-
76
-
77
-
78
-
79
-
80
-
81
-
82
-
83
-
84
-
85
-
86
-
87
-
88
-
89
-
90
-
91
-
92
-
93
-
94
-
95
-
96
-
97
-
98
-
99
-
100
-
101
-
102
-
103
-
104
-
105
-
106
-
107
-
108
-
109
-
110
-
111
-
112
-
113
-
114
-
115
-
116
-
117
-
118
-
119
-
120
-
121
-
122
-
123
-
124
-
125
-
126
-
127
-
128
-
129
-
130
-
131
-
132
-
133
-
 134
134 -
 135
135 -
 136
136 -
 137
137 -
 138
138 -
 139
139 -
 140
140 -
 141
141 -
 142
142 -
 143
143 -
 144
144 -
145
-
146
-
147
-
148
-
149
-
150
-
151
-
152
-
153
-
154
-
155
-
156
-
157
-
158
-
159
-
160
-
161
-
162
-
163
-
164
-
165
-
166
-
167
-
168
-
169
-
170
-
171
-
172
-
173
-
174
-
175
-
176
-
177
-
178
-
179
-
180
-
181
-
182
-
183
-
184
-
185
-
186
-
187
-
188
-
189
-
190
-
191
-
192
-
193
-
194
-
195
-
196
-
197
-
198
-
199
-
200
-
201
-
202
-
203
-
204
-
205
-
206
-
207
-
208
-
209
-
210
-
211
-
212
-
213
-
214
 |
 |

Removing and Installing Parts
139
Align the tip of a Phillips screwdriver with the slot on the break-away metal
plate and rotate the screwdriver outwards to break and remove the metal
plate.
Replacing the Floppy Drive Panel Insert
Align the drive panel insert along the edges of the empty slot for the floppy
drive and push the panel insert.The drive panel insert is locked in place.
NOTE:
To comply with FCC regulations, it is recommended that you replace the
drive panel insert whenever the floppy drive is removed from the computer.
1
drive panel insert (optional)
2
back of the computer
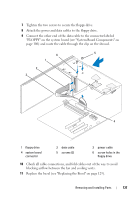
2
1