Dell Vostro 24 5450 Dell Vostro 245450 Owners Manual - Page 13
Installing the Heatsink, Removing the WLAN Card
 |
View all Dell Vostro 24 5450 manuals
Add to My Manuals
Save this manual to your list of manuals |
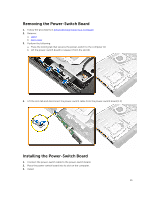
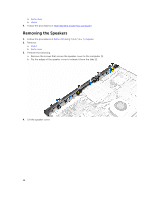
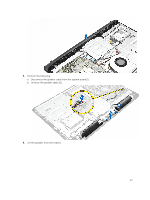
Page 13 highlights
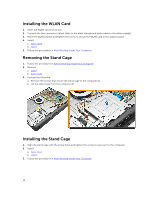
Installing the Heatsink 1. Install the heatsink to align with the screw holes on the system board. 2. Tighten the screws to secure the heatsink to the system board. 3. Install: a. back cover b. stand 4. Follow the procedures in After Working Inside Your Computer. Removing the WLAN Card 1. Follow the procedures in Before Working Inside Your Computer. 2. Remove: a. stand b. back cover 3. Perform the following steps as shown in the illustration: a. Remove the screw that secures the WLAN card [1]. b. Slide to remove the WLAN bracket from the system board [2]. c. Disconnect the connectors that secure the WLAN card to the WLAN card [3]. d. Remove the WLAN card from its slot [4]. 13
-
 1
1 -
2
-
3
-
4
-
5
-
6
-
7
-
 8
8 -
 9
9 -
 10
10 -
 11
11 -
 12
12 -
 13
13 -
 14
14 -
 15
15 -
 16
16 -
 17
17 -
 18
18 -
19
-
20
-
21
-
22
-
23
-
24
-
25
-
26
-
27
-
28
-
29
-
30
-
31
-
32
-
33
-
34
-
35
-
36
-
37
-
38
 |
 |
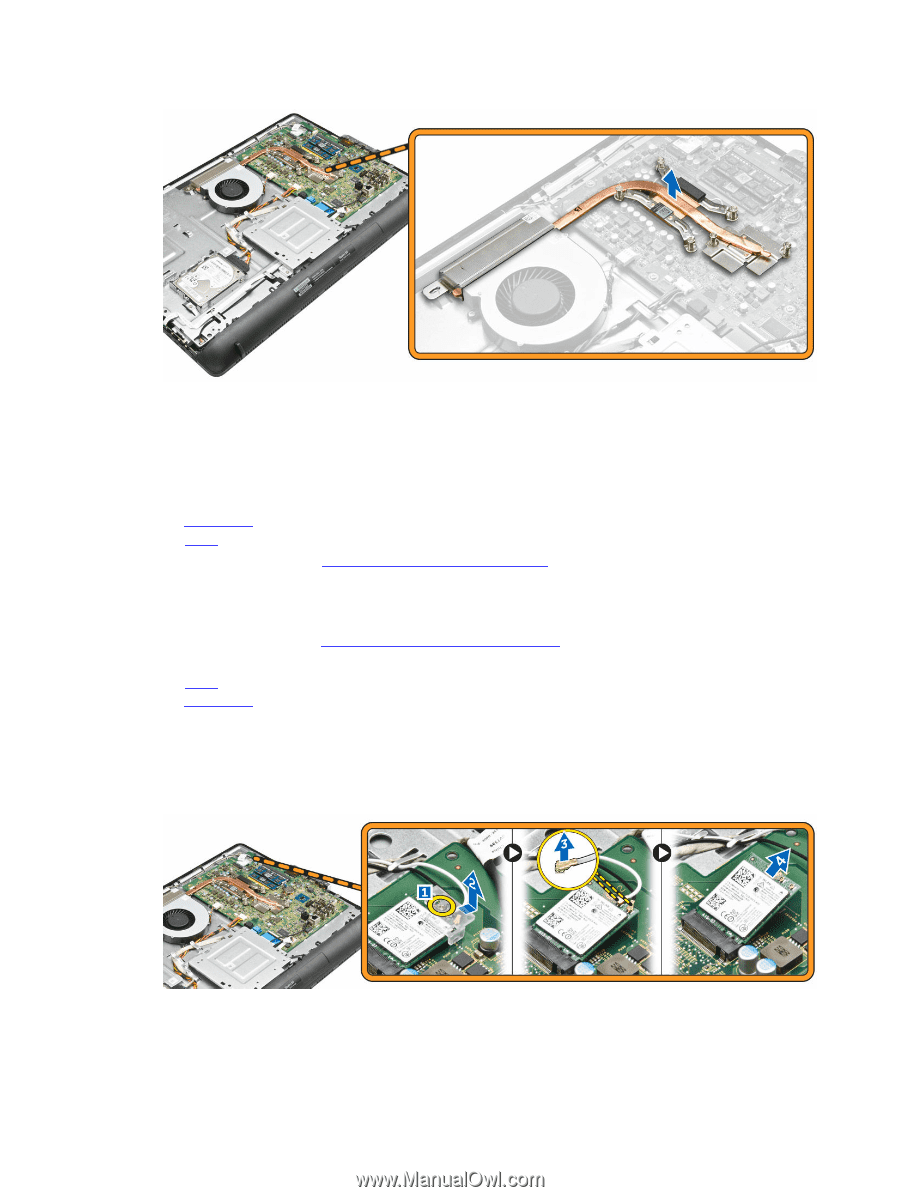
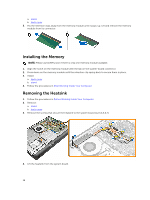
Installing the Heatsink
1.
Install the heatsink to align with the screw holes on the system board.
2.
Tighten the screws to secure the heatsink to the system board.
3.
Install:
a.
back cover
b.
stand
4.
Follow the procedures in
After Working Inside Your Computer
.
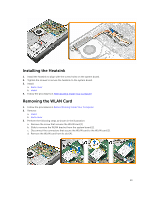
Removing the WLAN Card
1.
Follow the procedures in
Before Working Inside Your Computer
.
2.
Remove:
a.
stand
b.
back cover
3.
Perform the following steps as shown in the illustration:
a.
Remove the screw that secures the WLAN card [1].
b.
Slide to remove the WLAN bracket from the system board [2].
c.
Disconnect the connectors that secure the WLAN card to the WLAN card [3].
d.
Remove the WLAN card from its slot [4].
13