Dell Vostro 420 Service Manual - Page 26
Removing a Drive Bay Break-Away Metal Plate
 |
UPC - 683728233853
View all Dell Vostro 420 manuals
Add to My Manuals
Save this manual to your list of manuals |
Page 26 highlights
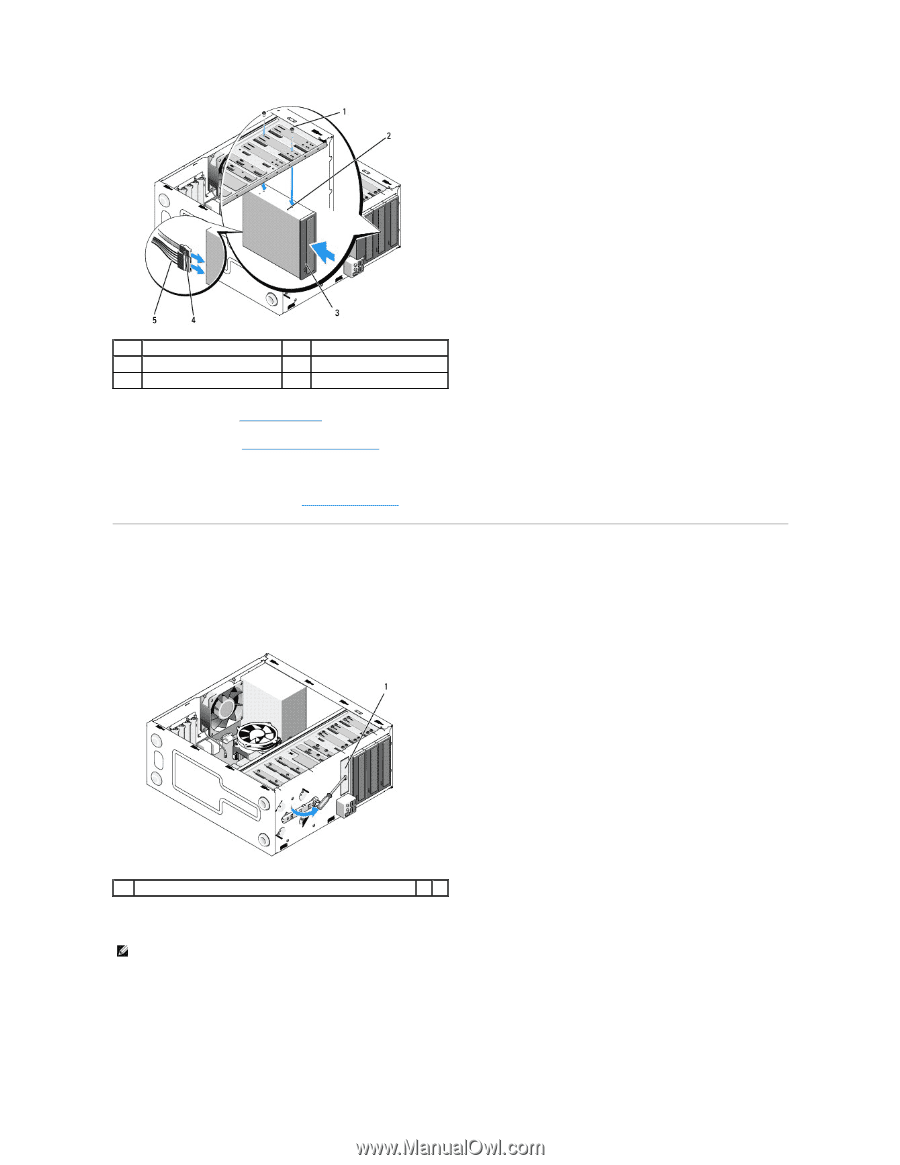
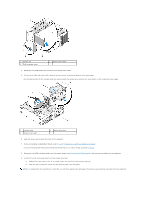
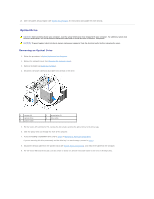
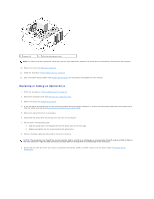
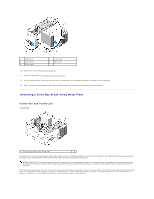
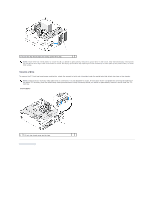
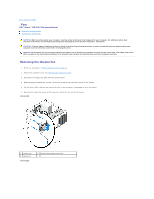
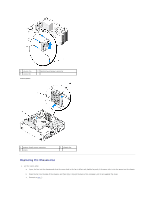
1 screws (2) 3 optical drive 5 power cable 2 screw holes 4 data cable 10. Replace the bezel (see Replacing the Bezel). 11. Follow the procedure in After Working on Your Computer. 12. See the documentation that came with the drive for instructions on installing any software required for drive operation. 13. Enter the system setup program (see System Setup Program for instructions) and update the drive settings. Removing a Drive Bay Break-Away Metal Plate Vostro 420 and Vostro 220 Vostro 420 1 3.5-inch bay break-away metal plate To remove the 3.5-inch bay break-away metal plate, insert the tip of a Phillips screwdriver into the slot on the plate, and rotate the screwdriver outwards for leverage to twist and ultimately break the two metal tabs that attach the plate to the chassis. NOTE: Discard the 3.5-inch bay metal plate once it is removed. It is not designed for reuse. A front-panel insert is available for covering the opening of the empty 3.5-inch bay (once the break-away metal plate has been initially removed) should you decide to permanently remove a device from the 3.5inch bay. The break-away metal plates for the 5.25-inch drive bays can be reused as front-panel inserts to cover an empty 5.25-inch drive bay. Before removing a metal plate for an optical drive bay (5.25-inch drive bay), notice whether it is still a break-away plate or whether it is attached with two screws. Remove the two screws, if installed, or use the Phillips screwdriver to break away the plate, as appropriate.
-
 1
1 -
2
-
3
-
4
-
5
-
6
-
7
-
8
-
9
-
10
-
11
-
12
-
13
-
14
-
15
-
16
-
17
-
18
-
19
-
20
-
 21
21 -
 22
22 -
 23
23 -
 24
24 -
 25
25 -
 26
26 -
 27
27 -
 28
28 -
 29
29 -
 30
30 -
 31
31 -
32
-
33
-
34
-
35
-
36
-
37
-
38
-
39
-
40
-
41
-
42
-
43
-
44
-
45
-
46
-
47
-
48
-
49
-
50
-
51
-
52
-
53
-
54
-
55
-
56
-
57
-
58
-
59
-
60
-
61
-
62
-
63
-
64
-
65
-
66
-
67
-
68
-
69
-
70
 |
 |