Dell Vostro 420 Service Manual - Page 29
Replacing the Chassis Fan
 |
UPC - 683728233853
View all Dell Vostro 420 manuals
Add to My Manuals
Save this manual to your list of manuals |
Page 29 highlights
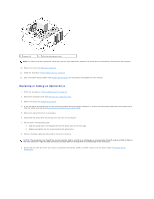
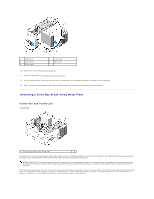
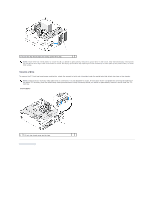
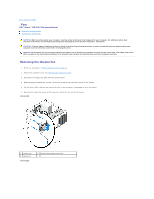
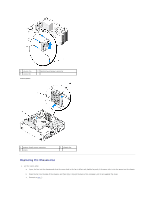
1 chassis fan 3 screws (4) Vostro 220s 2 system board power connector 1 system board power connector 3 screw 2 chassis fan Replacing the Chassis Fan 1. For the Vostro 220s: a. Lower the fan into the chassis such that the screw hole in the fan is offset and slightly forward of the screw hole in the fan mount on the chassis. b. Press the fan into the side of the chassis, and then slide it toward the back of the computer until it sets against the stops. c. Proceed to step 3.
-
 1
1 -
2
-
3
-
4
-
5
-
6
-
7
-
8
-
9
-
10
-
11
-
12
-
13
-
14
-
15
-
16
-
17
-
18
-
19
-
20
-
21
-
22
-
23
-
 24
24 -
 25
25 -
 26
26 -
 27
27 -
 28
28 -
 29
29 -
 30
30 -
 31
31 -
 32
32 -
 33
33 -
 34
34 -
35
-
36
-
37
-
38
-
39
-
40
-
41
-
42
-
43
-
44
-
45
-
46
-
47
-
48
-
49
-
50
-
51
-
52
-
53
-
54
-
55
-
56
-
57
-
58
-
59
-
60
-
61
-
62
-
63
-
64
-
65
-
66
-
67
-
68
-
69
-
70
 |
 |
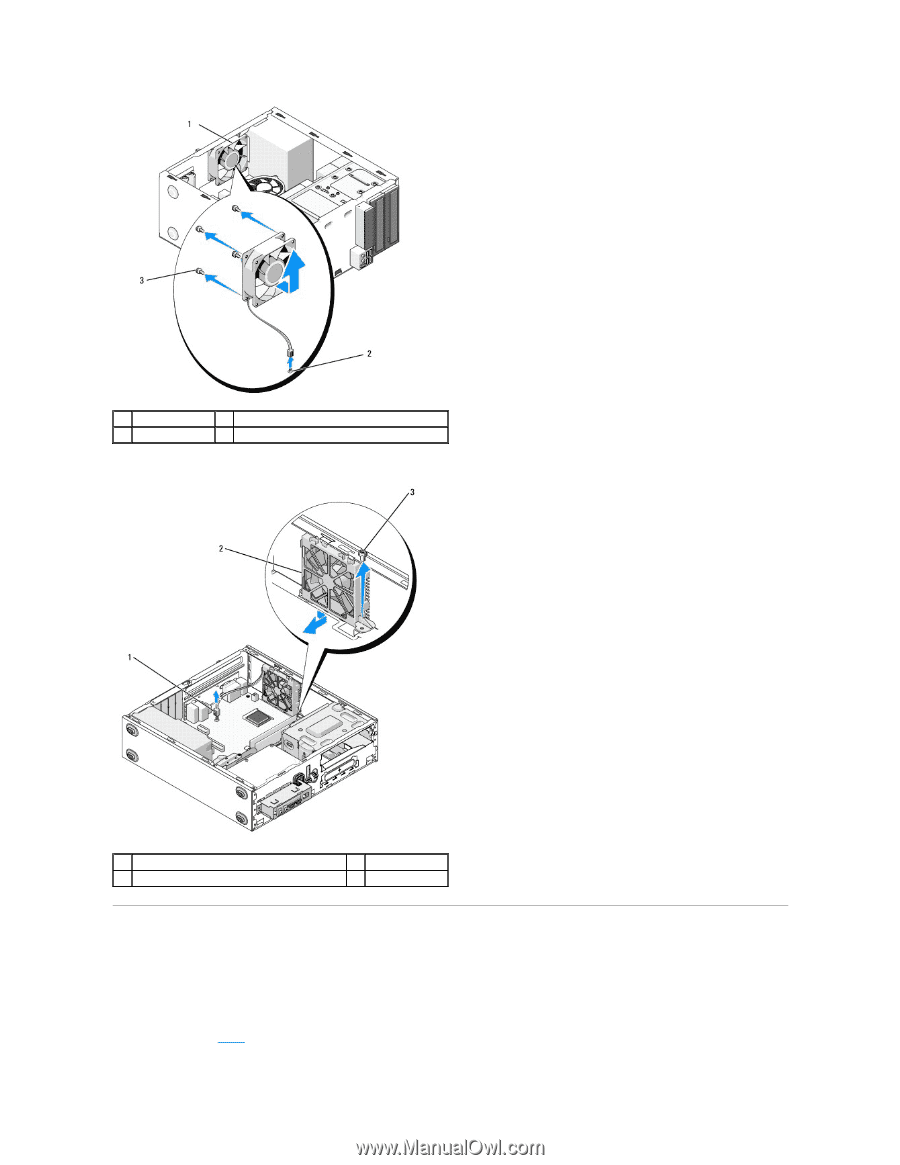
Vostro 220s
Replacing the Chassis Fan
1.
For the Vostro 220s:
a.
Lower the fan into the chassis such that the screw hole in the fan is offset and slightly forward of the screw hole in the fan mount on the chassis.
b.
Press the fan into the side of the chassis, and then slide it toward the back of the computer until it sets against the stops.
c.
Proceed to
step 3
.
1
chassis fan
2
system board power connector
3
screws (4)
1
system board power connector
2
chassis fan
3
screw