Dell Wireless Adapter 3300 User Guide - Page 9
Setting up your wireless printer adapter, Connecting your wireless printer adapter to your computer - wireless printer adapter wpa
 |
View all Dell Wireless Adapter 3300 manuals
Add to My Manuals
Save this manual to your list of manuals |
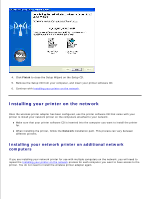
Page 9 highlights
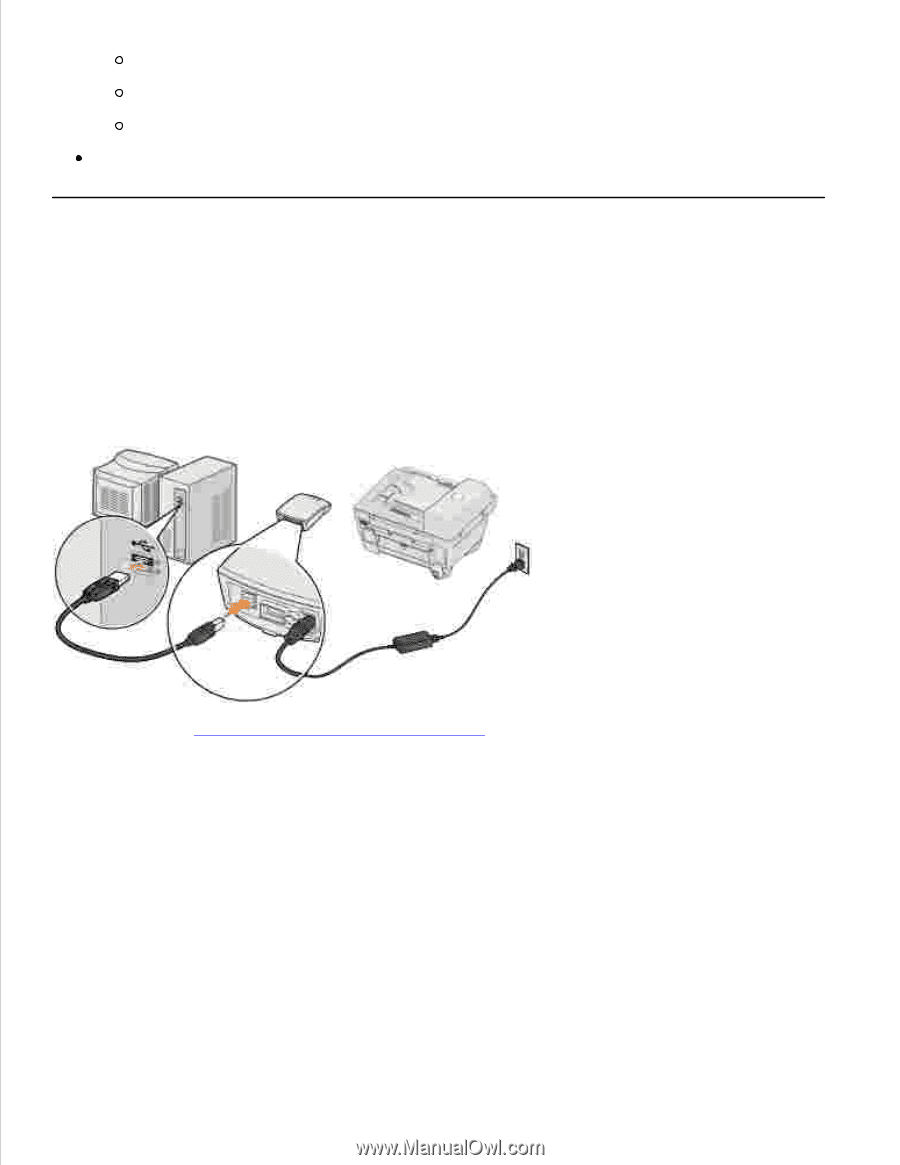
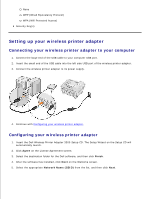
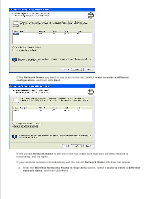
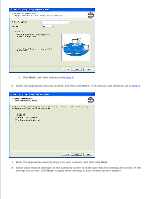
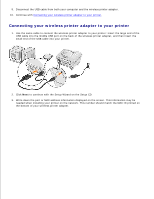
None WEP (Wired Equivalency Protocol) WPA (Wifi Protected Access) Security Key(s) Setting up your wireless printer adapter Connecting your wireless printer adapter to your computer 1. Connect the large end of the USB cable to your computer USB port. 2. Insert the small end of the USB cable into the left side USB port of the wireless printer adapter. 3. Connect the wireless printer adapter to its power supply. 4. Continue with Configuring your wireless printer adapter. Configuring your wireless printer adapter 1. Insert the Dell Wireless Printer Adapter 3300 Setup CD. The Setup Wizard on the Setup CD will automatically launch. 2. Click Agree on the License Agreement screen. 3. Select the destination folder for the Dell software, and then click Finish. 4. After the software has installed, click Next on the Welcome screen. 5. Select the appropriate Network Name (SSID) from the list, and then click Next.
-
 1
1 -
2
-
3
-
 4
4 -
 5
5 -
 6
6 -
 7
7 -
 8
8 -
 9
9 -
 10
10 -
 11
11 -
 12
12 -
 13
13 -
 14
14 -
15
-
16
-
17
-
18
-
19
-
20
-
21
-
22
-
23
-
24
-
25
-
26
-
27
-
28
-
29
-
30
-
31
-
32
-
33
-
34
-
35
-
36
-
37
-
38
-
39
-
40
-
41
-
42
-
43
-
44
-
45
 |
 |