Denon DRM-555 Operating Instructions - Page 5

Table Of Contents, Features, Connection - reviews

Page 5 highlights

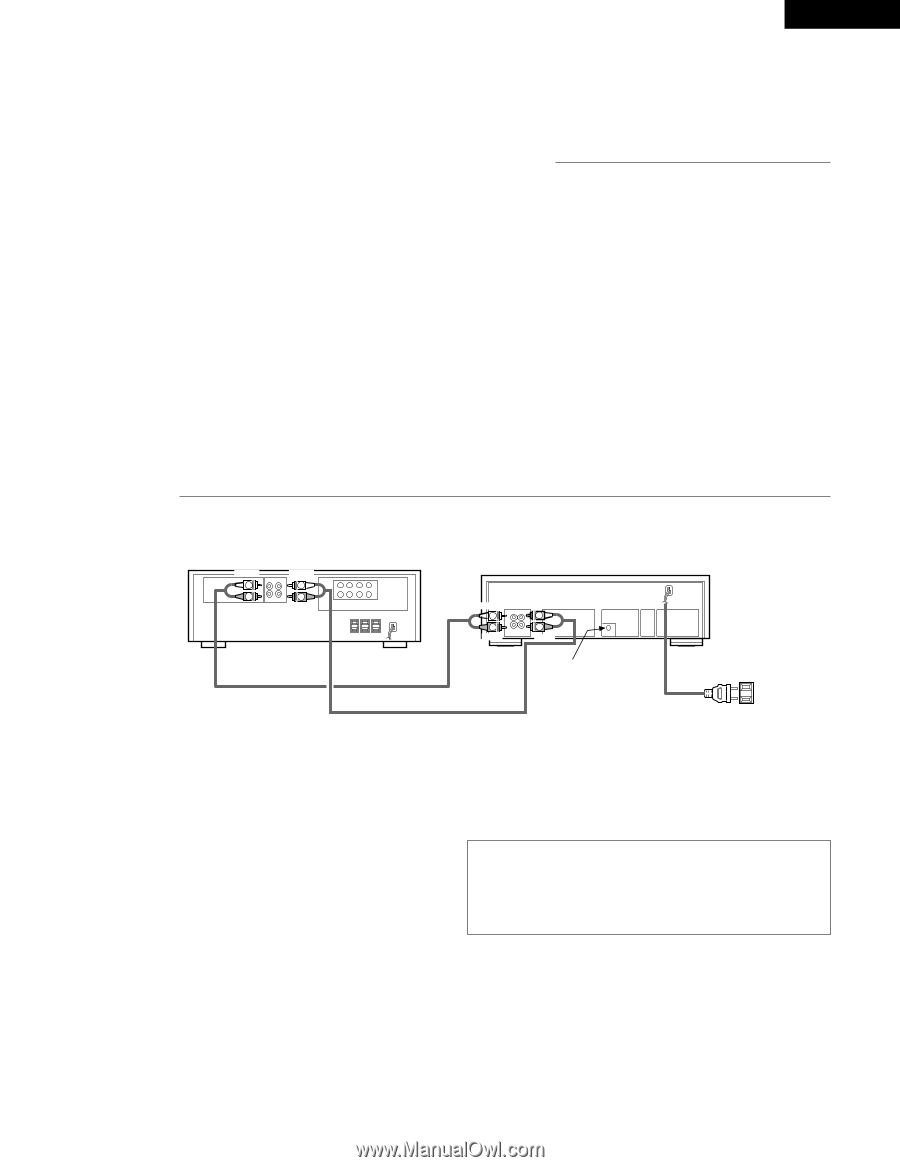
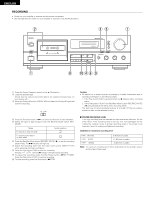
ENGLISH Thank you very much for purchasing the DENON component stereo cassette tape deck. DENON proudly presents this advanced tape deck to audiophiles and music lovers as a further proof of DENON's non-compromising pursuit of the ultimate in sound quality. The high quality performance and easy operation are certain to provide you with many hours of outstanding listening pleasure. - TABLE OF CONTENTS - FEATURES 5 CONNECTION 5 NAMES AND FUNCTIONS OF PARTS 6, 7 CASSETTE TAPES 7 AUTOMATIC TAPE SELECTION 8 PLAYBACK 8, 9 MUSIC SEARCH SYSTEM 9 RECORDING 10 PROPER RECORDING LEVEL 10 RECORDING BIAS ADJUSTMENT 11 REC/REC MUTE AND REC PAUSE BUTTON 11 DIMMER ADJUSTMENT 11 SYNCHRONIZED RECORDING FUNCTION 12 TAPE COUNTER AND MEMORY STOP 13 TIMER RECORDING/PLAYBACK 14 DOLBY B AND C NOISE REDUCTION SYSTEM 15 DOLBY HX-PRO HEADROOM EXTENSION SYSTEM 15 MAINTENANCE 15 TROUBLESHOOTING 16 SPECIFICATIONS 16 Please check to make sure the following items are included with the main unit in the carton: (1) Operating Instructions 1 (2) Connection Cords 2 (3) Mini-Plug Cable 1 FEATURES 2 Computer Controlled Mechanism 2 Dual Power Supply 2 Dolby HX-Pro Headroom Extension System 2 Dolby B & C Noise Reduction Systems 2 Manual Bias Adjustment Control 2 Computing Tape Counter with 4-Digit Readout and Memory Stop 2 Music Search System 2 FL Peak Level Meters 2 Auto Tape Selector 2 Synchronized Recording 2 Timer Play and Timer Recording 2 Optional Remote Controllable CONNECTION • Leave your entire system (including this cassette deck) turned off until all connections between the deck and other components have been completed. Receiver or amplifier WHITE L R RED WHITE PB REC L L R R TAPE-1 RED DRM-555 WHITE L R RED LINE OUT IN WHITE L L R LINE LINE OUT IN R RED SYNCHRO VOLTAGE SELECTOR 115V 230V PRESET This jack is for the synchronized recording function only. Do not plug in microphones, headphones nor other plugs. 60 Hz Power supply outlet. 2 Connecting the Deck to an Amplifier • Before connecting the deck to your amplifier, please review your amplifier's instruction manual. • Use the white plugs for the left channel and red plugs for the right channel. 2 Tape Dubbing • Many stereo amplifiers and receivers have tape dubbing circuitry so that tape duplication can be performed between two or more tape decks. Review your amplifier's instruction manual for a full explanation of this mode of operation. 2 Connecting Headphones To listen through headphones, plug your headphones into the PHONES jack. 2 Installation Precautions If the deck is placed near an amplifier, TV or tuner, noise (induced hum) or beat interference may result, especially during FM or AM reception. If this occurs, place the deck further away from other components or reorient its position. Caution: A mechanical sound is heard the first time the power switch is set to "ON" after the power cord is plugged into an outlet. This is the sound of the cassette mechanism being set to the proper operating state, and is normal. (When using an AC outlet on a receiver or amplifier, used an "UNSWITCHED" outlet.) 5

  • 1
  • 2
  • 3
  • 4
  • 5
  • 6
  • 7
  • 8
  • 9
  • 10
  • 11
  • 12
  • 13
  • 14
  • 15
  • 16
  • 17
  • 18
  • 19
  • 20
  • 21
  • 22

ENGLISH
5
Thank you very much for purchasing the DENON component stereo cassette
tape deck.
DENON proudly presents this advanced tape deck to audiophiles and music
lovers as a further proof of DENON’s non-compromising pursuit of the ultimate
in sound quality. The high quality performance and easy operation are certain to
provide you with many hours of outstanding listening pleasure.
TABLE OF CONTENTS
FEATURES ……………………………………………………………………………5
CONNECTION
………………………………………………………………………5
NAMES AND FUNCTIONS OF PARTS
…………………………………………6, 7
CASSETTE TAPES
……………………………………………………………………7
AUTOMATIC TAPE SELECTION
……………………………………………………8
PLAYBACK
…………………………………………………………………………8, 9
MUSIC SEARCH SYSTEM
………………………………………………………9
RECORDING …………………………………………………………………………10
PROPER RECORDING LEVEL …………………………………………………10
RECORDING BIAS ADJUSTMENT ……………………………………………11
REC/REC MUTE AND REC PAUSE BUTTON
………………………………11
DIMMER ADJUSTMENT
…………………………………………………………11
SYNCHRONIZED RECORDING FUNCTION
……………………………………12
TAPE COUNTER AND MEMORY STOP
…………………………………………13
TIMER RECORDING/PLAYBACK
…………………………………………………14
DOLBY B AND C NOISE REDUCTION SYSTEM
………………………………15
DOLBY HX-PRO HEADROOM EXTENSION SYSTEM
…………………………15
MAINTENANCE
……………………………………………………………………15
TROUBLESHOOTING ………………………………………………………………16
SPECIFICATIONS ……………………………………………………………………16
Please check to make sure the following items are included with the main
unit in the carton:
(1)
Operating Instructions
…………………………………………………1
(2)
Connection Cords
………………………………………………………2
(3)
Mini-Plug Cable
…………………………………………………………1
FEATURES
2
Computer Controlled Mechanism
2
Dual Power Supply
2
Dolby HX-Pro Headroom Extension System
2
Dolby B & C Noise Reduction Systems
2
Manual Bias Adjustment Control
2
Computing Tape Counter with 4-Digit Readout and Memory Stop
2
Music Search System
2
FL Peak Level Meters
2
Auto Tape Selector
2
Synchronized Recording
2
Timer Play and Timer Recording
2
Optional Remote Controllable
CONNECTION
Leave your entire system (including this cassette deck) turned off until all connections between the deck and other components have been completed.
VOLTAGE
SELECTOR
115V 230V
PRESET
LINE
OUT
LINE
IN
L
R
SYNCHRO
TAPE-1
PB REC
L
R
R
L
R
L
L
R
L
R
LINE
OUT
IN
Receiver or amplifier
This jack is for the synchronized
recording function only.
Do not plug in microphones,
headphones nor other plugs.
Power supply
outlet.
60 Hz
DRM-555
2
Connecting the Deck to an Amplifier
Before connecting the deck to your amplifier, please review your
amplifier’s instruction manual.
Use the white plugs for the left channel and red plugs for the right
channel.
2
Tape Dubbing
Many stereo amplifiers and receivers have tape dubbing circuitry so that
tape duplication can be performed between two or more tape decks.
Review your amplifier’s instruction manual for a full explanation of this
mode of operation.
2
Connecting Headphones
To listen through headphones, plug your headphones into the PHONES
jack.
2
Installation Precautions
If the deck is placed near an amplifier, TV or tuner, noise (induced hum) or
beat interference may result, especially during FM or AM reception. If this
occurs, place the deck further away from other components or reorient its
position.
Caution:
A mechanical sound is heard the first time the power switch is set to “ON”
after the power cord is plugged into an outlet. This is the sound of the
cassette mechanism being set to the proper operating state, and is normal.
(When using an AC outlet on a receiver or amplifier, used an
“UNSWITCHED” outlet.)
WHITE
WHITE
WHITE
WHITE
RED
RED
RED
RED