Dewalt DCP580B Instruction Manual - Page 14
Planing Fig. 2, 5-7, Rabbet Fence Fig. 8, 9
 |
View all Dewalt DCP580B manuals
Add to My Manuals
Save this manual to your list of manuals |
Page 14 highlights
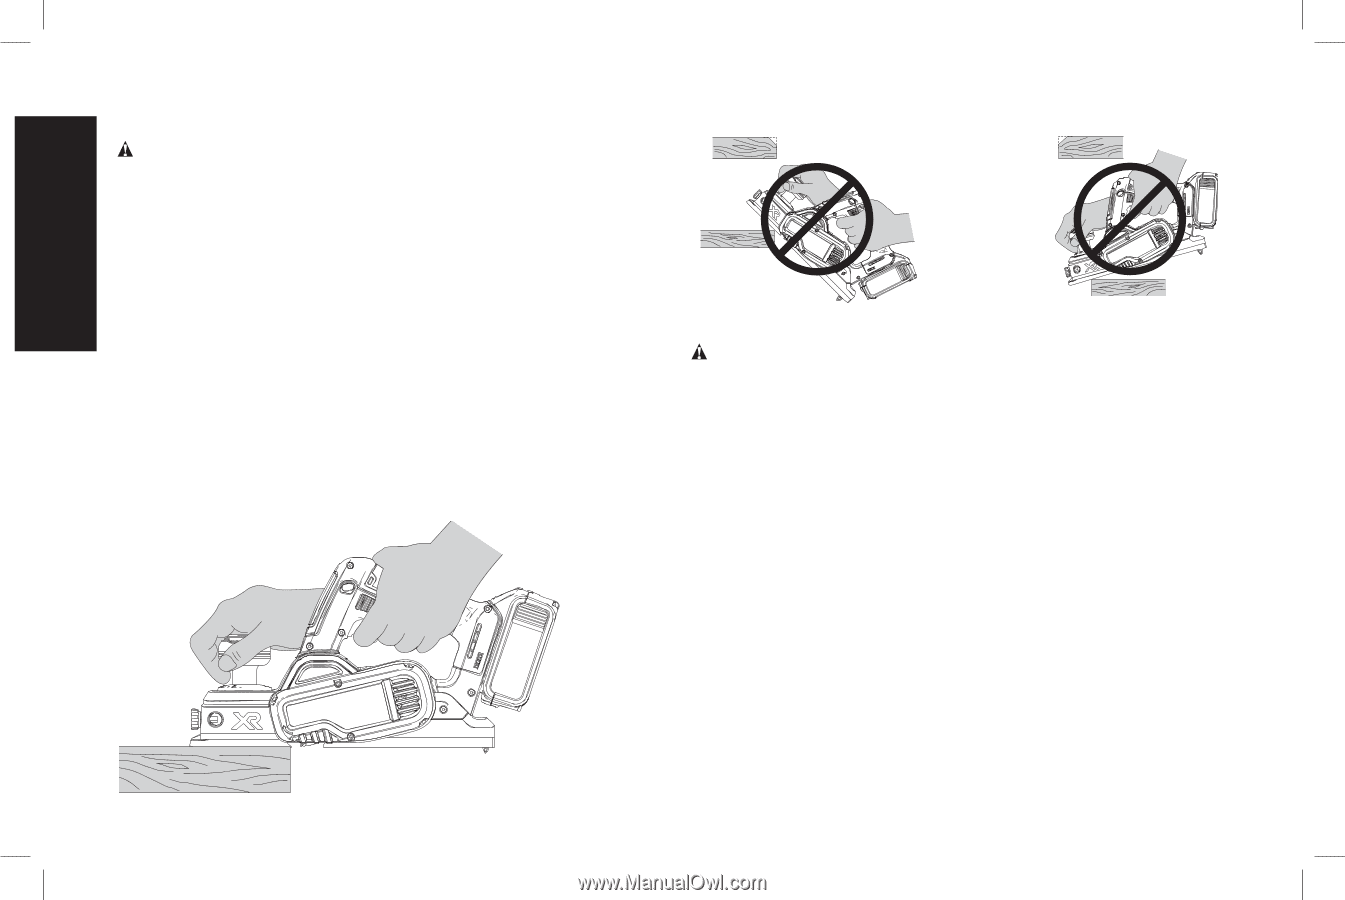
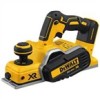
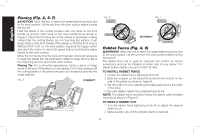
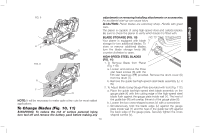
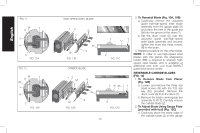
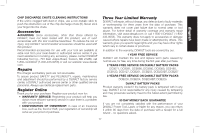
English Planing (Fig. 2, 5-7) CAUTION: Allow the tool to reach full speed before touching tool to the work surface. Lift the tool from the work surface before turning the tool off. Hold the planer in the correct position with one hand on the front handle (J) and the other hand on the main handle (C) as shown in Figure 2. Place the front shoe (G) on the surface to be planed, making certain that the cutting blades are not touching the surface. Push down firmly on the front handle of the planer so that the front shoe is ABSOLUTELY FLAT on the work surface. Squeeze the trigger switch and allow the motor to reach full speed before touching the planer blades to the work surface. Move the tool slowly into the work and maintain downward pressure to keep the planer flat. Be particularly careful to keep the tool flat at the beginning and the end of the work surface. Planing Tip: For a smoother appearance, fasten a piece of scrap wood to the end of the piece you are planing. Don't stop planing until the cutting blades of the planer are past your workpiece and into the scrap material. FIG. 5 CORRECT FIG. 6 FIG. 7 INCORRECT Rabbet Fence (Fig. 8, 9) WARNING: Allow the tool to reach full speed before touching tool to the work surface. Lift the tool from the work surface before turning the tool off. The rabbet fence (Q) is used for optimum tool control on narrow workpieces and can be installed on either side of your planer. The planer makes rabbet cuts up to 23/64" (9 mm). TO INSTALL RABBET FENCE 1. Loosen the rabbet fence tightening knob (H). 2. Slide the crossbar on the rabbet fence (Q) into the hole (F) on the side of the planer as shown in Figure 8. 3. Set the width of cut by adjusting the edge guide across the width of the shoe. 4. Securely tighten rabbet fence tightening knob (H). NOTE: The rabbet fence should be below the planer when installed correctly as shown in Figure 9. TO MAKE A RABBET CUT 1. Turn the rabbet fence tightening knob (H) to adjust the desired width of cut. 2. Make several cuts until the desired depth is reached. 12
-
 1
1 -
2
-
3
-
4
-
5
-
6
-
7
-
8
-
 9
9 -
 10
10 -
 11
11 -
 12
12 -
 13
13 -
 14
14 -
 15
15 -
 16
16 -
 17
17 -
 18
18 -
 19
19 -
20
-
21
-
22
-
23
-
24
-
25
-
26
-
27
-
28
-
29
-
30
-
31
-
32
-
33
-
34
-
35
-
36
-
37
-
38
-
39
-
40
-
41
-
42
-
43
-
44
-
45
-
46
-
47
-
48
-
49
-
50
-
51
-
52
-
53
-
54
-
55
-
56
-
57
-
58
-
59
-
60
-
61
-
62
-
63
-
64
 |
 |