Dynex DX-L37-10A User Manual (English) - Page 18
Changing channel settings
 |
View all Dynex DX-L37-10A manuals
Add to My Manuals
Save this manual to your list of manuals |
Page 18 highlights
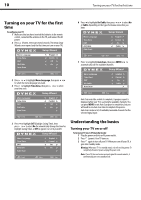
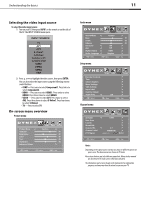
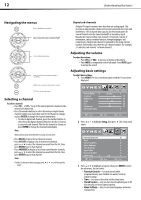
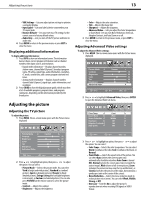
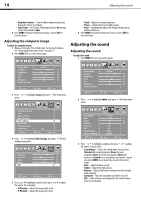
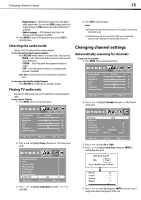
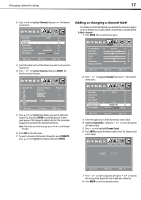
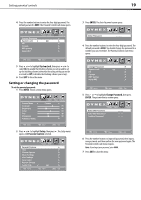
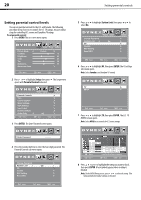
Changing channel settings 15 • Digital Output-(DTV channels only) Selects the digital audio output mode. You can select RAW (outputs audio in its original format) or PCM (outputs the audio in PCM mode, if available). • Audio Language-(DTV channels only) Selects an alternate audio language, if available. 4 Press MENU to return to the previous menu, or press EXIT to close the menu. Selecting the audio mode You can select the audio mode for analog channels. To select the audio mode for analog channels: • Press MTS/SAP on the remote one or more times. You can select: • MONO-Select this option if there is noise or static on weak stereo broadcasts. • STEREO-Select this option for programs broadcast in stereo. • SAP-Select this option to listen to a secondary audio program, if available. Note: Mono is automatically selected if the program is broadcast in mono. To select an audio track for a digital channel: • Press MTS/SAP. If an audio track is available, it plays. Playing TV audio only You can turn off the picture on your TV and listen to only the program audio. To play only the TV audio: 1 Press MENU. The on-screen menu opens. 4 Press EXIT to close the menu. Notes: Audio Only works only when the input source is TV and your TV is receiving a broadcast signal. To exit Audio Only mode, press any button. When you exit Audio Only mode, the Audio Only option is automatically reset to Off . Changing channel settings Automatically scanning for channels To auto scan for channels: 1 Press MENU. The on-screen menu opens. 2 Press or to highlight Channel, then press . The Channel menu opens. 2 Press or to highlight Setup, then press . The Setup menu opens. Parental Controls 3 Press or to select Air or Cable. 4 Press or to highlight Auto Scan, then press ENTER. A confirmation box opens. 3 Press or to highlight Audio Only, then press or to select On. 5 Press or to select Yes, then press ENTER to start the scan. A progress box shows the progress of the scan.
-
 1
1 -
2
-
3
-
4
-
5
-
6
-
7
-
8
-
9
-
10
-
11
-
12
-
 13
13 -
 14
14 -
 15
15 -
 16
16 -
 17
17 -
 18
18 -
 19
19 -
 20
20 -
 21
21 -
 22
22 -
 23
23 -
24
-
25
-
26
-
27
-
28
-
29
-
30
-
31
-
32
-
33
-
34
-
35
-
36
 |
 |
