Dynex DX-L40-10A User Manual (English) - Page 9
Side connections, Remote control - service menu
 |
View all Dynex DX-L40-10A manuals
Add to My Manuals
Save this manual to your list of manuals |
Page 9 highlights
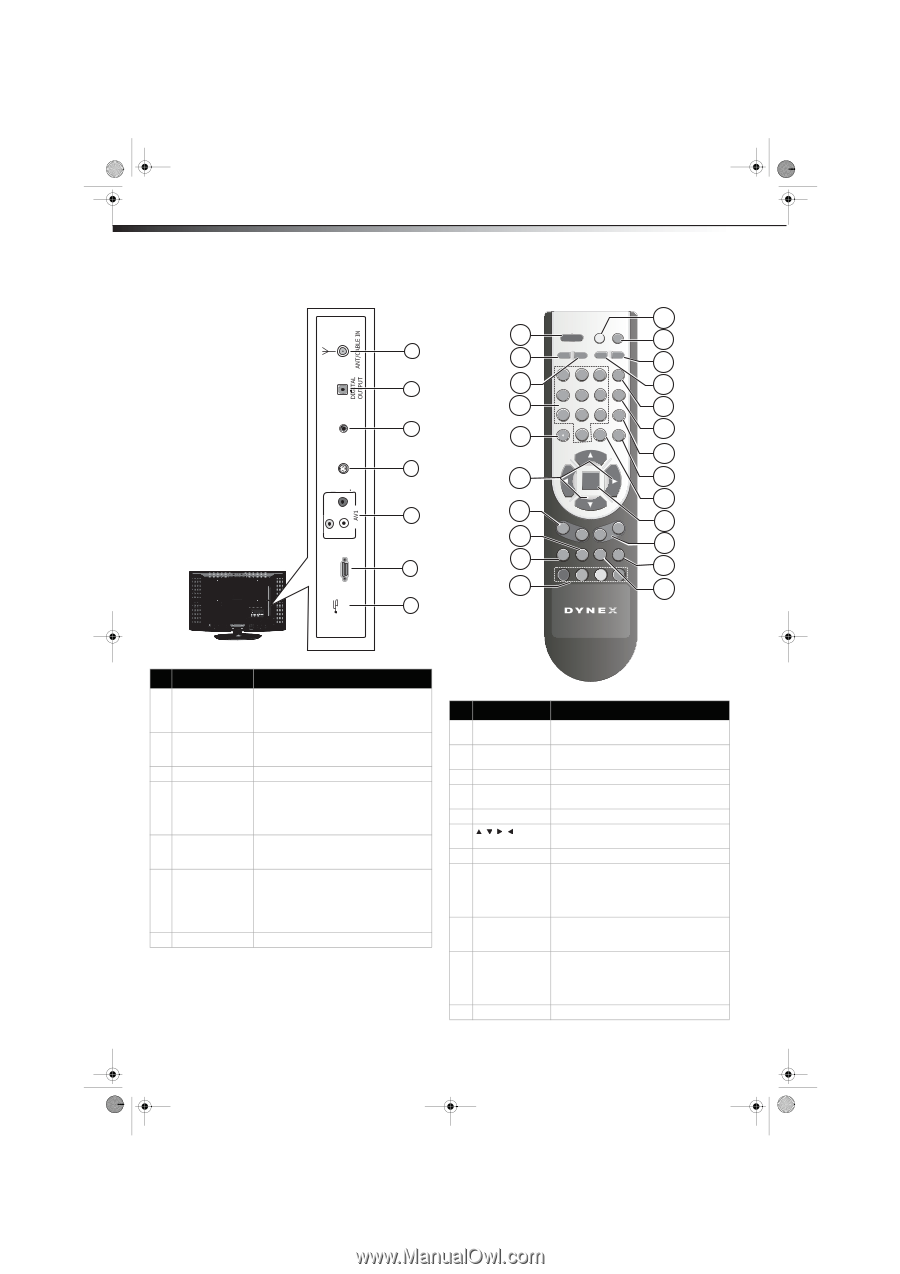
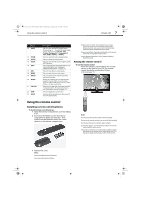
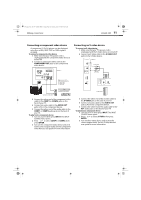
DX-L40-10A_09-0537_MAN_ENG_V1.book Page 6 Tuesday, July 28, 2009 10:07 AM 6 DX-L40-10A TV components Side connections HDMI1 VIDEOḤḤḤ SERVICE L ḤḤR S-VIDEO HEADPHONEḤḤḤḤ Remote control 11 1 POWER INPUT 12 1 2 MUTE PICTURE AUDIO ZOOM 13 1 2 3 GUIDE 2 3 14 4 5 6 INFO 4 15 7 8 9 EXIT 3 5 0 RECALL MENU 16 17 4 6 ENTER 18 19 5 7 20 VOL+ CH+ 8 VOL- CH- 21 6 9 CCD MTS/ SAP SLEEP TIME 22 10 23 7 EN-21669D ## Component Description 1 ANT/CABLE IN jack Connect an antenna, cable TV, or a satellite box to this jack. For more information, see "Connecting an antenna, cable TV, or satellite TV box" on page 9. 2 DIGITAL OUTPUT Connect an optical audio device to this jack. (Only available in digital TV or HDMI modes.) 3 HEADPHONE jack Plug your headphones into this jack. 4 S-VIDEO jack Connect an S-Video cable from a VCR or DVD player to this jack. Also requires an audio connection or audio output from an amplifier (see "Connecting an S-video device" on page 11). 5 AV1 (Video and Connect a composite video and audio L audio jacks) and R from a VCR, game console, or camcorder to these jacks. 6 HDMI1 jack 7 SERVICE port Connect an HDMI device, such as a cable box or DVD player, to this jack. An HDMI cable carries both video and audio, so you do not need to make an audio connection. For more information, see "Connecting an HDMI device" on page 10. For service update only. Do not use. # Button 1 POWER 2 MUTE 3 PICTURE 4 Numbers 5 • (dot) 6 7 VOL+/VOL- 8 MTS/SAP 9 CCD 10 Electronic Program Guide (EPG) function buttons 11 Power indicator Description Press to turn on your TV. Press again to put your TV in Standby mode. Press to turn off the sound. Press again to turn on the sound. Press to select the video mode. Press to enter channel numbers or the parental control password. Press to select a digital sub-channel. Press to navigate through the on-screen menus. Press to increase or decrease the volume. Press to enable the SAP (Second Audio Program) function. This lets you listen to a program using an alternative second language. Function availability depends on your TV provider. Press to turn closed captioning on or off. For more information, see "Adjusting the setup" on page 18. After pressing the GUIDE button in the digital TV channel option, the same color buttons will appear with explanations in the on-screen display (OSD). Follow the steps illustrated in the OSD. Lights when you turn your TV on.
-
 1
1 -
2
-
3
-
 4
4 -
 5
5 -
 6
6 -
 7
7 -
 8
8 -
 9
9 -
 10
10 -
 11
11 -
 12
12 -
 13
13 -
 14
14 -
15
-
16
-
17
-
18
-
19
-
20
-
21
-
22
-
23
-
24
-
25
-
26
-
27
-
28
 |
 |