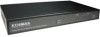
Edimax BR-6624 Manual - Page 16
Installing The Load Balancer in your LAN - - 2 wan
 |
View all Edimax BR-6624 manuals
Add to My Manuals
Save this manual to your list of manuals |
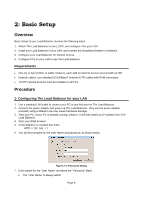
Page 16 highlights
2. Installing The Load Balancer in your LAN Figure 2-4: Installation Diagram 1. Ensure The Load Balancer and the DSL/Cable modem are powered OFF. Leave the modem or modems connected to their data line. 2. Connect the Broadband modem or modems to The Load Balancer. • If using only one (1) Broadband modem, connect it to the "WAN 1" port. • Use the cable supplied with your DSL/Cable modem. If no cable was supplied, use a standard cable. 3. Use standard LAN cables to connect PCs to the Switching Hub ports on The Load Balancer. • Both 10BaseT and 100BaseT connections can be used simultaneously. • If you need to connect The Load Balancer to another Hub, just use a standard LAN cable to connect any port on The Load Balancer to a standard port on another hub. Any LAN port on The Load Balancer will automatically act as an "Uplink" port when required. 4. Power Up • Power on the Cable or DSL modem or modems. • Connect the supplied power adapter to The Load Balancer and power up. 5. Check the LEDs • The Power LED should be ON. • The WAN - Link LED should be ON, if the corresponding WAN port is connected to a broadband modem. • The Error LED will flash during start up, but will then turn Off. If it stays On, there is an error condition. Page 12
-
 1
1 -
2
-
3
-
4
-
5
-
6
-
7
-
8
-
9
-
10
-
 11
11 -
 12
12 -
 13
13 -
 14
14 -
 15
15 -
 16
16 -
 17
17 -
 18
18 -
 19
19 -
 20
20 -
 21
21 -
22
-
23
-
24
-
25
-
26
-
27
-
28
-
29
-
30
-
31
-
32
-
33
-
34
-
35
-
36
-
37
-
38
-
39
-
40
-
41
-
42
-
43
-
44
-
45
-
46
-
47
-
48
-
49
-
50
-
51
-
52
-
53
-
54
-
55
-
56
-
57
-
58
-
59
-
60
-
61
-
62
-
63
-
64
-
65
-
66
-
67
-
68
-
69
-
70
-
71
-
72
-
73
-
74
-
75
-
76
-
77
-
78
-
79
-
80
-
81
 |
 |
