Edimax EW-7438RPn Quick Install Guide - Page 6
B: Setting Up the Wi, Fi Extender with a Computer - installation
 |
View all Edimax EW-7438RPn manuals
Add to My Manuals
Save this manual to your list of manuals |
Page 6 highlights
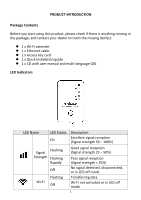
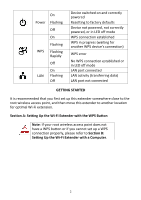
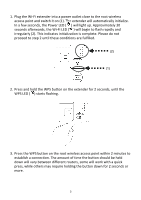
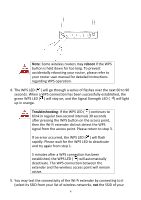
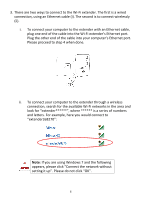
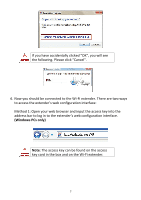
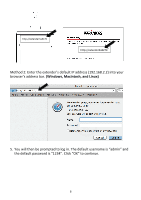
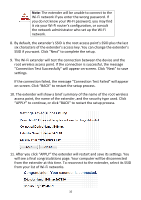
root wireless access point) and attempting to open a web page with your web browser. 6. After you have connected the extender to the existing Wi‐Fi network and confirmed it works, you can move this extender to another location for optimal Wi‐Fi extension. To move the extender, turn off the device and unplug it from its socket. The extender will remember the Wi‐Fi network it is assigned to. Move the extender to its new location and plug it in, then turn the device on again. The extender will go through its initialization process after being turned on. You will be unable to connect to the extender while it is initializing. When the green Wi‐Fi LED ( ) begins flashing irregularly and the orange Signal Strength LED ( ) activates, the extender is ready for use. For best results, install the extender at a location where the Signal Strength LED ( ) remains on without blinking. This indicates the extender is receiving a strong signal from the root wireless access point. Section B: Setting Up the Wi‐Fi Extender with a Computer 1. First make sure that your computer is a DHCP client (it obtains its IP automatically from a DHCP server). If you are unsure, please refer to the User Manual on the enclosed CD. 2. Plug the Wi‐Fi extender into a power outlet close to the root wireless access point and switch it on (1). The extender will automatically initialize. In a few seconds, the Power LED ( ) will light up. Approximately 30 seconds afterwards, the Wi‐Fi LED ( ) will begin to flash rapidly and irregularly (2). This indicates initialization is complete. Please do not proceed to step 3 until these conditions are fulfilled. (2) (1) 5
-
 1
1 -
 2
2 -
 3
3 -
 4
4 -
 5
5 -
 6
6 -
 7
7 -
 8
8 -
 9
9 -
 10
10 -
 11
11 -
 12
12 -
13
-
14
-
15
-
16
-
17
-
18
-
19
 |
 |