Electrolux E48DF76EPS Installation Instructions - Page 17
Installation
 |
View all Electrolux E48DF76EPS manuals
Add to My Manuals
Save this manual to your list of manuals |
Page 17 highlights
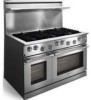
Installation 17 INSTALLING THE 30", 36" & 48" RANGE OPTIONAL BACKGUARDS Your Electrolux IconTM range was shipped with a backguard in place. These instructions cover the installation of one of the optional backguards. WARNING Be sure that the range is not connected to gas or power before proceeding. Installing the Range Optional Backguard: 1. Remove the backguard from its box. 2. To avoid scratches, place small scraps of thin cardboard on the rear of the side panels where the backguard will make contact. With the assistance of at least one other person, carefully lift the backguard and place down on to the range top. Special attention should be given to the lower flange in front of the backguard, which must fit between the stainless steel side panels. 3. Fasten the provided screws through the rear flange. 4. Connect the gas line to the regulator. Reposition and attach the access panel or the back cover if the entire back cover was removed. 5. You are now ready to continue with the range installation. Figure 11 Figure 12 Backguard Installation (36" range shown) Backguard Installation (48" range shown) NOTE For 24" Backguards, fasten the provided screws through the holes in the back panel of the Backguard.
-
 1
1 -
2
-
3
-
4
-
5
-
6
-
7
-
8
-
9
-
10
-
11
-
 12
12 -
 13
13 -
 14
14 -
 15
15 -
 16
16 -
 17
17 -
 18
18 -
 19
19 -
 20
20 -
 21
21 -
 22
22 -
23
-
24
-
25
-
26
-
27
-
28
-
29
-
30
-
31
-
32
-
33
-
34
-
35
-
36
 |
 |
