Electrolux E48DF76EPS Installation Instructions - Page 28
STEP 3, Prepare Range for Conversion, STEP 4, Convert Regulator to LPG
 |
View all Electrolux E48DF76EPS manuals
Add to My Manuals
Save this manual to your list of manuals |
Page 28 highlights
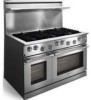
STEP 3 Prepare Range for Conversion 3-1 Move the range out from the wall, if necessary. 3-2 If the range is connected to a natural gas supply line, close the gas supply valve. 3-3 Disconnect the range power connector from the electrical outlet. 3-4 Remove the grates from the cooktop. 3-5 Remove all of the burner caps and burner rings from top of the burner heads. Remove Grates Burner Cap Burner Ring Burner Head Figure 3-1 Grate, Burner Cap and Burner Ring Removal STEP 4 Convert Regulator to LPG 4-1 Locate and remove the regulator access panel on the back of the range. 4-2 Locate the regulator and remove the regulator cap. Make sure that the regulator spring remains in place. 4-3 Remove the spool from the cap and insert the opposite side. The large end of the spool must insert into the regulator first for LPG operation. 4-4 Replace the cap. The access panel will be reinstalled later. Regulator Spring Spool: Direction for LPG Regulator Cap Access panel for E36DF76EPS & E48DF76EPS Access panel for E30DF74EPS Spool: Direction for natural gas Figure 4-1 Regulator Conversion Page 4 Back of range
-
 1
1 -
2
-
3
-
4
-
5
-
6
-
7
-
8
-
9
-
10
-
11
-
12
-
13
-
14
-
15
-
16
-
17
-
18
-
19
-
20
-
21
-
22
-
 23
23 -
 24
24 -
 25
25 -
 26
26 -
 27
27 -
 28
28 -
 29
29 -
 30
30 -
 31
31 -
 32
32 -
 33
33 -
34
-
35
-
36
 |
 |
