Electrolux E48DF76EPS Installation Instructions - Page 30
STEP 6, Replace Bypass Orifices
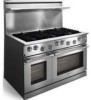 |
View all Electrolux E48DF76EPS manuals
Add to My Manuals
Save this manual to your list of manuals |
Page 30 highlights
STEP 6 Replace Bypass Orifices 6-1 Make sure all knobs are in the off position. 6-2 Remove all of the burner knobs from the front of the range. 6-3 Insert the 1/8" screwdriver into the valve stem hole for the left rear burner. Unscrew the bypass orifice from the right side of the valve assembly. 6-4 Identify the appropriate bypass orifice from Table 6-1. Match both the model number and the burner location. The bypass orifice size is stamped on its head. 6-5 Insert the bypass orifice and the attached o-ring into the right side of the valve with the needle nose pliers. Tighten into place with the 1/8" screwdriver. 6-6 Repeat steps 6-1 through 6-5 for the remaining burner valves. 6-7 Replace the knobs. Burner E30DF74EPS E36DF76EPS E48DF76EPS Location (30-Inch) (36-Inch) (48-Inch) Left Rear 61 61 61 Left Front 48 48 48 Right Rear 61 48 48 Right Front 61 61 61 Center Rear - 61 61 Center Front - 61 61 Table 6-1 Bypass Orifice Sizes (x 100 mm) Valve Stem Hole Valve Assembly Bypass Orifice Figure 6-1 Bypass Orifice Conversion Page 6
-
 1
1 -
2
-
3
-
4
-
5
-
6
-
7
-
8
-
9
-
10
-
11
-
12
-
13
-
14
-
15
-
16
-
17
-
18
-
19
-
20
-
21
-
22
-
23
-
24
-
 25
25 -
 26
26 -
 27
27 -
 28
28 -
 29
29 -
 30
30 -
 31
31 -
 32
32 -
 33
33 -
 34
34 -
 35
35 -
36
 |
 |
