Electrolux EI28BS56IB Use and Care Guide - Page 13
Connecting the Water Supply
 |
UPC - 012505747786
View all Electrolux EI28BS56IB manuals
Add to My Manuals
Save this manual to your list of manuals |
Page 13 highlights
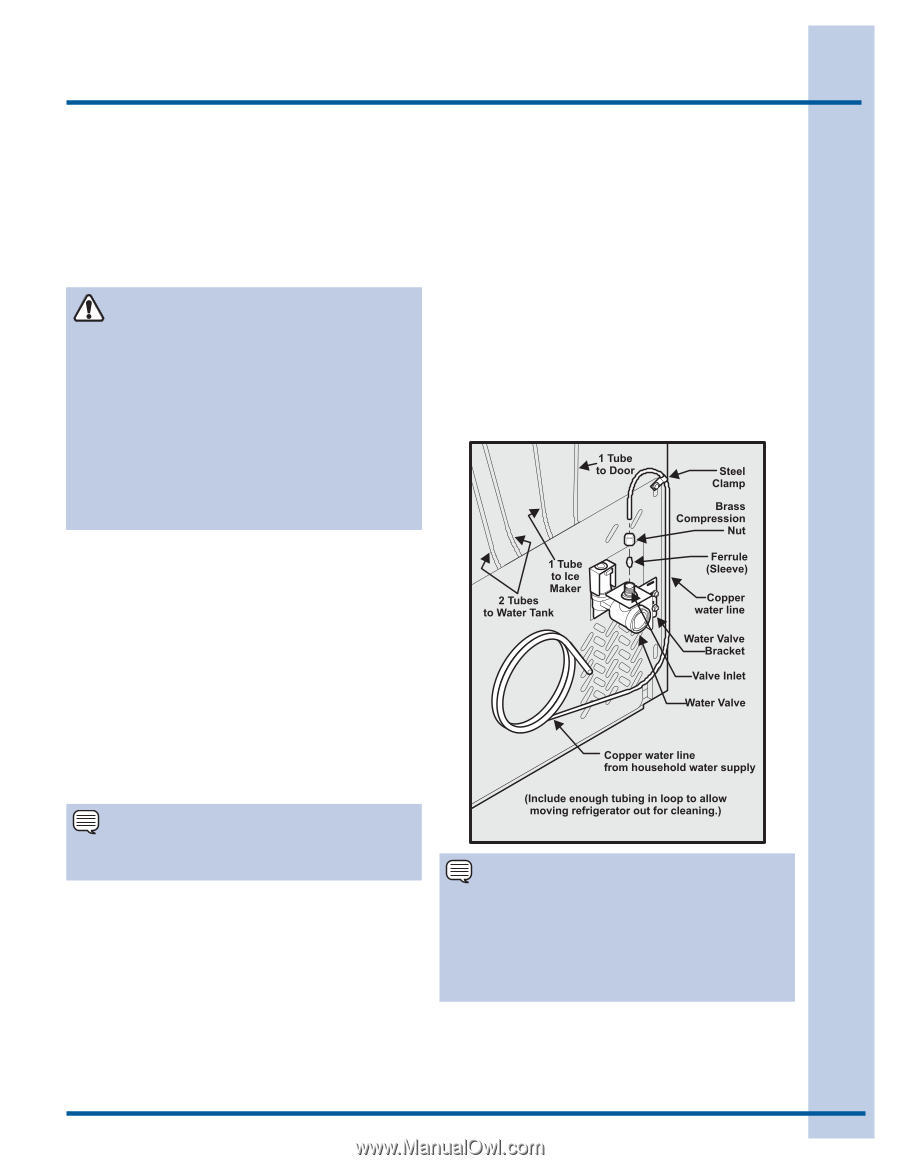
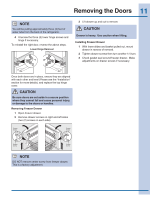
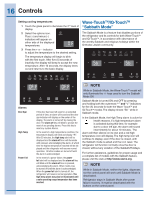
Connecting the Water Supply 13 About your refrigerator's water supply The automatic ice & water dispenser on your refrigerator requires a permanent water supply to function correctly. During installation, you (or a service professional) establish this water supply by connecting a copper tube from your household water system to a valve at the rear of the refrigerator. CAUTION To avoid property damage: • Use copper tubing for the water supply line (plastic tubing is more likely to leak). Manufacturer is not responsible for any damage if plastic tubing is used for supply line. • Ensure water supply and installation comply with state and local laws and regulations. • For proper dispenser operation, recommended water supply pressure should fall between 30 psi and 100 psi. Excessive pressure may cause water filter to malfunction. What you will need: • Access to a cold water line with pressure of 30-100 psi. (System supplied with cold water only.) • Copper tubing with ¼ inch (6.4mm) Outside Diameter (OD). Length is the distance from the rear of the refrigerator to your household water supply line plus seven (7) feet (2.1 meters). • A shut-off valve for the connection between your household water line and the refrigerator supply line. DO NOT use a self-piercing shut-off valve. • A compression nut and ferrule (sleeve) for the water supply connection at the rear of your refrigerator. NOTE Kits are available that provide all materials for a water supply installation. To connect the water supply to the rear of your refrigerator: 1 Ensure that the refrigerator is unplugged. 2 Flush the supply line until water is clear by placing the end of the copper tube in a sink or bucket and opening the shut-off valve. 3 Remove and discard the plastic cap from the water valve inlet at the rear of your refrigerator. 4 Slide the brass compression nut, then the ferrule (sleeve) onto the copper tube. 5 Push the copper tube into the water valve inlet as far as it will go (¼ inch or 6.4mm). 6 Slide the ferrule (sleeve) into the water valve and finger-tighten the compression nut onto the valve. Tighten another half turn with a wrench but DO NOT over-tighten. 7 Secure the copper tube to your refrigerator's rear panel with a steel clamp and screw (see illustration). 8 Coil the excess copper tubing (about 2½ turns) behind your refrigerator as shown. Arrange coiled tubing to avoid vibration or wear against other surfaces. 9 Open water supply shut-off valve and tighten any connections that leak. 10 Prime the water supply system according to the directions. NOTE Your refrigerator's water supply system includes several tubing lines, a water filter, a water valve and a water tank. To ensure that your water dispenser works properly, this system must be completely filled with water when your refrigerator is first connected to the household water supply line.
-
 1
1 -
2
-
3
-
4
-
5
-
6
-
7
-
 8
8 -
 9
9 -
 10
10 -
 11
11 -
 12
12 -
 13
13 -
 14
14 -
 15
15 -
 16
16 -
 17
17 -
 18
18 -
19
-
20
-
21
-
22
-
23
-
24
-
25
-
26
-
27
-
28
-
29
-
30
-
31
-
32
-
33
-
34
-
35
-
36
-
37
-
38
 |
 |