Electrolux EW23BC87SS Complete Owners Guide English - Page 26
Important, Caution
 |
View all Electrolux EW23BC87SS manuals
Add to My Manuals
Save this manual to your list of manuals |
Page 26 highlights
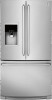
26 Dispenser Model Automatic Ice Maker/Water Dispenser IMPORTANT On occasion, unusually small ice cubes may be noticed in the bucket or in dispensed ice. This could occur in normal operation of the ice maker. If you start seeing these more frequently, it may be an indication of low water pressure or the water filter needs to be replaced. As the water filter nears the end of its useful life and becomes clogged with particles, less water is delivered to the ice maker during each cycle. Remember, if it's been six months or longer since you last changed your water filter, replace the water filter with a new one. Poor quality household water may require the filter to be changed more frequently. Ice maker/dispenser tips • If your refrigerator is not connected to a water supply or the water supply is turned off, turn off the ice maker by holding the On/Off soft-touch icon for three seconds. • The following sounds are normal when the ice maker is operating: - Motor running - Ice dropping into ice bin - Water valve opening or closing - Running water • If you need a large quantity of ice at one time, it is best to get cubes directly from the ice bin. • Ice cubes stored too long may develop an odd flavor. Empty the ice bin as explained below. • When dispensing cubed ice, it is normal to have a small quantity of little pieces along with the whole cubes. CAUTION If the water supply to your refrigerator is softened, be sure the softener is properly maintained. Chemicals from a water softener can damage the ice maker. Cleaning the ice maker Clean the ice maker and ice bin at regular intervals, especially prior to vacation or moving. 1 Turn off the ice maker. 2 Remove the ice bin by pulling straight out. 3 Empty and carefully Removing Ice Bin clean the ice bin with mild detergent. Do not use harsh or abrasive cleaners. Rinse with clear water. 4 Allow the ice bin to dry completely before replacing. 5 Replace the ice bin. Turn the ice maker on. Remove and empty the ice bin if: • An extended power failure (one hour or longer) causes ice cubes in the ice bin to melt and freeze together, jamming the dispenser mechanism. • You do not use the ice dispenser frequently. Ice cubes will freeze together in the bin, jamming the dispenser mechanism. Remove the ice bin and shake to loosen the cubes or clean as explained above. CAUTION NEVER use an ice pick or similar sharp instrument to break up the ice. This could damage the ice bin. To loosen stuck ice, use warm water. Before replacing the ice bin, make sure it is completely dry.
-
 1
1 -
2
-
3
-
4
-
5
-
6
-
7
-
8
-
9
-
10
-
11
-
12
-
13
-
14
-
15
-
16
-
17
-
18
-
19
-
20
-
 21
21 -
 22
22 -
 23
23 -
 24
24 -
 25
25 -
 26
26 -
 27
27 -
 28
28 -
 29
29 -
 30
30 -
 31
31 -
32
-
33
-
34
-
35
-
36
-
37
-
38
-
39
-
40
-
41
-
42
-
43
-
44
-
45
 |
 |
