Epson 11880 User's Guide - Page 133
Release the side pin carefully. The cutter pops out., print head.
 |
UPC - 010343867024
View all Epson 11880 manuals
Add to My Manuals
Save this manual to your list of manuals |
Page 133 highlights
Maintaining and Transporting the Printer | 133 5. Open the front cover. Caution: To avoid damaging the printer, make sure you don't push the side pin in too far. Do not touch the black parts inside the printer or the cables around the print head. 6. Locate the cutter assembly with a blue plastic cover on the left side of the print head. 7. Hold down the side pin as shown and turn the latch to the right. WARNING: The blade is sharp. Be careful when removing it. 8. Release the side pin carefully. The cutter pops out. 5-133
-
 1
1 -
2
-
3
-
4
-
5
-
6
-
7
-
8
-
9
-
10
-
11
-
12
-
13
-
14
-
15
-
16
-
17
-
18
-
19
-
20
-
21
-
22
-
23
-
24
-
25
-
26
-
27
-
28
-
29
-
30
-
31
-
32
-
33
-
34
-
35
-
36
-
37
-
38
-
39
-
40
-
41
-
42
-
43
-
44
-
45
-
46
-
47
-
48
-
49
-
50
-
51
-
52
-
53
-
54
-
55
-
56
-
57
-
58
-
59
-
60
-
61
-
62
-
63
-
64
-
65
-
66
-
67
-
68
-
69
-
70
-
71
-
72
-
73
-
74
-
75
-
76
-
77
-
78
-
79
-
80
-
81
-
82
-
83
-
84
-
85
-
86
-
87
-
88
-
89
-
90
-
91
-
92
-
93
-
94
-
95
-
96
-
97
-
98
-
99
-
100
-
101
-
102
-
103
-
104
-
105
-
106
-
107
-
108
-
109
-
110
-
111
-
112
-
113
-
114
-
115
-
116
-
117
-
118
-
119
-
120
-
121
-
122
-
123
-
124
-
125
-
126
-
127
-
 128
128 -
 129
129 -
 130
130 -
 131
131 -
 132
132 -
 133
133 -
 134
134 -
 135
135 -
 136
136 -
 137
137 -
 138
138 -
139
-
140
-
141
-
142
-
143
-
144
-
145
-
146
-
147
-
148
-
149
-
150
-
151
-
152
-
153
-
154
-
155
-
156
-
157
-
158
-
159
-
160
-
161
-
162
-
163
-
164
-
165
-
166
-
167
-
168
-
169
-
170
-
171
-
172
-
173
-
174
-
175
-
176
-
177
-
178
-
179
-
180
 |
 |
5-133
Maintaining and Transporting the Printer
|
133
5.
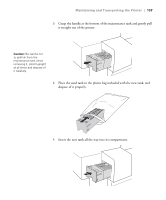
Open the front cover.
6.
Locate the cutter assembly with a blue plastic cover on the left side of the
print head.
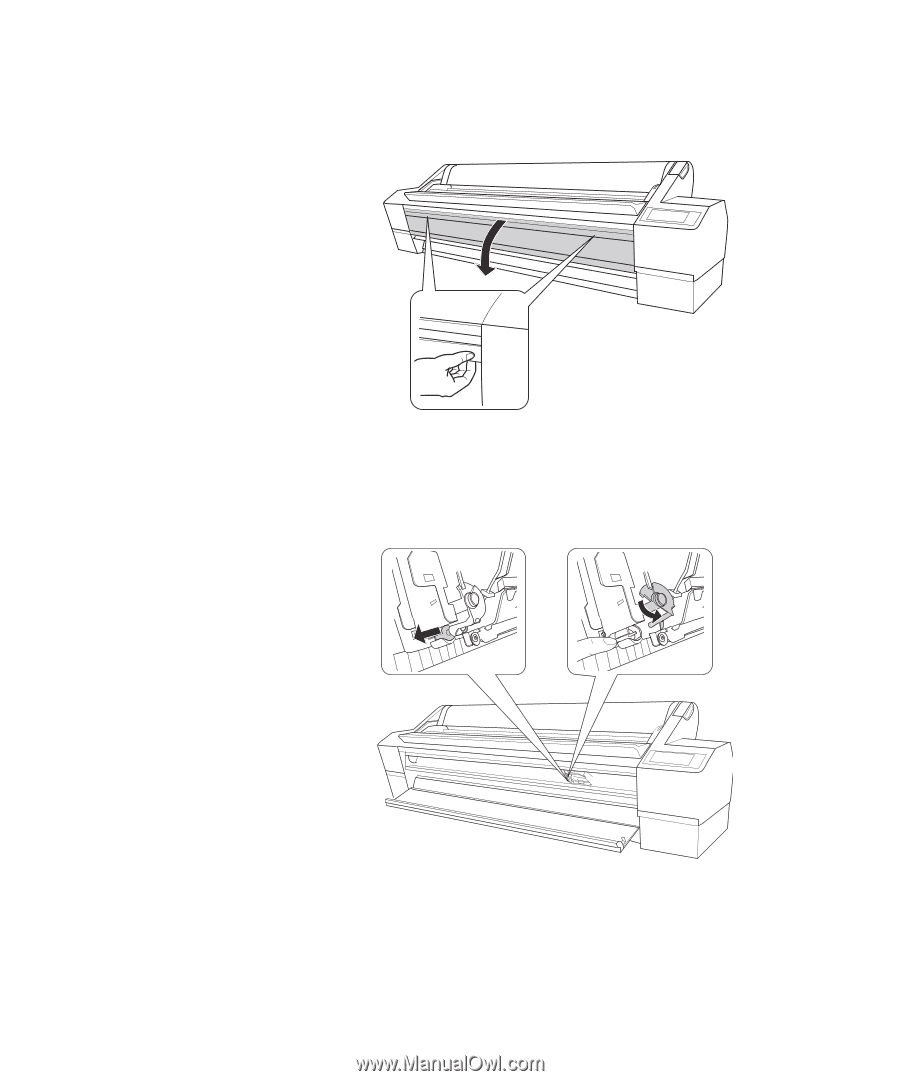
7.
Hold down the side pin as shown and turn the latch to the right.
8.
Release the side pin carefully. The cutter pops out.
Caution:
To avoid
damaging the printer,
make sure you don’t push
the side pin in too far. Do
not touch the black parts
inside the printer or the
cables around the print
head.
WARNING:
The blade is
sharp. Be careful when
removing it.