Epson 1520 User Setup Information - Page 2
Attach the Paper Support and Output Tray
 |
UPC - 010343813328
View all Epson 1520 manuals
Add to My Manuals
Save this manual to your list of manuals |
Page 2 highlights
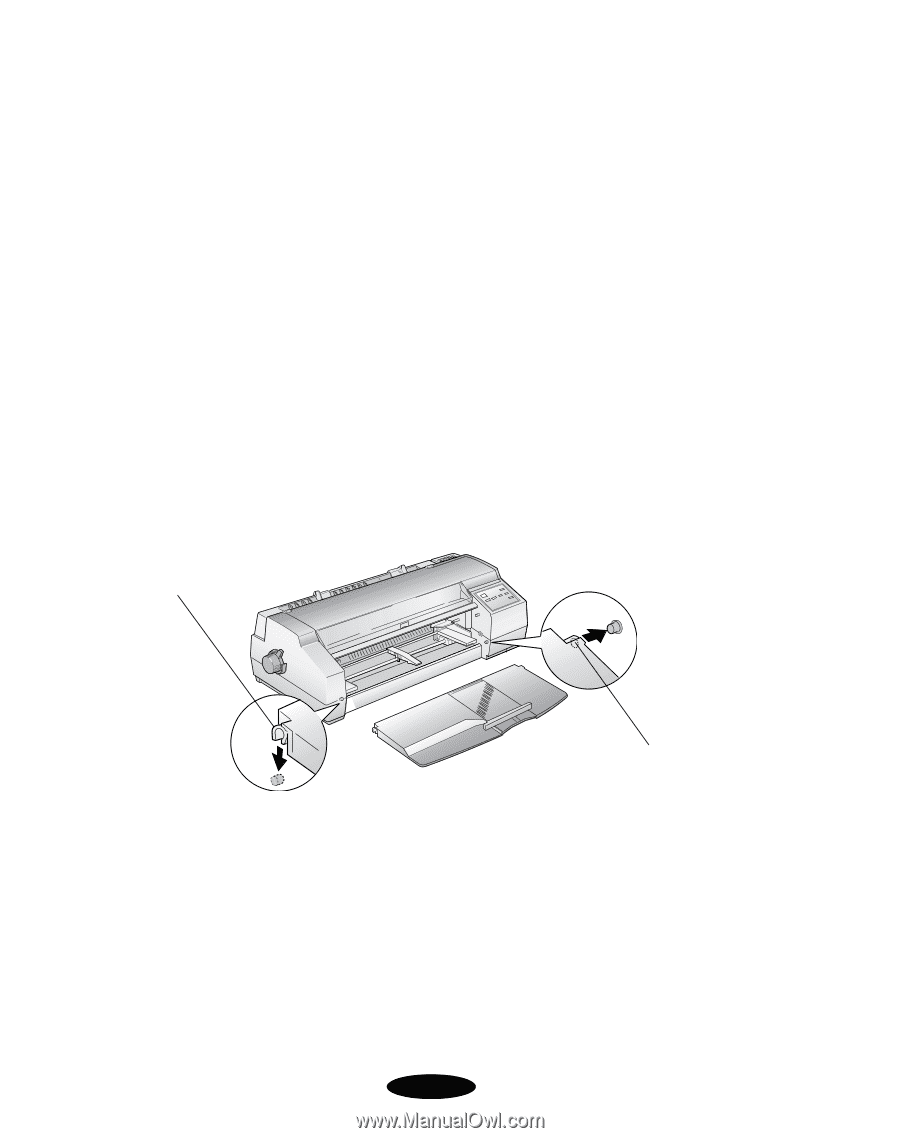
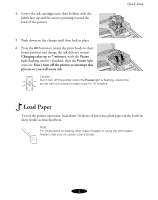
Quick Setup Place the printer flat on a stable desk near a grounded outlet. Leave plenty of room in back for the cables and for a stack of continuous paper, if you use it. Leave enough room in front for the paper support and output tray. Do NOT put the printer: ◗ In an area with high temperature or humidity ◗ In direct sunlight or dusty conditions ◗ Near sources of heat or electromagnetic interference, such as loudspeakers or cordless telephone base units Also, be sure to follow the safety instructions in your on-screen User's Guide. 2 Attach the Paper Support and Output Tray 1. Place the hole in the right side of the paper support on the printer's right post. Then slightly lift the left side of the paper support and push the notch down over the printer's left post. Notch Hole 2
-
 1
1 -
 2
2 -
 3
3 -
 4
4 -
 5
5 -
 6
6 -
 7
7 -
 8
8 -
9
-
10
-
11
-
12
-
13
-
14
-
15
-
16
-
17
-
18
-
19
-
20
 |
 |