Epson 1520 User Setup Information - Page 8
Connect the Printer to Your Computer, Connecting to a PC - stylus color parts
 |
UPC - 010343813328
View all Epson 1520 manuals
Add to My Manuals
Save this manual to your list of manuals |
Page 8 highlights
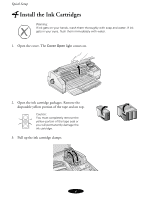
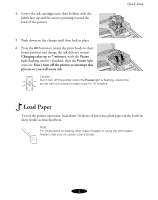
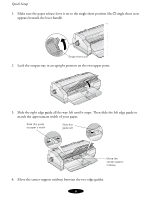
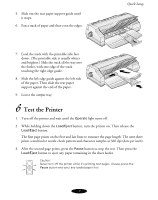
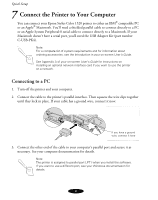
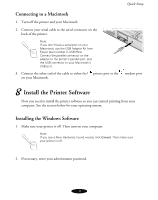
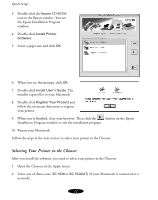
Quick Setup 7 Connect the Printer to Your Computer You can connect your Epson Stylus Color 1520 printer to either an IBM® compatible PC or an Apple® Macintosh. You'll need a shielded parallel cable to connect directly to a PC or an Apple System Peripheral-8 serial cable to connect directly to a Macintosh. If your Macintosh doesn't have a serial port, you'll need the USB Adapter Kit (part number C-USB-PK4). Note Note: For a complete list of system requirements and for information about ordering accessories, see the Introduction in your on-screen User's Guide. See Appendix A of your on-screen User's Guide for instructions on installing an optional network interface card if you want to use the printer on a network. Connecting to a PC 1. Turn off the printer and your computer. 2. Connect the cable to the printer's parallel interface. Then squeeze the wire clips together until they lock in place. If your cable has a ground wire, connect it now. If you have a ground wire, connect it here 3. Connect the other end of the cable to your computer's parallel port and secure it as necessary. See your computer documentation for details. Note: The printer is assigned to parallel port LPT1 when you install the software. If you want to use a different port, see your Windows documentation for details. 8
-
 1
1 -
2
-
 3
3 -
 4
4 -
 5
5 -
 6
6 -
 7
7 -
 8
8 -
 9
9 -
 10
10 -
 11
11 -
 12
12 -
 13
13 -
14
-
15
-
16
-
17
-
18
-
19
-
20
 |
 |
