Epson 1520 User Setup Information - Page 3
Plug the Printer In and Turn It
 |
UPC - 010343813328
View all Epson 1520 manuals
Add to My Manuals
Save this manual to your list of manuals |
Page 3 highlights
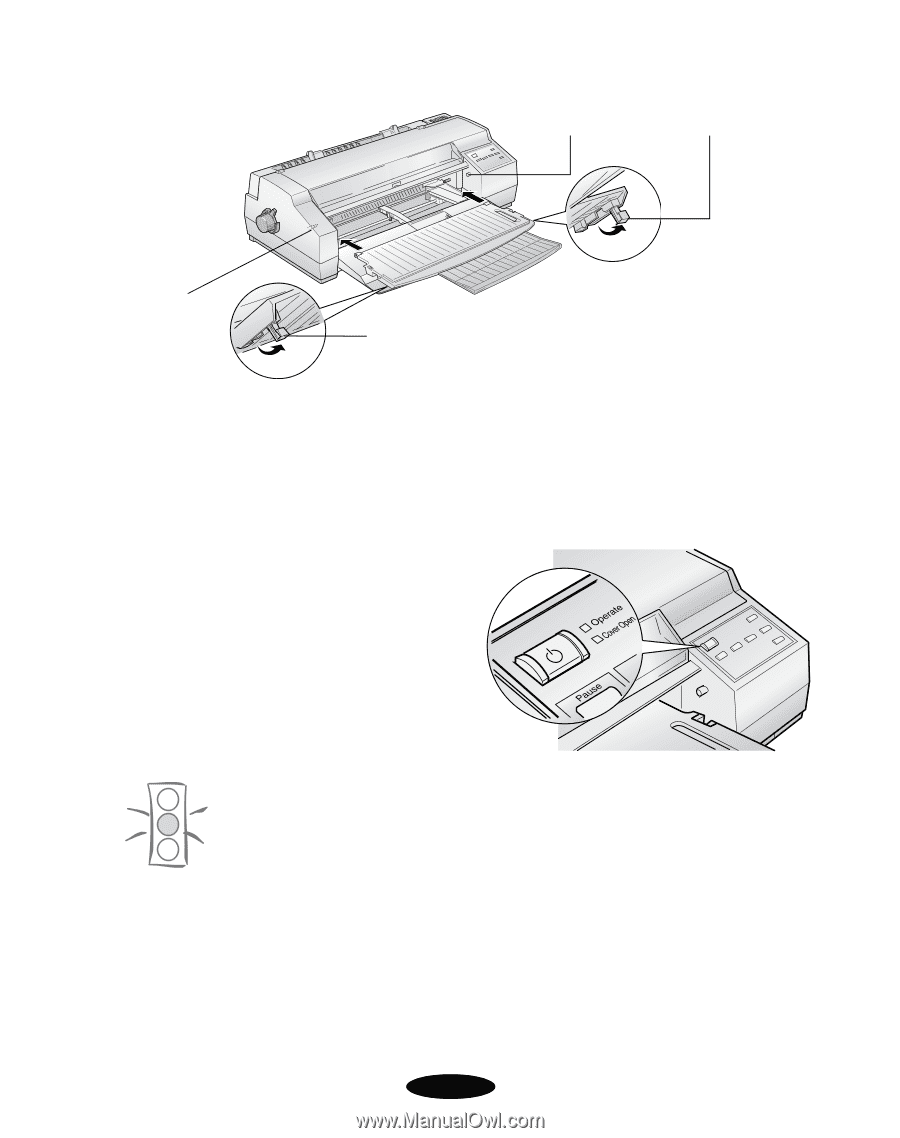
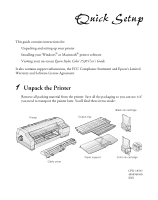
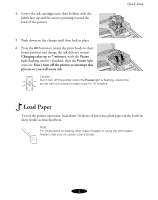
Quick Setup 2. Press the two notches at the back of the output tray onto the metal posts on the printer. Post Leg Post Leg 3. Flip down the legs on the underside of the output tray so it sits up on the paper support. 3 Plug the Printer In and Turn It On 1. First make sure the power is off. Check the P Operate button; it's off when its surface is even with the button guards on each side. 2. Plug the power cord into a properly grounded outlet. To protect the printer from power surges, you may want to use a surge protector. Caution: Do not plug the printer into an outlet controlled by a wall switch or timer, or on the same circuit as a large appliance. This may disrupt the power, which can erase the printer's memory and damage the power supply. 3. Press the P Operate button to turn on the printer. The Operate and Ink Out lights come on and the ink cartridge holders move to the installation position. The Pause light begins flashing. 3
-
 1
1 -
 2
2 -
 3
3 -
 4
4 -
 5
5 -
 6
6 -
 7
7 -
 8
8 -
 9
9 -
10
-
11
-
12
-
13
-
14
-
15
-
16
-
17
-
18
-
19
-
20
 |
 |