Epson 1810p User's Guide - Page 53
Auto Setup, Tracking, Progressive, Position, Computer1 Input, Computer1, Component, Video Signal
 |
UPC - 010343858213
View all Epson 1810p manuals
Add to My Manuals
Save this manual to your list of manuals |
Page 53 highlights
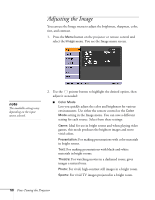
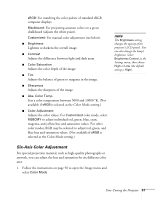
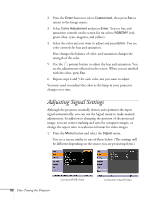
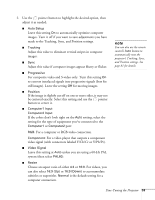
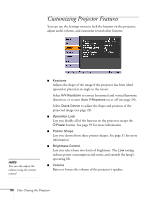
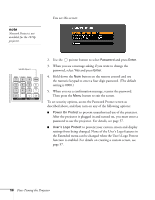
2. Use the pointer button to highlight the desired option, then adjust it as needed: ■ Auto Setup Leave this setting On to automatically optimize computer images. Turn it off if you want to save adjustments you have made to the Tracking, Sync, and Position settings. ■ Tracking Adjust this value to eliminate vertical stripes in computer images. ■ Sync Adjust this value if computer images appear blurry or flicker. ■ Progressive For composite video and S-video only. Turn this setting On to convert interlaced signals into progressive signals (best for still images). Leave the setting Off for moving images. ■ Position If the image is slightly cut off on one or more sides, it may not be centered exactly. Select this setting and use the pointer button to center it. ■ Computer1 Input Computer2 Input If the colors don't look right on the Auto setting, select the setting for the type of equipment you've connected to the Computer1 or Computer2 port: RGB: For a computer or RGB-video connection. Component: For a video player that outputs a component video signal (with connectors labeled Y/Cb/Cr or Y/Pb/Pr). ■ Video Signal Leave this setting at Auto unless you are using a 60-Hz PAL system (then select PAL60). ■ Resize Choose an aspect ratio of either 4:3 or 16:9. For videos, you can also select 16:9 (Up) or 16:9 (Down) to accommodate subtitles or supertitles. Normal is the default setting for a computer connection. note You can also use the remote control's Auto button to automatically reset the projector's Tracking, Sync, and Position settings. See page 81 for details. Fine-Tuning the Projector 53
-
 1
1 -
2
-
3
-
4
-
5
-
6
-
7
-
8
-
9
-
10
-
11
-
12
-
13
-
14
-
15
-
16
-
17
-
18
-
19
-
20
-
21
-
22
-
23
-
24
-
25
-
26
-
27
-
28
-
29
-
30
-
31
-
32
-
33
-
34
-
35
-
36
-
37
-
38
-
39
-
40
-
41
-
42
-
43
-
44
-
45
-
46
-
47
-
 48
48 -
 49
49 -
 50
50 -
 51
51 -
 52
52 -
 53
53 -
 54
54 -
 55
55 -
 56
56 -
 57
57 -
 58
58 -
59
-
60
-
61
-
62
-
63
-
64
-
65
-
66
-
67
-
68
-
69
-
70
-
71
-
72
-
73
-
74
-
75
-
76
-
77
-
78
-
79
-
80
-
81
-
82
-
83
-
84
-
85
-
86
-
87
-
88
-
89
-
90
-
91
-
92
-
93
-
94
-
95
-
96
-
97
-
98
-
99
-
100
-
101
-
102
 |
 |
