Epson 9600 Product Information Guide - Page 8
Printing a Status Check, Replacing an Ink Cartridge, lights is flashing - maintenance tank
 |
UPC - 010343841888
View all Epson 9600 manuals
Add to My Manuals
Save this manual to your list of manuals |
Page 8 highlights
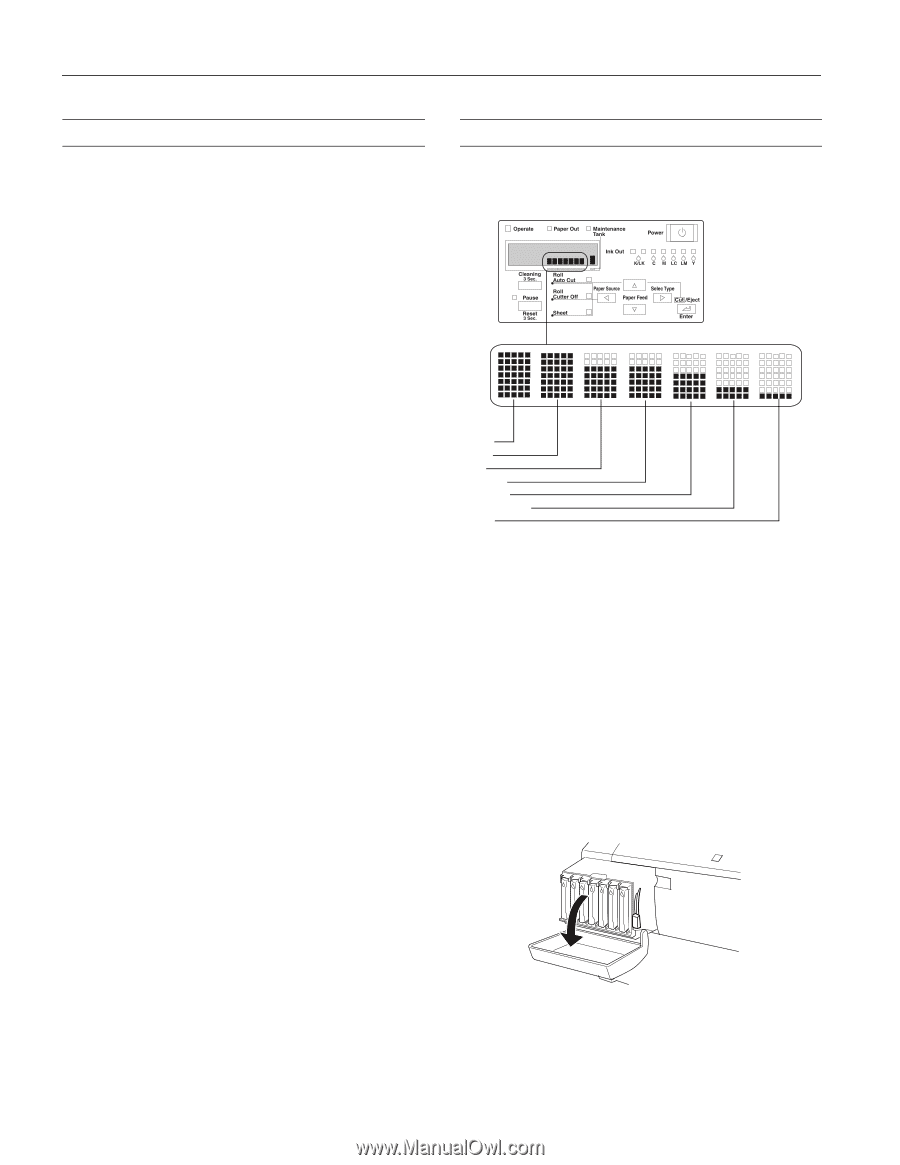
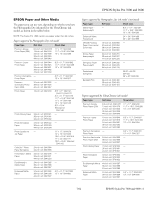
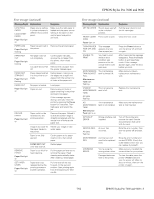
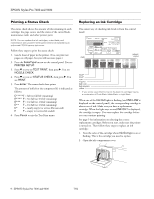
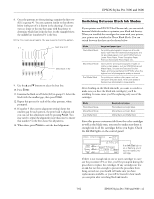
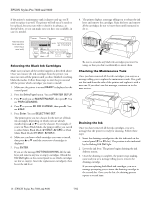
EPSON Stylus Pro 7600 and 9600 Printing a Status Check The status check shows the amount of ink remaining in each cartridge, the page count, and the status of the cutter blade, maintenance tank, and other printer parts. NOTE: You can replace the ink cartridges, cutter blade, and maintenance tank yourself. Other parts need to be replaced by an authorized EPSON service technician. Follow these steps to print the status check: 1. Load a sheet of paper in the printer. (You can print test pages on roll paper, but you will use more paper.) 2. Press the SelecType button on the control panel. You see PRINTER SETUP. 3. Press d so you see TEST PRINT, then press r. You see NOZZLE CHECK. 4. Press d so you see STATUS CHECK, then press r. You see PRINT. 5. Press Enter. The status check sheet prints. The amount of ink left or the component life is indicated as follows: E*****F = full (or full life remaining) E**** F = 3/4 full (or 3/4 life remaining) E*** F = 1/2 full (or 1/2 life remaining) E** F = 1/4 full (or 1/4 life remaining) E* F = nearly empty (or service life near end) E F = empty (or service life ended) 6. Press Pause to exit the Test Print menu. Replacing an Ink Cartridge The easiest way of checking ink levels is from the control panel: (almost (full) empty) black* black* cyan magenta light cyan light magenta yellow * If your printer uses UltraChrome ink, the black ink cartridges may be a combination of Photo Black, Matte Black, or Light Black. When one of the Ink Out lights is flashing (and INK LOW is displayed on the control panel), the corresponding cartridge is almost out of ink. Make sure you have a replacement cartridge. When the light stays on and INK OUT is displayed, the cartridge is empty. You must replace the cartridge before you can continue printing. See page 5 for information on selecting the correct replacement cartridges. Before you start, make sure the printer is turned on. Then follow these steps to replace an ink cartridge: 1. Note the color of the cartridge whose Ink Out light is on or flashing. This is the cartridge you need to replace. 2. Open the ink compartment cover. 9 - EPSON Stylus Pro 7600 and 9600 7/02
-
 1
1 -
2
-
 3
3 -
 4
4 -
 5
5 -
 6
6 -
 7
7 -
 8
8 -
 9
9 -
 10
10 -
 11
11 -
 12
12 -
 13
13 -
14
 |
 |