Epson C84WN Start Here Card - Page 5
Con the Print Server
 |
UPC - 010343849143
View all Epson C84WN manuals
Add to My Manuals
Save this manual to your list of manuals |
Page 5 highlights
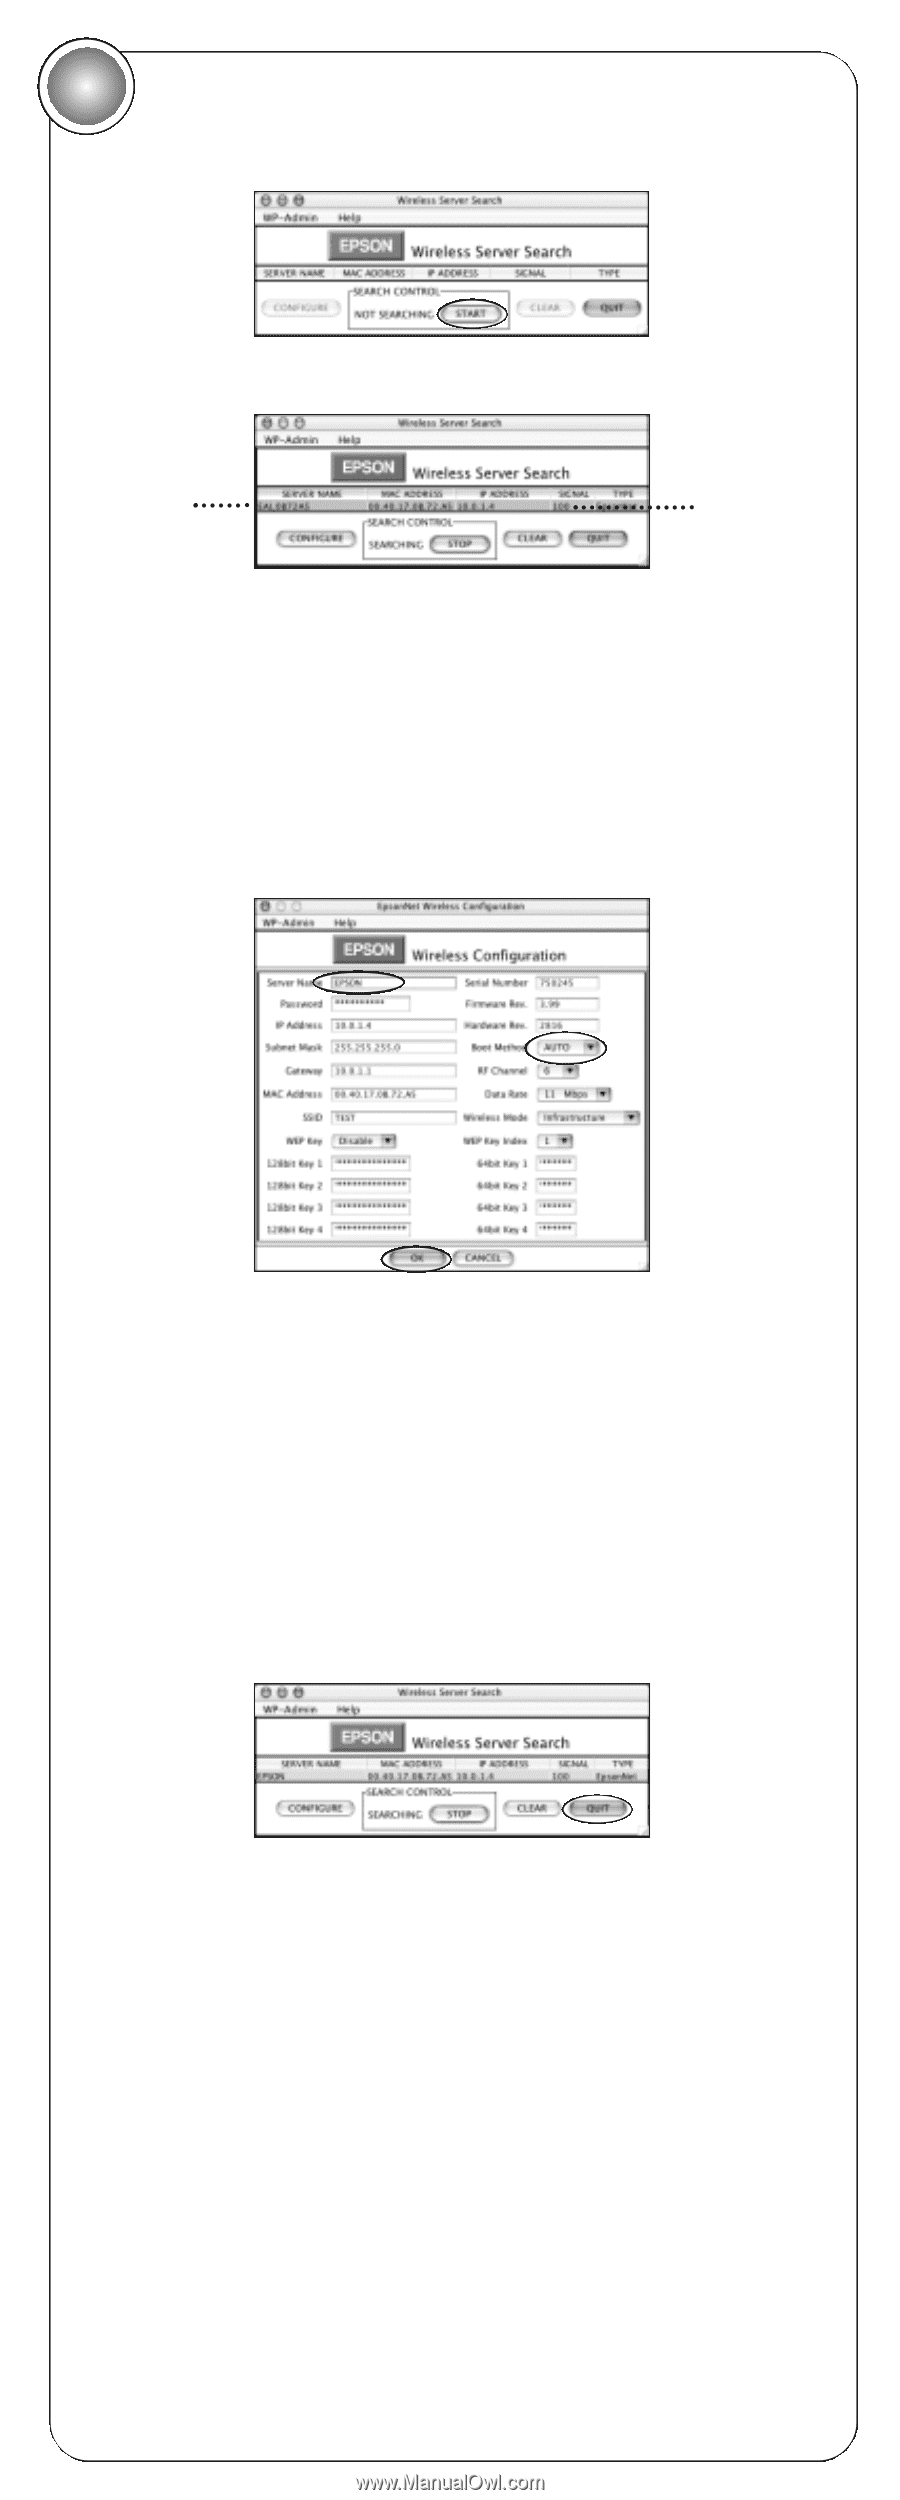
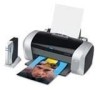
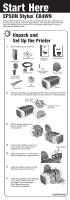
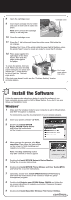
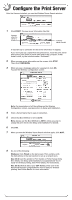
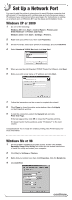
4 Configure the Print Server After the files are installed, you see the Wireless Server Search window: 1 Click START. You see server information like this: Appears when the server is found Indicates signal strength It may take up to 2 minutes for the server information to appear. If you don't pick up a signal from the print server, move the print server and access point closer to each other and to the computer. If that doesn't work, try the solutions under "Problems?." 2 When you see server information on the screen, click STOP. Then click CONFIGURE. 3 When you see a message asking for a password, click OK. You see the Wireless Configuration screen: Note: For descriptions of all the settings on the Wireless Configuration screen, see Appendix A in Setup and Installation. 4 Enter a Server Name that is easy to remember. 5 Check that Boot Method is set to AUTO. Note: Always set the Boot Method to AUTO, unless you plan to unplug the print server. See Setup and Installation for details. 6 Click OK. 7 When you see the Wireless Server Search window again, click QUIT. 8 Do one of the following: Windows: Click Finish on the last screen. Then continue with the instructions in the next section to set up a network port. Mac OS X: Add the printer to Print Center or Printer Setup Utility. (For details, see Setup and Installation.) Congratulations! You're ready for wireless printing. See Printer Basics for instructions. Mac OS 8.6 to 9.x: Select your C84 Series printer icon in the Macintosh Chooser. Congratulations! You're ready for wireless printing. See Printer Basics for more information.
-
 1
1 -
 2
2 -
 3
3 -
 4
4 -
 5
5 -
 6
6 -
 7
7 -
 8
8
 |
 |