Epson C84WN Start Here Card - Page 6
Set Up a Network Port, Windows XP or 2000, Windows Me or 98
 |
UPC - 010343849143
View all Epson C84WN manuals
Add to My Manuals
Save this manual to your list of manuals |
Page 6 highlights
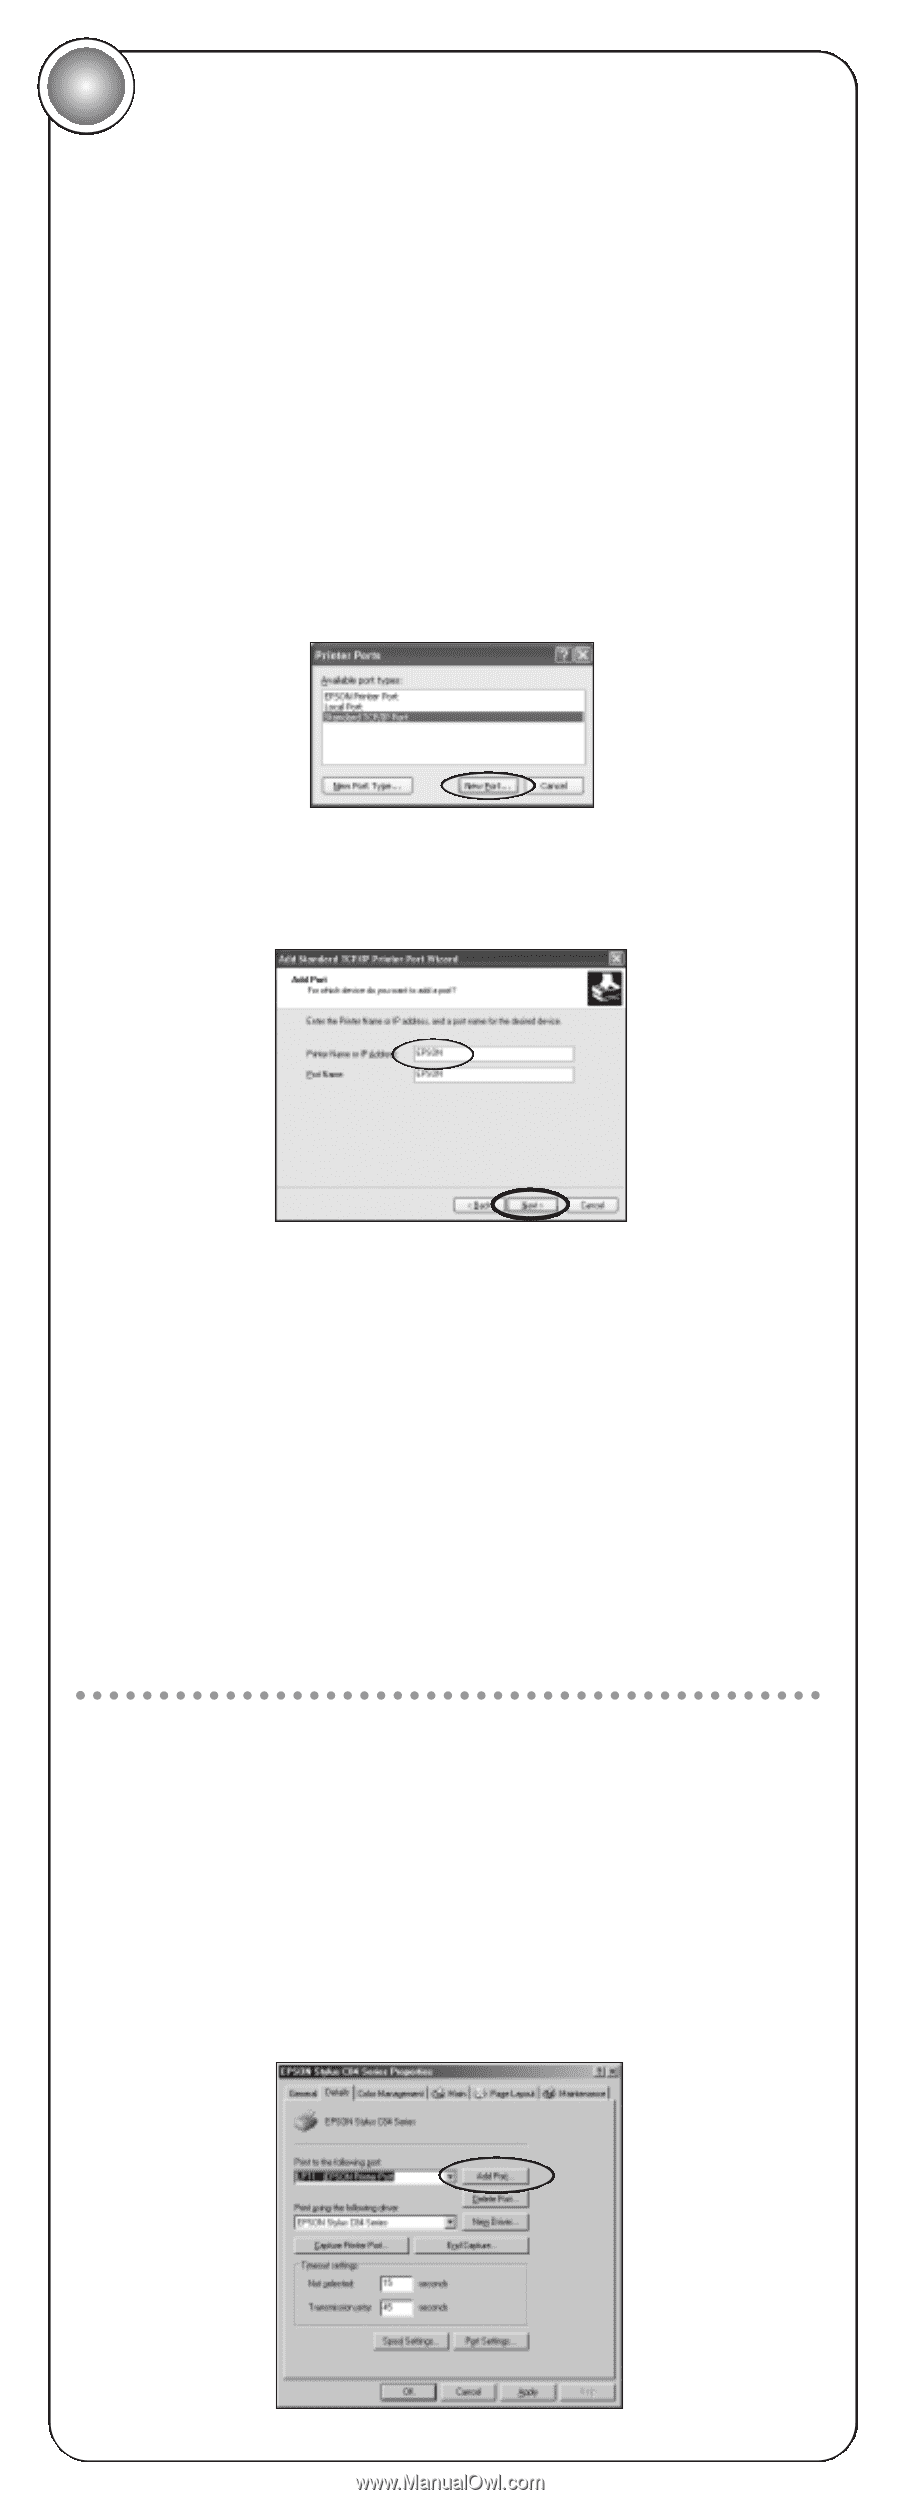
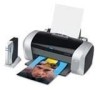
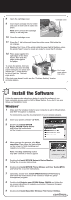
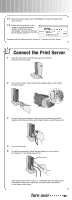
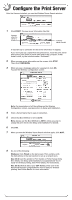
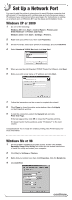
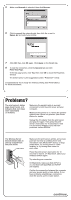
5 Set Up a Network Port You need to add the printer's network port to each Windows computer that will access it. If necessary, print a status page and note the server name or IP address of your print server before you begin. For instructions on setting up a network port on Windows NT,® see the Setup and Installation book. Windows XP or 2000 1 Do one of the following: Windows XP: Click Start > Control Panel > Printers and Other Hardware > Printers and Faxes. Windows 2000: Click Start > Settings > Printers. 2 Right-click your printer icon, then click Properties. 3 On the Ports tab, select your printer (if necessary), and click Add Port. 4 Select Standard TCP/IP Port and click New Port. 5 When you see the Add Standard TCP/IP Printer Port Wizard, click Next. 6 Enter your print server name or IP address and click Next. 7 Follow the instructions on the screen to complete the wizard. 8 Click Close to close the printer ports window, then click Apply on the Properties window. 9 To test the connection, select the General tab and click Print Test Page. If the test page prints, click OK to close the Properties window. If it doesn't print, try the solutions under "Problems?" in the next column. Congratulations! You're ready for wireless printing. See Printer Basics for more information. Windows Me or 98 1 On the EPSON® Installation Program screen, double-click Install EpsonNet Direct Print Utility and follow the on-screen instructions to install the utility and restart your computer. 2 Click Start > Settings > Printers. 3 Right-click your printer icon, then click Properties. Click the Details tab. 4 Click Add Port. continue
-
 1
1 -
 2
2 -
 3
3 -
 4
4 -
 5
5 -
 6
6 -
 7
7 -
 8
8
 |
 |