Epson CX6400 Product Information Guide - Page 12
Removing and Installing Ink Cartridges, If an ink cartridge is empty - stylus scanner
 |
UPC - 013438468694
View all Epson CX6400 manuals
Add to My Manuals
Save this manual to your list of manuals |
Page 12 highlights
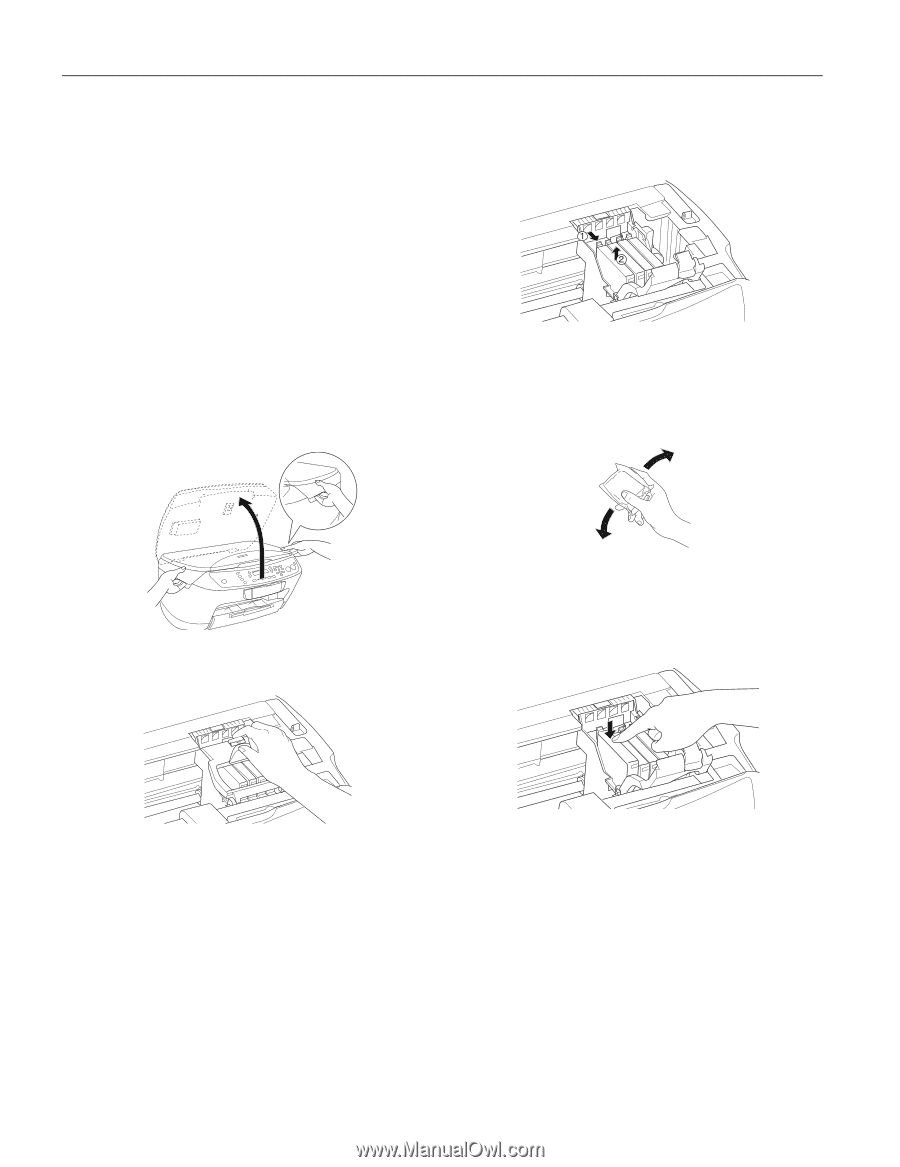
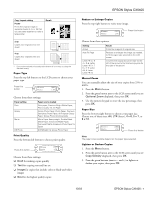
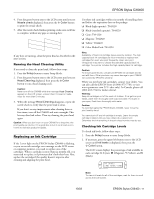
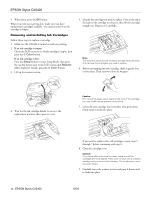
EPSON Stylus CX6400 3. When done, press the OK button. When your ink starts getting low, make sure you have replacement cartridges available. You cannot print if an ink cartridge is empty. Removing and Installing Ink Cartridges Follow these steps to replace a cartridge: 1. Make sure the CX6400 is turned on and not printing. 2. If an ink cartridge is empty: Check the LCD screen to see which cartridge is empty, then press the x Color button. If an ink cartridge is low: Press the Setup button to enter Setup Mode, then press the top left button next to the LCD screen until Replace ink is displayed. Finally, press the x Color button. 3. Lift up the scanner section. 5. Identify the cartridge you need to replace. Press in the tab at the back of the cartridge to release it, then lift the cartridge straight out. Dispose of it carefully. Note: The illustration above shows the black cartridge being removed. Only remove the cartridge(s) you need to replace. 6. Before unwrapping the new cartridge, shake it gently four or five times. Then remove it from its wrapper. 4. Wait for the ink cartridge holder to move to the replacement position, then open its cover. Caution: Don't touch the green circuit board on the front of the cartridge; you may inhibit normal operation and printing. 7. Lower the new cartridge into its holder, then press down firmly until it clicks into place. 12 - EPSON Stylus CX6400 If you need to replace other ink cartridges, repeat steps 5 through 7 before continuing with step 8. 8. Close the cartridge cover. Caution: If you find it difficult to close the cover, make sure all the cartridges are firmly seated. Press down on each newly installed cartridge until you hear it click into place. Do not attempt to force the cover closed. 9. Carefully lower the scanner section and press it down until it clicks into place. 10/03
-
 1
1 -
2
-
3
-
4
-
5
-
6
-
 7
7 -
 8
8 -
 9
9 -
 10
10 -
 11
11 -
 12
12 -
 13
13
 |
 |