Epson LQ-2500 User Manual - Page 12
Choosing a Place for the Printer, Installing the Ribbon, Appendix D. - ribbon for
 |
View all Epson LQ-2500 manuals
Add to My Manuals
Save this manual to your list of manuals |
Page 12 highlights
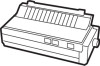
When you are finished unpacking, put the packaging materials and the head protector in the box and keep them in case you need to transport the printer. Full details on transporting the printer are in Appendix D. 2 Choosing a Place for the Printer The printer must be close enough to the computer for the cable to reach. Also keep the following tips in mind: Place the printer on a flat, stable surface-never on a chair or any other unstable support. Choose a place that is clean and free from excessive heat (including direct sunlight), moisture, and dust. Use a grounded outlet-one that has three holes to match the power plug on the printer. Don't use an adapter plug. Avoid sockets on the same circuit with large motors or other appliances that might disturb the power supply Keep your entire computer system away from potential sources of interference such as the base units of cordless telephones. 3 Installing the Ribbon The LQ-2500 uses a simple cartridge ribbon for convenient and troublefree installation. With the color option kit, you can use a color ribbon whenever YOU need one and a normal black ribbon for day-today printing. You install both types of ribbon in the same way 1. Remove the dust cover. 2. If the printer is plugged in, be sure that it's turned off. Setting Up the Printer 1-3
-
 1
1 -
2
-
3
-
4
-
5
-
6
-
 7
7 -
 8
8 -
 9
9 -
 10
10 -
 11
11 -
 12
12 -
 13
13 -
 14
14 -
 15
15 -
 16
16 -
 17
17 -
18
-
19
-
20
-
21
-
22
-
23
-
24
-
25
-
26
-
27
-
28
-
29
-
30
-
31
-
32
-
33
-
34
-
35
-
36
-
37
-
38
-
39
-
40
-
41
-
42
-
43
-
44
-
45
-
46
-
47
-
48
-
49
-
50
-
51
-
52
-
53
-
54
-
55
-
56
-
57
-
58
-
59
-
60
-
61
-
62
-
63
-
64
-
65
-
66
-
67
-
68
-
69
-
70
-
71
-
72
-
73
-
74
-
75
-
76
-
77
-
78
-
79
-
80
-
81
-
82
-
83
-
84
-
85
-
86
-
87
-
88
-
89
-
90
-
91
-
92
-
93
-
94
-
95
-
96
-
97
-
98
-
99
-
100
-
101
-
102
-
103
-
104
-
105
-
106
-
107
-
108
-
109
-
110
-
111
-
112
-
113
-
114
-
115
-
116
-
117
-
118
-
119
-
120
-
121
-
122
-
123
-
124
-
125
-
126
-
127
-
128
-
129
-
130
-
131
-
132
-
133
-
134
-
135
-
136
-
137
-
138
-
139
-
140
-
141
-
142
-
143
-
144
-
145
-
146
-
147
-
148
-
149
-
150
-
151
-
152
-
153
-
154
-
155
-
156
-
157
-
158
-
159
-
160
-
161
-
162
-
163
-
164
-
165
-
166
-
167
-
168
-
169
-
170
-
171
-
172
-
173
-
174
-
175
-
176
-
177
-
178
-
179
-
180
-
181
-
182
-
183
-
184
 |
 |
