Epson PowerLite 715c User Manual - Page 56
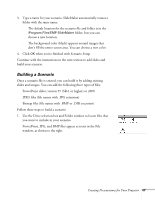
Building a Scenario, PowerPoint slides, version 97 SR-1 or higher or 2000
 |
View all Epson PowerLite 715c manuals
Add to My Manuals
Save this manual to your list of manuals |
Page 56 highlights
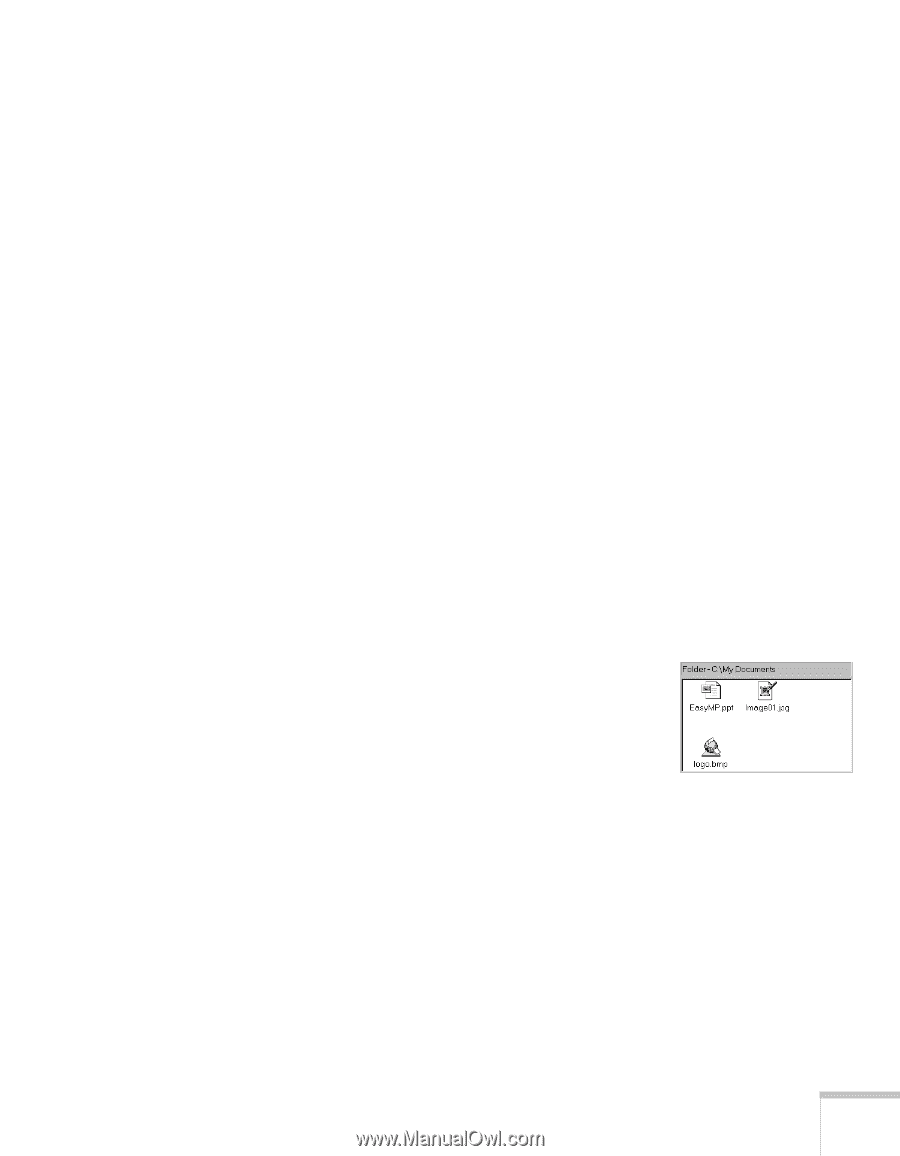
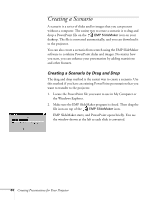
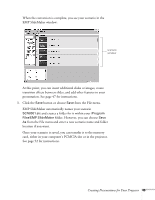
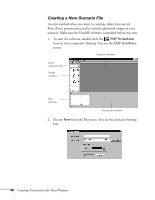
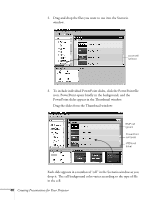
3. Type a name for your scenario. SlideMaker automatically creates a folder with the same name. s The default location for the scenario file and folder is in the \Program Files\EMP SlideMaker folder, but you can choose a new location. s The background color (black) appears around images that don't fill the entire screen area. You can choose a new color. 4. Click OK when you're finished with Scenario Setup. Continue with the instructions in the next section to add slides and build your scenario. Building a Scenario Once a scenario file is created, you can build it by adding existing slides and images. You can add the following three types of files: s PowerPoint slides, version 97 (SR-1 or higher) or 2000 s JPEG files (file names with .JPG extension) s Bitmap files (file names with .BMP or .DIB extension) Follow these steps to build a scenario: 1. Use the Drive selection box and Folder window to locate files that you want to include in your scenario. PowerPoint, JPG, and BMP files appear as icons in the File window, as shown to the right. Creating Presentations for Your Projector 47
-
 1
1 -
2
-
3
-
4
-
5
-
6
-
7
-
8
-
9
-
10
-
11
-
12
-
13
-
14
-
15
-
16
-
17
-
18
-
19
-
20
-
21
-
22
-
23
-
24
-
25
-
26
-
27
-
28
-
29
-
30
-
31
-
32
-
33
-
34
-
35
-
36
-
37
-
38
-
39
-
40
-
41
-
42
-
43
-
44
-
45
-
46
-
47
-
48
-
49
-
50
-
 51
51 -
 52
52 -
 53
53 -
 54
54 -
 55
55 -
 56
56 -
 57
57 -
 58
58 -
 59
59 -
 60
60 -
 61
61 -
62
-
63
-
64
-
65
-
66
-
67
-
68
-
69
-
70
-
71
-
72
-
73
-
74
-
75
-
76
-
77
-
78
-
79
-
80
-
81
-
82
-
83
-
84
-
85
-
86
-
87
-
88
-
89
-
90
-
91
-
92
-
93
-
94
-
95
-
96
-
97
-
98
-
99
-
100
-
101
-
102
-
103
-
104
-
105
-
106
-
107
-
108
-
109
-
110
-
111
-
112
-
113
-
114
-
115
-
116
-
117
-
118
-
119
-
120
-
121
-
122
-
123
-
124
-
125
-
126
-
127
-
128
-
129
-
130
-
131
-
132
-
133
-
134
-
135
-
136
-
137
-
138
-
139
-
140
-
141
 |
 |