Epson PowerLite 735c Product Information Guide - Page 9
Creating a Scenario from Scratch, Adding Images and Transitions - powerlite emp
 |
View all Epson PowerLite 735c manuals
Add to My Manuals
Save this manual to your list of manuals |
Page 9 highlights
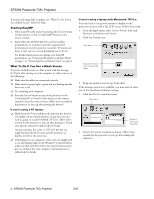
EPSON PowerLite 735c Projector 4. Optionally, insert additional images or create transition effects between slides, as described in "Adding Images and Transitions" below. 5. Click Save to let EMP SlideMaker automatically name your scenario (SCN_) and create a folder for it in your \Program Files\EMP SlideMaker folder. To choose a different location and name for your scenario, choose Save As from the File menu. Once your scenario is saved, you can transfer it to the memory card in your computer's PCMCIA slot, as described on page 10. Creating a Scenario from Scratch Use this method when you want to create a new scenario that combines a selection of PowerPoint slides and other graphics. 1. Double-click the EMP SlideMaker icon on your desktop to start the software. 2. Click New from the File menu. You see the scenario Properties window. 3. Type a name for your scenario. Then select from the following options: ❏ The default location for the scenario file and folder is in the \Program Files\EMP SlideMaker folder. Click Browse to choose a new location. ❏ The background color (gray) appears around images that don't fill the entire screen. Select a new color if desired. ❏ Select the image quality for imported PowerPoint slides. Higher-quality images look better on the screen but may take longer to appear. 4. Click OK to close the window. Then continue with the instructions in the next section to create slides and build your scenario. Adding Images and Transitions Once a scenario file is created (either from an existing PowerPoint presentation or from scratch), you can include additional PowerPoint slides and other graphics. You can also customize transitions between slides. You can add the following types of files to your scenario: ❏ PowerPoint slides, version 97 (SR-1 or higher) through 2002 ❏ JPEG files (files with a .JPG extension) ❏ Bitmap files (files with a .BMP or .DIB extension) 1. Use the navigation tools on the left side of the EMP SlideMaker screen to locate the files you want to include. PowerPoint, JPG, and BMP files appear as icons as shown below. Click icon to see preview Thumbnail preview 2. Click the icon for each image you want to preview in the thumbnail window. If you click a PowerPoint icon, thumbnail images are generated for all the slides in the PowerPoint file. 3. Drag and drop the images or PowerPoint slides you want to use into the scenario window. To include a PowerPoint file (instead of individual slides), drag the PowerPoint icon itself into the scenario window. 4. Continue dragging additional images into the scenario window to build your presentation. Each slide appears in a numbered cell as you drop it. The cell background color varies according to the type of file in the cell. 5. If you need to rearrange cells, you can drag and drop them as necessary within the scenario window. 2/03 EPSON PowerLite 735c Projector - 9
-
 1
1 -
2
-
3
-
 4
4 -
 5
5 -
 6
6 -
 7
7 -
 8
8 -
 9
9 -
 10
10 -
 11
11 -
 12
12 -
 13
13
 |
 |
