Epson PowerLite 8100NL User Manual - Page 54
Using the Remote Control
 |
View all Epson PowerLite 8100NL manuals
Add to My Manuals
Save this manual to your list of manuals |
Page 54 highlights
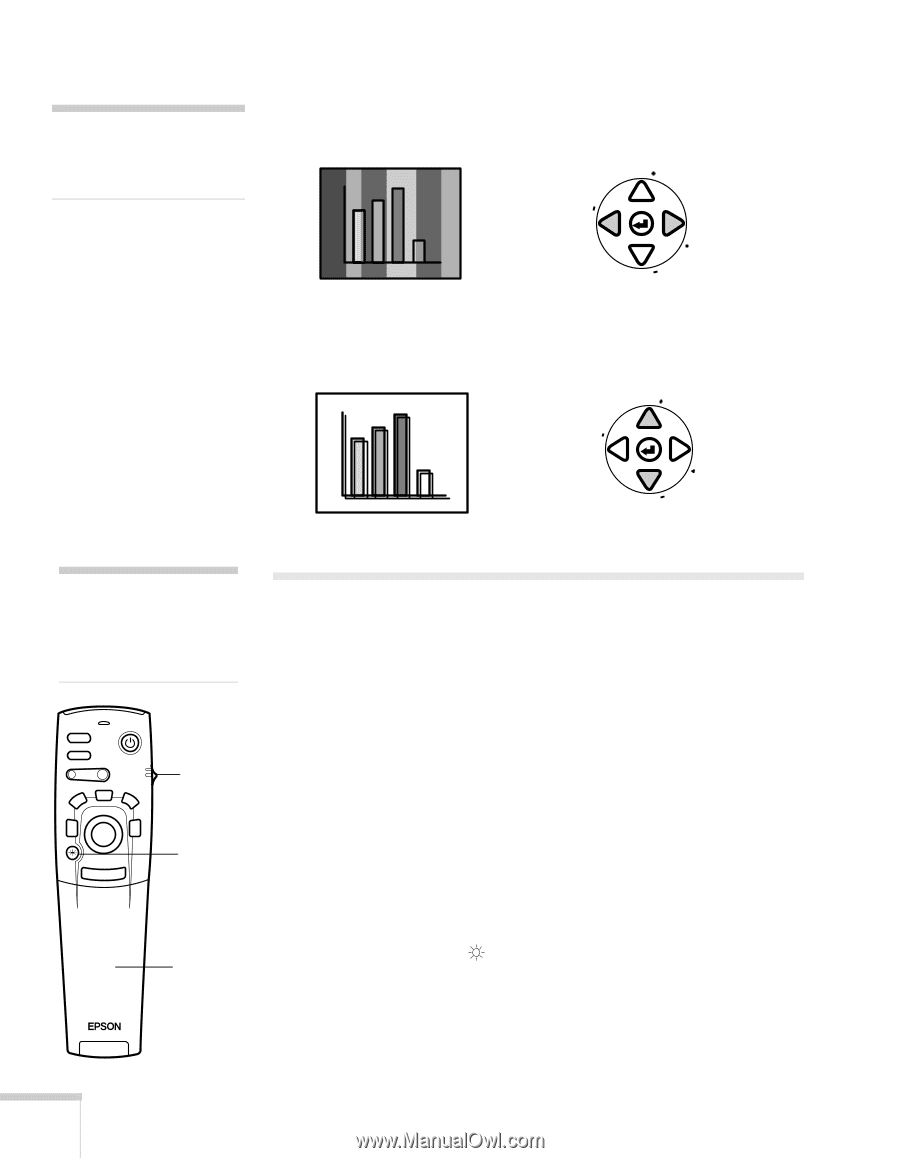
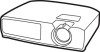
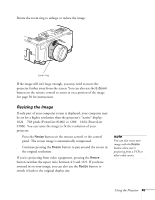
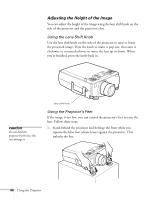
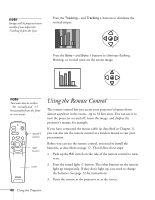
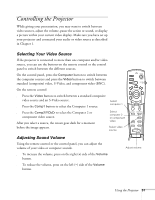
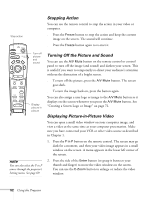
note Images will be projected more vividly if you adjust the Tracking before the Sync. s Press the Tracking - and Tracking + buttons to eliminate the vertical stripes. Sync. Tracking Tracking Sync. s Press the Sync - and Sync + buttons to eliminate flashing, blurring, or vertical noise on the screen image. Sync. Tracking Tracking Sync. note You must also be within ± 30 ° verically and ±1 5 ° horizontally from the front or rear sensor. Freeze A/V Mute E-Zoom Power R/C ON OFF 3 2 5 4 1 Enter Esc ON/OFF switch light button cover Using the Remote Control The remote control lets you access your projector's features from almost anywhere in the room-up to 32 feet away. You can use it to turn the projector on and off, zoom the image, and display the projector's menus, for example. If you have connected the mouse cable (as described in Chapter 1), you can also use the remote control as a wireless mouse to run your presentation. Before you can use the remote control, you need to install the batteries, as described on page 12. Then follow these steps: 1. Push up the R/C switch on the side of the remote control to turn it on. 2. Press the round light button. The other buttons on the remote light up temporarily. If they don't light up, you need to change the batteries. See page 12 for instructions. 3. Point the remote at the projector or at the screen. 48 Using the Projector
-
 1
1 -
2
-
3
-
4
-
5
-
6
-
7
-
8
-
9
-
10
-
11
-
12
-
13
-
14
-
15
-
16
-
17
-
18
-
19
-
20
-
21
-
22
-
23
-
24
-
25
-
26
-
27
-
28
-
29
-
30
-
31
-
32
-
33
-
34
-
35
-
36
-
37
-
38
-
39
-
40
-
41
-
42
-
43
-
44
-
45
-
46
-
47
-
48
-
 49
49 -
 50
50 -
 51
51 -
 52
52 -
 53
53 -
 54
54 -
 55
55 -
 56
56 -
 57
57 -
 58
58 -
 59
59 -
60
-
61
-
62
-
63
-
64
-
65
-
66
-
67
-
68
-
69
-
70
-
71
-
72
-
73
-
74
-
75
-
76
-
77
-
78
-
79
-
80
-
81
-
82
-
83
-
84
-
85
-
86
-
87
-
88
-
89
-
90
-
91
-
92
-
93
-
94
-
95
-
96
-
97
-
98
-
99
-
100
-
101
-
102
-
103
-
104
-
105
-
106
-
107
-
108
-
109
-
110
-
111
-
112
-
113
-
114
-
115
-
116
-
117
-
118
-
119
-
120
 |
 |