Epson PowerLite 8150i Product Information Guide - Page 5
Presenting Without a Computer, Connecting to Your Network, Configuring the Projector to the Network
 |
View all Epson PowerLite 8150i manuals
Add to My Manuals
Save this manual to your list of manuals |
Page 5 highlights
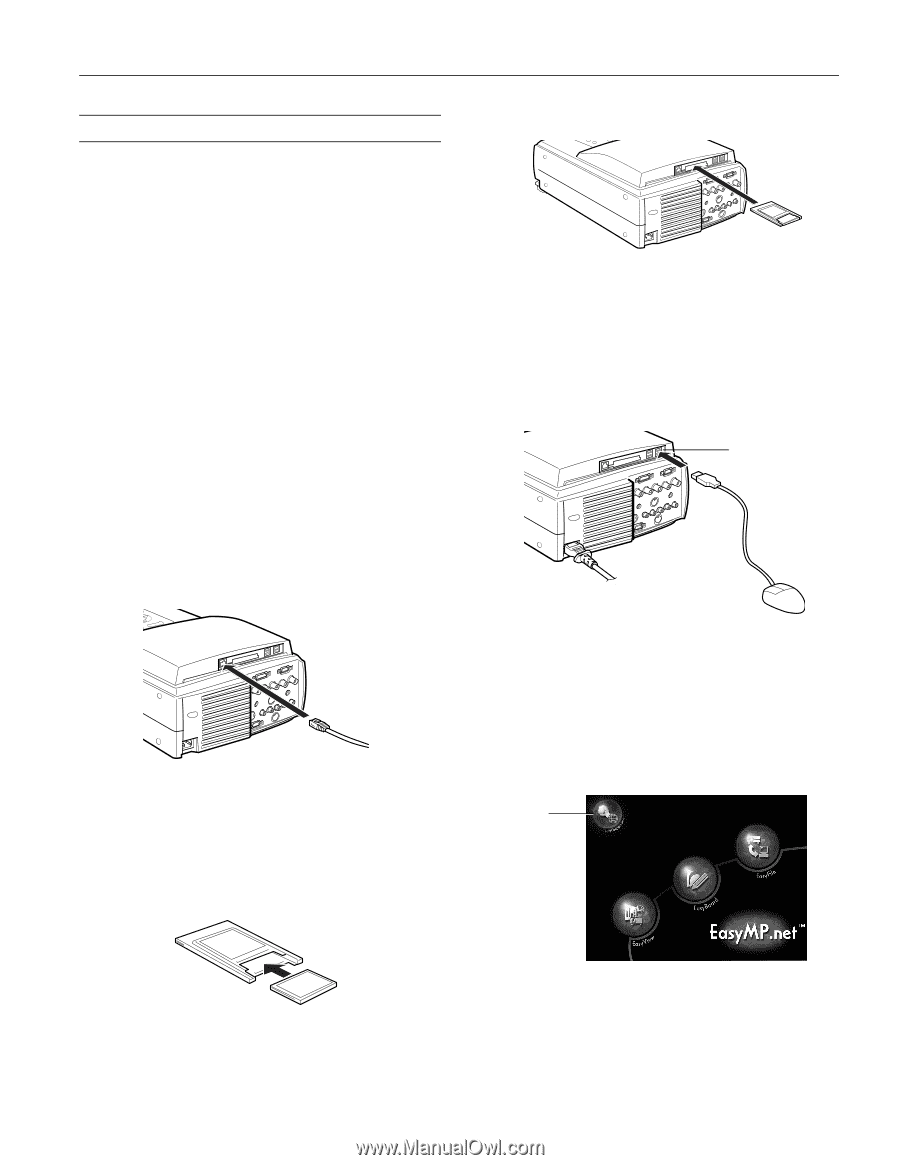
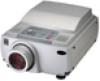
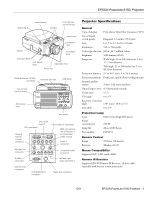
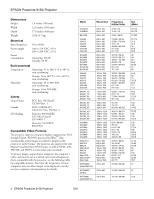
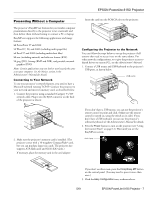
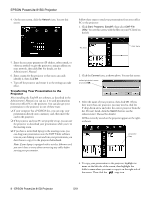
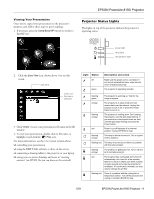
EPSON PowerLite 8150i Projector Presenting Without a Computer The projector's EasyMP.net features let you transfer computer presentations directly to the projector (over a network) and then deliver them without having to connect a PC or laptop. EasyMP.net supports the following applications and image formats: ❏ PowerPoint 97 and 2000 ❏ Word 97, 98, and 2000 (including multi-page files) ❏ Excel 97 and 2000 (including multi-sheet files) ❏ text (including unicode) and rich text format (RTF) ❏ jpeg (JPG), bitmap (BMP and DIB), and portable network graphics (PNG) Note: Certain applications may not look or work exactly the same as on your computer. See the Notices section in the Administrator's Manual for details. Connecting to Your Network To use your projector's network features, you need to have a Microsoft network running TCP/IP. Connect the projector to your network and insert its memory card, as described below. 1. Connect the projector using a standard (Category 5 UTP) network cable. Plug it into the RJ45 connector on the back of the projector as shown: Insert the card into the PCMCIA slot on the projector: Configuring the Projector to the Network You can follow the steps below to set up the projector if all systems that need to access it are on the same subnet. For other network configurations, or to give the projector access to shared drives on remote PCs, see the Administrator's Manual. 1. Connect a USB mouse and USB keyboard to the projector's USB ports, as shown below. USB ports 2. Make sure the projector's memory card is installed. (The projector comes with a 16-megabyte CompactFlash card, but you can purchase larger-size cards. The projector also supports ATA flash cards and ATA HDD cards.) If necessary, place the memory card in the card adapter: If you don't have a USB mouse, you can use the projector's remote control to point and click. (Make sure the remote control is turned on, using the switch on its side.) If you don't have a USB keyboard, you can use the projector's software keyboard; see the Administrator's Manual for details. 2. Press the Power button to turn on the projector (see "Using the Control Panel" on page 12). Wait until you see the EasyMP.net screen: click here If you don't see this screen, press the Comp/Easy-MP button on the control panel. (You may need to press it more than once.) 3. Click the Easy Configuration icon, as shown above. 5/01 EPSON PowerLite 8150i Projector - 7
-
 1
1 -
 2
2 -
 3
3 -
 4
4 -
 5
5 -
 6
6 -
 7
7 -
 8
8 -
 9
9 -
 10
10 -
 11
11 -
12
 |
 |