Epson PowerLite 8150i Product Information Guide - Page 6
Transferring Your Presentation to the Projector, You see this screen - user manual
 |
View all Epson PowerLite 8150i manuals
Add to My Manuals
Save this manual to your list of manuals |
Page 6 highlights
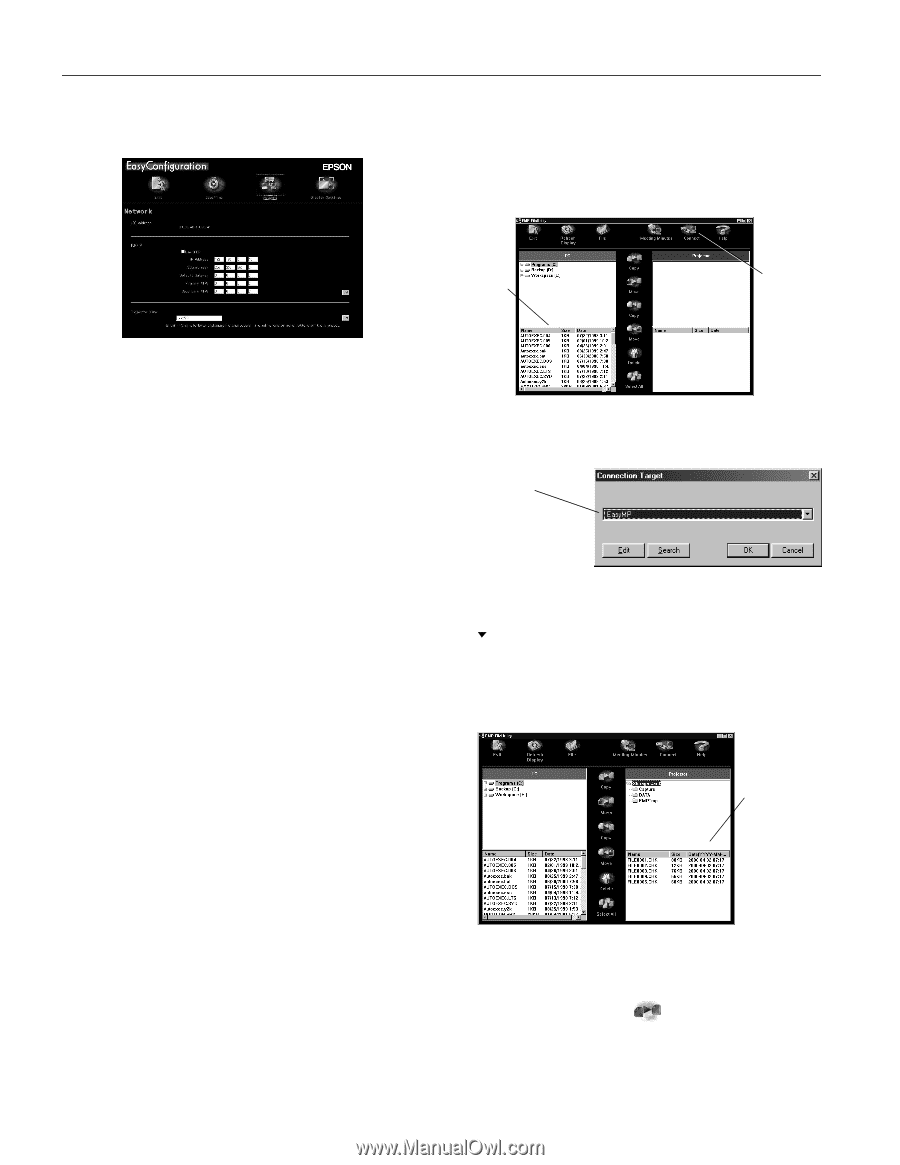
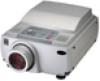
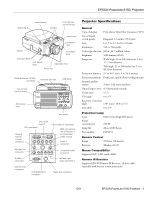
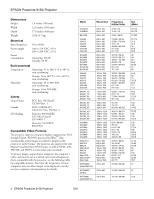
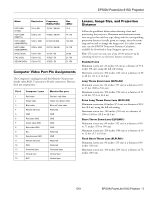
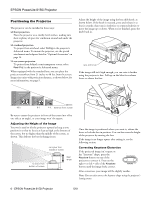
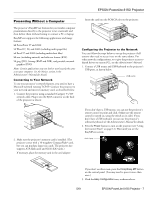
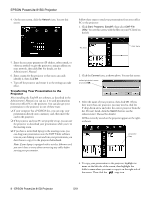
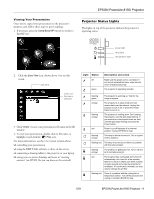
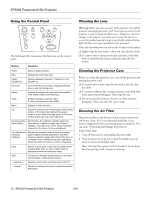
EPSON PowerLite 8150i Projector 4. On the next screen, click the Network icon. You see this screen: Follow these steps to send your presentation from your office PC to the projector: 1. Click Start, Programs, EasyMP, then select EMP File Utility. You see this screen, with the files on your PC listed on the left: PC files click here 5. Enter the necessary parameters (IP address, subnet mask, or others as needed) to give the projector a unique address on your network, then click Set. For details, see the Administrator's Manual. 6. Enter a name for the projector so that users can easily identify it, then click Set. 7. Turn off the projector and restart it so the settings can take effect. Transferring Your Presentation to the Projector After installing the EasyMP.net software, as described in the Administrator's Manual, you can use it to send presentations from your office PC to the projector. You can also get your presentation to the projector in one of these ways: ❏ If your computer has a PCMCIA slot, you can copy your presentation directly onto a memory card, then insert the card in the projector. ❏ If the projector and your PC are properly set up, you can use the projector to download your presentation while you're in the meeting room. ❏ If you have a networked laptop in the meeting room, you can drag your presentation onto the EMP Tablet software icon on your desktop to start and run your presentation; you don't have to copy it to the projector beforehand. Note: If your laptop is equipped with a wireless Ethernet card, you won't have to worry about connecting any cables before starting your presentation. 2. Click the Connect icon, as shown above. You see this screen: select projector name and click OK 3. Select the name of your projector, then click OK. (If you have more than one projector, you may need to click the drop-down arrow and select the correct projector from the list. If it isn't listed, click the Search button; see the Administrator's Manual for details.) All files currently stored on the projector appear on the right, as shown: projector files 4. To copy your presentation to the projector, highlight its name on the left side of the screen, then highlight the folder's name where you want to copy it on the right side of the screen. Then click the copy icon. 8 - EPSON PowerLite 8150i Projector 5/01
-
 1
1 -
 2
2 -
 3
3 -
 4
4 -
 5
5 -
 6
6 -
 7
7 -
 8
8 -
 9
9 -
 10
10 -
 11
11 -
 12
12
 |
 |