Epson R300 Product Information Guide - Page 11
Cleaning the Print Head, Examining the Nozzle Check Pattern - stylus photo software
 |
UPC - 010343848818
View all Epson R300 manuals
Add to My Manuals
Save this manual to your list of manuals |
Page 11 highlights
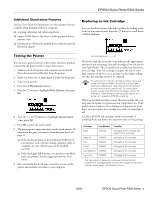
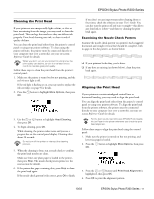
EPSON Stylus Photo R300 Series Cleaning the Print Head If your printouts are unexpectedly light or faint, or dots or lines are missing from the image, you may need to clean the print head. This unclogs the nozzles so they can deliver ink properly. Print head cleaning uses ink, so clean it only if quality declines. You can clean the print head either from the printer's control panel or using your printer software. To clean using the printer software, the printer must be connected directly to your computer (not over a network); see your on-screen Reference Guide for details. When you don't turn on your printer for a long time, the print quality can decline, so turn it on at least once a month to maintain good print quality. Follow these steps to clean the print head from the printer's control panel: 1. Make sure the printer is turned on but not printing, and the red b error light is off. If the red light is flashing or on, you may need to replace the ink cartridge; see page 9 for details. 2. Press the button to highlight More Options, then press OK. 3. Use the or button to highlight Head Cleaning, then press OK. 4. To begin cleaning, press OK. While cleaning, the printer makes noise and you see a progress bar on the control panel display. Cleaning takes about 30 seconds. Do not turn off the printer or interrupt the cleaning process. 5. When the cleaning is done, run a nozzle check to confirm the print head nozzles are clean. Make sure letter-size plain paper is loaded in the printer, then press Stop. The nozzle check pattern prints (see the next section for details). 6. If the pattern has gaps or missing dots, press Stop to clean the print head again. If the nozzle check pattern looks correct, press OK to finish. If you don't see any improvement after cleaning three or four times, check the solutions in your User's Guide. You can also turn the printer off and wait overnight-this allows any dried ink to soften-and then try cleaning the print head again. Examining the Nozzle Check Pattern Examine the nozzle check pattern you printed. Each staggered horizontal and straight vertical line should be complete, with no gaps in the dot pattern, as shown below: ❏ If your printout looks okay, you're done. ❏ If any dots are missing (as shown below), clean the print head again. Aligning the Print Head If your printouts contain misaligned vertical lines or horizontal banding, you may need to align the print head. You can align the print head either from the printer's control panel or using your printer software. To align the print head from the printer software, the printer must be connected directly to your computer (not over a network); see your onscreen Reference Guide for details. For the best results, load letter-size EPSON Photo Quality Ink Jet Paper in the printer whenever you check the print head alignment. Follow these steps to align the print head using the control panel: 1. Make sure the printer is turned on but not printing, and letter-size paper is loaded. 2. Press the button to highlight More Options, then press OK. 3. Press the or button until Print Head Alignment is highlighted, then press OK. 4. Press OK to print the alignment pattern. 10/03 EPSON Stylus Photo R300 Series - 11
-
 1
1 -
2
-
3
-
4
-
5
-
 6
6 -
 7
7 -
 8
8 -
 9
9 -
 10
10 -
 11
11 -
 12
12
 |
 |
