Epson R300 Product Information Guide - Page 7
Selecting Photos for Printing, Printing an Index, Selecting One Photo, Selecting a Set of Photos - stylus photo r300m
 |
UPC - 010343848818
View all Epson R300 manuals
Add to My Manuals
Save this manual to your list of manuals |
Page 7 highlights
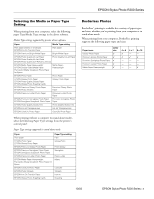
EPSON Stylus Photo R300 Series Selecting Photos for Printing Before selecting the photos you want to print, make sure you have inserted your memory card or connected your camera or external device to the printer. See page 6. ❏ If you have the EPSON Stylus Photo R300 printer, start by printing an index, so you can select your photos by number. If you have the EPSON Stylus Photo R300M printer, you can use the preview monitor to easily select your photos. Once you know which photos are available for printing, you can select a single photo, a set of photos, a range of photos or all the photos. ❏ If you've used your camera's PictBridge or DPOF (Digital Print Order Format) feature to select the photos you want to print, you won't have to print an index. When you insert the camera's memory card, PictBridge or DPOF appears under the Select Photo menu and your photos are automatically selected. (If you don't want to use PictBridge or DPOF, you can choose your photos manually.) Printing an Index An index print shows small, numbered images of all the photos on your memory card-and includes the date each picture was taken. This enables you to select the photos you want to print. If you have the EPSON Stylus Photo R300M printer with the preview monitor, you may not need to print an index. 1. Load your paper in the printer. 2. Highlight Select Photo, then press OK. 3. In the Select Photo menu, use the and buttons to highlight Index, then press OK to select it. 4. Press the and buttons to highlight Paper Type, then press OK to enter the Paper Type menu. 5. Highlight the type of paper you've loaded, then press OK. (If you're not sure about the paper type, see the table on page 3.) It's important to select the correct Paper Type setting for the paper you're using, or the print quality may not be what you expect. 6. Enter the Paper Size menu, then select the size of paper you've loaded. 7. Press the Print button. Your index starts printing. If you would prefer to print an index print with larger images, choose All under the Select Photo menu, then choose a different layout setting. Selecting One Photo You can select a photo, then print one or more copies of it on a page using a variety of layouts. With the Copies option, you can print up to 100 copies of your selected layout. If your printer doesn't have the preview monitor, first print an index to identify the photos on the memory card (as described on page 8). 1. Highlight Select Photo, then press OK. 2. In the Select Photo menu, use the and buttons to highlight the number of the photo you want to print, then press OK to select it. 3. If you want to print more than one copy of this photo, highlight Copies and press OK, then use the and buttons to select the desired number of copies and press OK. 4. Continue with "Printing the Selected Photos" on page 8 to finish laying out your photos and setting up your print job. Selecting a Set of Photos You can select two or more photos, then print them as a group using a variety of layouts. If you've selected more photos than can fit on a page, the printer automatically prints additional pages, using the same layout. If you don't have the optional preview monitor, first print an index to identify the photos on the memory card. 1. Highlight Select Photo, then press OK. If you want to print all your photos, select All. To print a range of photos, see page 8. 2. Use the button to highlight Individual, then press OK. If you have the preview monitor, it displays the first photo on your card. 3. Use the and buttons to select the photo you want to print, then press OK. 4. If you want to print more than one copy of this photo, use the and buttons to select the desired number of copies, then press OK. 10/03 EPSON Stylus Photo R300 Series - 7
-
 1
1 -
 2
2 -
 3
3 -
 4
4 -
 5
5 -
 6
6 -
 7
7 -
 8
8 -
 9
9 -
 10
10 -
 11
11 -
 12
12
 |
 |