Epson R300 Product Information Guide - Page 8
Selecting a Range of Photos, Printing the Selected Photos - printer stylus photo
 |
UPC - 010343848818
View all Epson R300 manuals
Add to My Manuals
Save this manual to your list of manuals |
Page 8 highlights
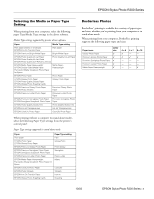
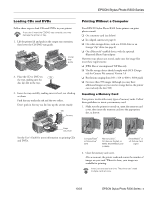
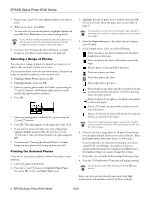
EPSON Stylus Photo R300 Series 5. Repeat steps 3 and 4 for each additional photo you want to print. 6. When you're done, press Back. 7. To view a list of your selected photos, highlight Copies and press OK. Press Back when you're done viewing the list. If you made a mistake and selected the wrong photo, you can remove it from the list of selected photos. Simply change its number of copies to zero; see step 4. 8. Continue with "Printing the Selected Photos" to finish laying out your photos and setting up your print job. Selecting a Range of Photos You can select a range of photos to print if you took a set of photos that you want to print out at once. If your printer doesn't have the preview monitor, first print an index to identify the photos on the memory card. 1. Highlight Select Photo, then press OK. 2. Highlight Range, then press OK. 3. Choose a starting photo under the From: option using the and buttons. (Hold down either button to scroll quickly through the photo numbers.) 4. Press OK. 5. Choose an ending photo under the To: option using the and buttons. 6. Press OK. The range appears on the right side of the LCD. 7. If you want to print more than one copy of this range, highlight Copies and press OK, then use the and buttons to select the desired number of copies and press OK. 8. Continue with "Printing the Selected Photos" to finish laying out your photos and setting up your print job. Printing the Selected Photos Once you've selected your photos, follow these steps to start printing: 1. Load your paper in the printer. 2. Press the and buttons to highlight Paper Type, then press OK to enter the Paper Type menu. 3. Highlight the type of paper you've loaded, then press OK. (If you're not sure about the paper type, see the table on page 3.) It's important to select the correct Paper Type setting for the paper you're using, or the print quality may not be what you expect. 4. Enter the Paper Size menu, then select the size of paper you've loaded. 5. In the Layout menu, select one of the following: Prints one photo per sheet, borderless; fits the photo lengthwise on the paper. Prints one photo per sheet, with borders around the edges. Prints a photo on the top half of the sheet. Prints two photos per sheet. Prints four photos per sheet. Prints eight photos per sheet. Prints 20 photos per sheet; the photo number and date are also printed with each photo. (Good for printing larger-size index prints.) Prints an index of your photos. 80 photos are printed on letter-size paper. Prints a CD jewel case insert with one photo on one side of the insert. Prints a CD jewel case insert with twenty-four photos; twelve on each side of the insert. If you don't see the entire image in your prints, check to make sure the Fit to Frame and Crop options are Off. See the User's Guide. 6. If you've selected a single photo or all photos for printing, you can print multiple sheets of your selected layout. Enter the Copies menu, then select from 1 to 100 copies. If you've selected a set of photos for printing, or if you're using DPOF or PictBridge, the number of copies is automatically determined (it's displayed as Pages next to the Copies setting); you cannot change this setting. 7. If you like, you can make further changes before printing. 8. Press the Print button. Your print job begins printing. To cancel a print job while printing, press the button. Stop Keep your pictures and unused paper away from high temperatures and humidity and out of direct sunlight. 8 - EPSON Stylus Photo R300 Series 10/03
-
 1
1 -
2
-
 3
3 -
 4
4 -
 5
5 -
 6
6 -
 7
7 -
 8
8 -
 9
9 -
 10
10 -
 11
11 -
 12
12
 |
 |