Epson R380 Product Information Guide - Page 7
Designing CDs and DVDs, Printing Your Design, Replacing an Ink Cartridge - stylus photo manual
 |
UPC - 010343859074
View all Epson R380 manuals
Add to My Manuals
Save this manual to your list of manuals |
Page 7 highlights
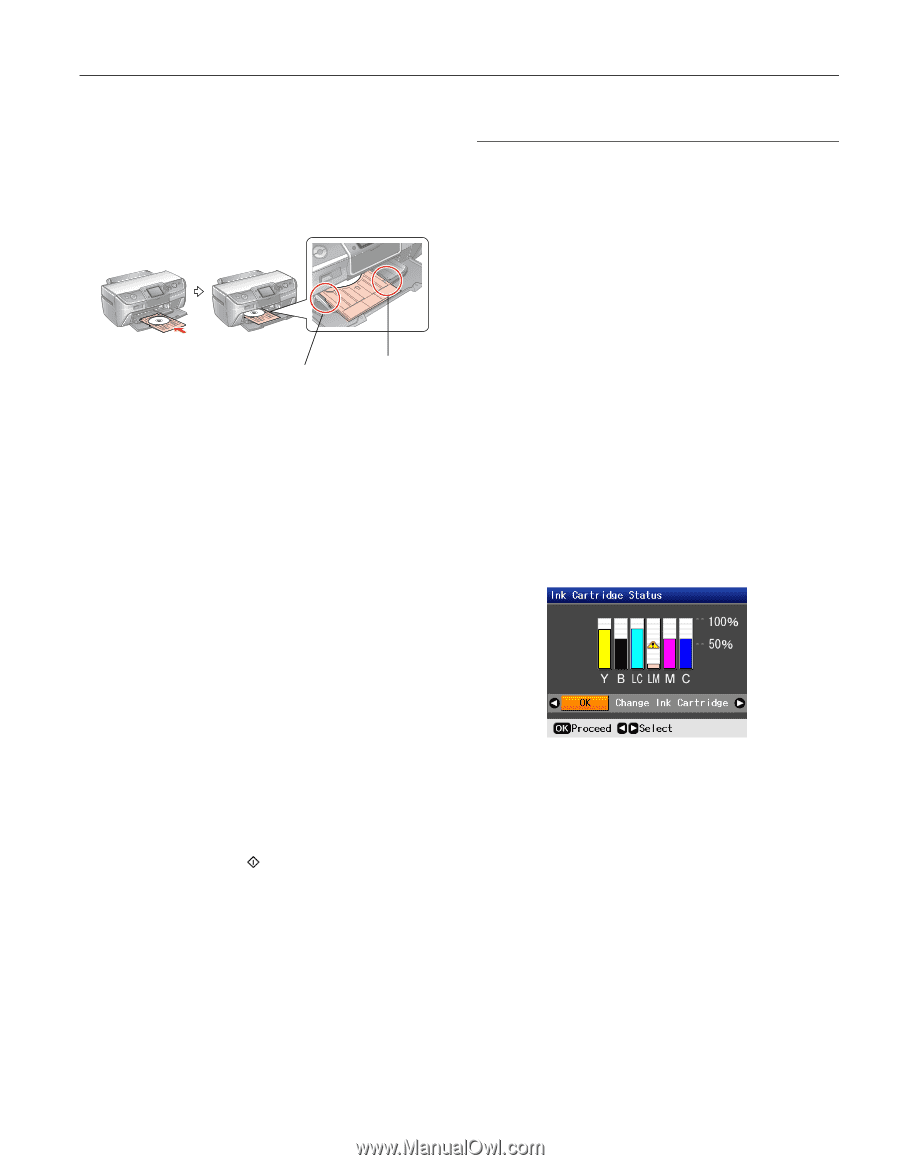
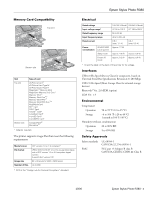
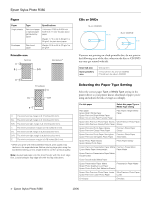
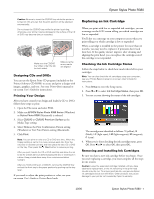
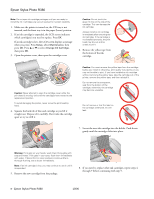
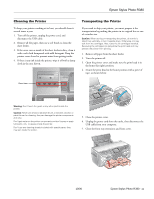
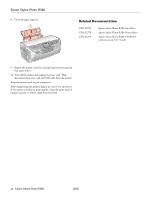
Epson Stylus Photo R380 Caution: Be sure to insert the CD/DVD tray while the printer is turned on; this ensures that the print position will be adjusted automatically. Do not insert the CD/DVD tray while the printer is printing; otherwise, your printer may be damaged or the surface of the CD or DVD may become dirty or scratched. Make sure the CD/DVD tray slides under the tab (on both sides) Make sure the arrow marks are aligned Designing CDs and DVDs You can use the Epson Print CD program (included on the Printer Software CD-ROM) to create and print a design with images, graphics, and text. See your Printer Basics manual or on-screen User's Guide for instructions. Printing Your Design After you have created your design and loaded a CD or DVD, follow these steps to print: 1. Open the File menu and select Print. 2. Make sure EPSON Stylus Photo R380 Series (Windows) or Stylus Photo R380 (Macintosh) is selected. 3. Select CD/DVD or CD/DVD Premium Surface as the Media Type setting. 4. Select None as the Print Confirmation Pattern setting (Windows) or Test Print Pattern setting (Macintosh). 5. Click Print. Note: You can print on only one CD or DVD at a time. When the Copies setting is set to 2 or more, remove each disc from the tray after it has been printed, and then place the next CD or DVD on the tray. Then press the Start button to resume printing. After you print, handle the CD or DVD carefully and allow the ink to dry for at least 24 hours before playing the disc or inserting it in a drive. Keep printed discs away from moisture and direct sunlight. After you finish printing on a CD/DVD, remove the CD/DVD tray and set the front tray to the paper position by pushing up the tray lever. If you need to adjust the print position or color, see your on-screen User's Guide or Printer Basics book. Replacing an Ink Cartridge When you print with low or expended ink cartridges, you see a message on the LCD screen telling you which cartridges are low or expended. You'll also see a message on your computer screen when you print telling you which cartridge is low or expended. When a cartridge is installed in the printer for more than six months, you may need to replace it if printouts don't look their best. If the quality doesn't improve after cleaning and aligning the print head, you can replace the cartridge even if the cartridge is not expended. Checking the Ink Cartridge Status Follow the steps below to check how much ink is left in your cartridges. Note: You can also check the ink cartridges using your computer; see your Printer Basics manual or on-screen User's Guide for instructions. 1. Press Setup to enter the Setup menu. 2. Press l or r to select Ink Cartridge Status, then press OK. 3. You see a screen showing the status of the ink cartridges: The cartridges are identified as follows: Y (yellow), B (black), LC (light cyan), LM (light magenta), M (magenta), C (cyan). 4. When you're done checking the ink cartridge status, press OK. Press l or r to select OK, then press OK. Removing and Installing Ink Cartridges Be sure you have a new ink cartridge before you begin. Once you start replacing a cartridge, you must complete all the steps in one session. Caution: Leave the expended cartridge installed until you have obtained a replacement, or the ink remaining in the print head nozzles may dry out. To ensure good results, use genuine Epson ink cartridges and do not refill them. Other products may cause damage to your printer not covered by Epson's warranty. 10/06 Epson Stylus Photo R380 - 7
-
 1
1 -
 2
2 -
 3
3 -
 4
4 -
 5
5 -
 6
6 -
 7
7 -
 8
8 -
 9
9 -
 10
10 -
 11
11 -
 12
12
 |
 |