Epson Stylus NX330 Quick Guide - Page 10
settings for the paper you are using see for details. - online user guide
 |
View all Epson Stylus NX330 manuals
Add to My Manuals
Save this manual to your list of manuals |
Page 10 highlights
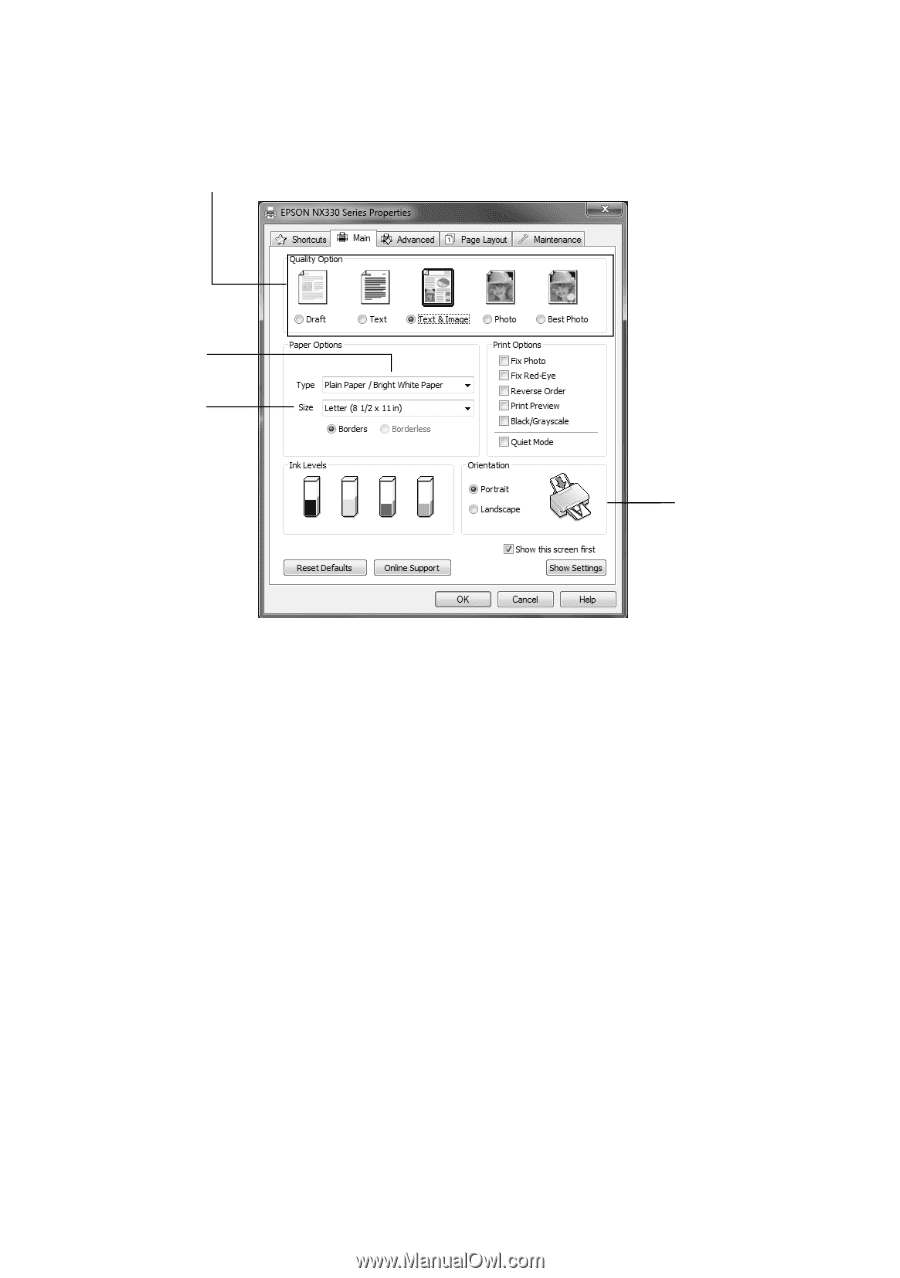
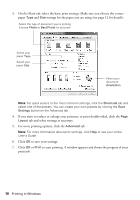
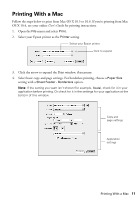
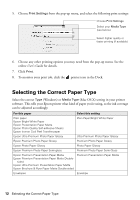
3. On the Main tab, select the basic print settings. Make sure you choose the correct paper Type and Size settings for the paper you are using (see page 12 for details). Select the type of document you're printing (choose Photo or Best Photo for pictures) Select your paper Type Select your paper Size Select your document Orientation Note: For quick access to the most common settings, click the Shortcuts tab and select one of the presets. You can create your own presets by clicking the Save Settings button on the Advanced tab. 4. If you want to reduce or enlarge your printout, or print double-sided, click the Page Layout tab and select settings as necessary. 5. For more printing options, click the Advanced tab. Note: For more information about print settings, click Help or see your online User's Guide. 6. Click OK to save your settings. 7. Click OK or Print to start printing. A window appears and shows the progress of your print job. 10 Printing in Windows
-
 1
1 -
2
-
3
-
4
-
 5
5 -
 6
6 -
 7
7 -
 8
8 -
 9
9 -
 10
10 -
 11
11 -
 12
12 -
 13
13 -
 14
14 -
 15
15 -
16
-
17
-
18
-
19
-
20
-
21
-
22
-
23
-
24
-
25
-
26
-
27
-
28
-
29
-
30
-
31
-
32
-
33
-
34
-
35
-
36
-
37
-
38
-
39
-
40
-
41
-
42
-
43
-
44
-
45
-
46
-
47
-
48
-
49
-
50
-
51
-
52
-
53
-
54
-
55
-
56
-
57
-
58
-
59
-
60
-
61
-
62
-
63
-
64
-
65
-
66
-
67
-
68
 |
 |