Epson Stylus Pro 10000 User Manual - Page 27
Running a Nozzle Check, There are two ways to run a nozzle check.
 |
View all Epson Stylus Pro 10000 manuals
Add to My Manuals
Save this manual to your list of manuals |
Page 27 highlights
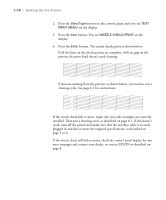
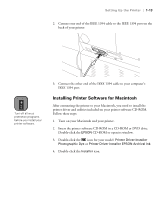
Setting Up the Printer | 1-9 Caution 6. Push the paper set lever all the way in, then close the roll paper cover. PRESS PAUSE BUTTON appears briefly on the control panel display. To avoid damaging the printer, never move the paper set lever while the Operate or Pause light is flashing. 7. Press the Pause button. The print head moves and the paper feeds into printing position automatically. READY appears on the control panel display. (Even if you don't press Pause, the paper and printer will move into printing position automatically after 10 seconds.) Running a Nozzle Check The nozzle check prints a pattern of dots that lets you see if any print head nozzles are clogged. You can also use the nozzle check at this point to make sure the printer is operating correctly before you connect it to your computer. There are two ways to run a nozzle check. • Using the printer's control panel buttons, as described below • Using the Nozzle Check utility from your printer software, as described on page 6-1 (not available if you're accessing the printer over a network) Follow these steps to print a nozzle check using the control panel buttons: 1. Make sure the printer is turned on but not printing, and paper is loaded. 1-9
-
 1
1 -
2
-
3
-
4
-
5
-
6
-
7
-
8
-
9
-
10
-
11
-
12
-
13
-
14
-
15
-
16
-
17
-
18
-
19
-
20
-
21
-
 22
22 -
 23
23 -
 24
24 -
 25
25 -
 26
26 -
 27
27 -
 28
28 -
 29
29 -
 30
30 -
 31
31 -
 32
32 -
33
-
34
-
35
-
36
-
37
-
38
-
39
-
40
-
41
-
42
-
43
-
44
-
45
-
46
-
47
-
48
-
49
-
50
-
51
-
52
-
53
-
54
-
55
-
56
-
57
-
58
-
59
-
60
-
61
-
62
-
63
-
64
-
65
-
66
-
67
-
68
-
69
-
70
-
71
-
72
-
73
-
74
-
75
-
76
-
77
-
78
-
79
-
80
-
81
-
82
-
83
-
84
-
85
-
86
-
87
-
88
-
89
-
90
-
91
-
92
-
93
-
94
-
95
-
96
-
97
-
98
-
99
-
100
-
101
-
102
-
103
-
104
-
105
-
106
-
107
-
108
-
109
-
110
-
111
-
112
-
113
-
114
-
115
-
116
-
117
-
118
-
119
-
120
-
121
-
122
-
123
-
124
-
125
-
126
-
127
-
128
-
129
-
130
-
131
-
132
-
133
-
134
-
135
-
136
-
137
-
138
-
139
-
140
-
141
-
142
-
143
-
144
-
145
-
146
-
147
-
148
-
149
-
150
-
151
-
152
-
153
-
154
-
155
-
156
-
157
-
158
-
159
-
160
-
161
-
162
-
163
-
164
-
165
-
166
-
167
-
168
 |
 |
