Epson Stylus Pro WT7900 Designer Edition User's Guide - Page 91
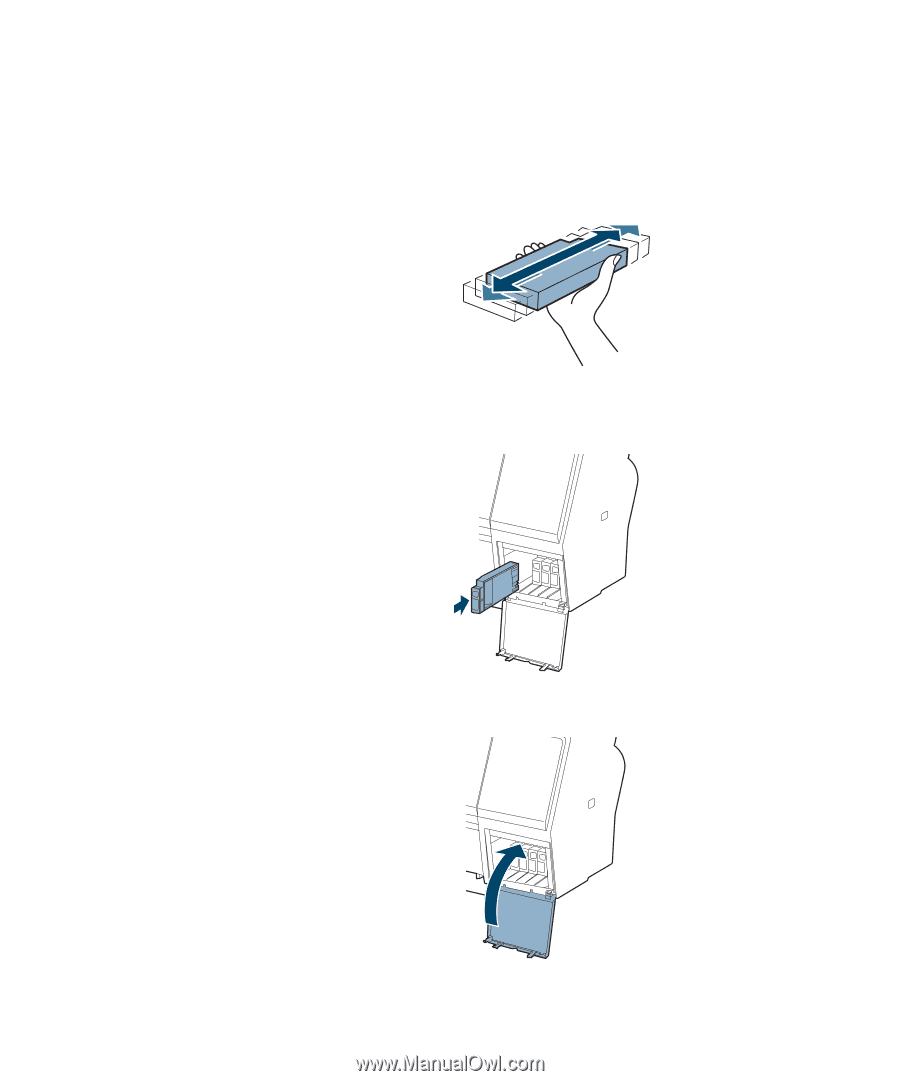
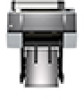
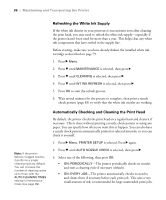
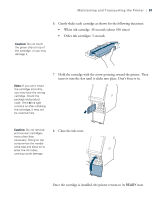
insert it into the slot until it clicks into place. Don't force it in., Close the ink cover.
 |
View all Epson Stylus Pro WT7900 Designer Edition manuals
Add to My Manuals
Save this manual to your list of manuals |
Page 91 highlights
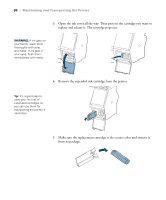
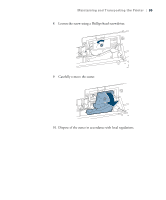
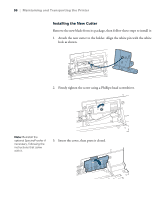
Maintaining and Transporting the Printer | 91 Caution: Do not touch the green chip on top of the cartridge, or you may damage it. 6. Gently shake each cartridge as shown for the following durations: • White ink cartridge: 30 seconds (about 100 times) • Other ink cartridges: 5 seconds Note: If you can't insert the cartridge smoothly, you may have the wrong cartridge. Check the package and product code. If the B Ink light remains on after installing the cartridge, it may not be inserted fully. 7. Hold the cartridge with the arrow pointing toward the printer. Then insert it into the slot until it clicks into place. Don't force it in. Caution: Do not remove and re-insert cartridges more often than necessary. Doing so can compromise the needle valve seal and allow air to enter the ink tubes, causing nozzle damage. 8. Close the ink cover. Once the cartridge is installed, the printer returns to its READY state. 91
-
 1
1 -
2
-
3
-
4
-
5
-
6
-
7
-
8
-
9
-
10
-
11
-
12
-
13
-
14
-
15
-
16
-
17
-
18
-
19
-
20
-
21
-
22
-
23
-
24
-
25
-
26
-
27
-
28
-
29
-
30
-
31
-
32
-
33
-
34
-
35
-
36
-
37
-
38
-
39
-
40
-
41
-
42
-
43
-
44
-
45
-
46
-
47
-
48
-
49
-
50
-
51
-
52
-
53
-
54
-
55
-
56
-
57
-
58
-
59
-
60
-
61
-
62
-
63
-
64
-
65
-
66
-
67
-
68
-
69
-
70
-
71
-
72
-
73
-
74
-
75
-
76
-
77
-
78
-
79
-
80
-
81
-
82
-
83
-
84
-
85
-
 86
86 -
 87
87 -
 88
88 -
 89
89 -
 90
90 -
 91
91 -
 92
92 -
 93
93 -
 94
94 -
 95
95 -
 96
96 -
97
-
98
-
99
-
100
-
101
-
102
-
103
-
104
-
105
-
106
-
107
-
108
-
109
-
110
-
111
-
112
-
113
-
114
-
115
-
116
-
117
-
118
-
119
-
120
-
121
-
122
-
123
-
124
-
125
-
126
-
127
-
128
-
129
-
130
-
131
-
132
-
133
-
134
-
135
-
136
 |
 |