Epson SureColor P7000 Commercial Edition User Manual - Page 30
Installing ink, Plug the power cord into a properly grounded electrical outlet.
 |
View all Epson SureColor P7000 Commercial Edition manuals
Add to My Manuals
Save this manual to your list of manuals |
Page 30 highlights
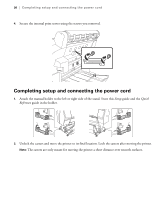
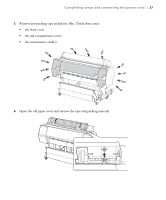
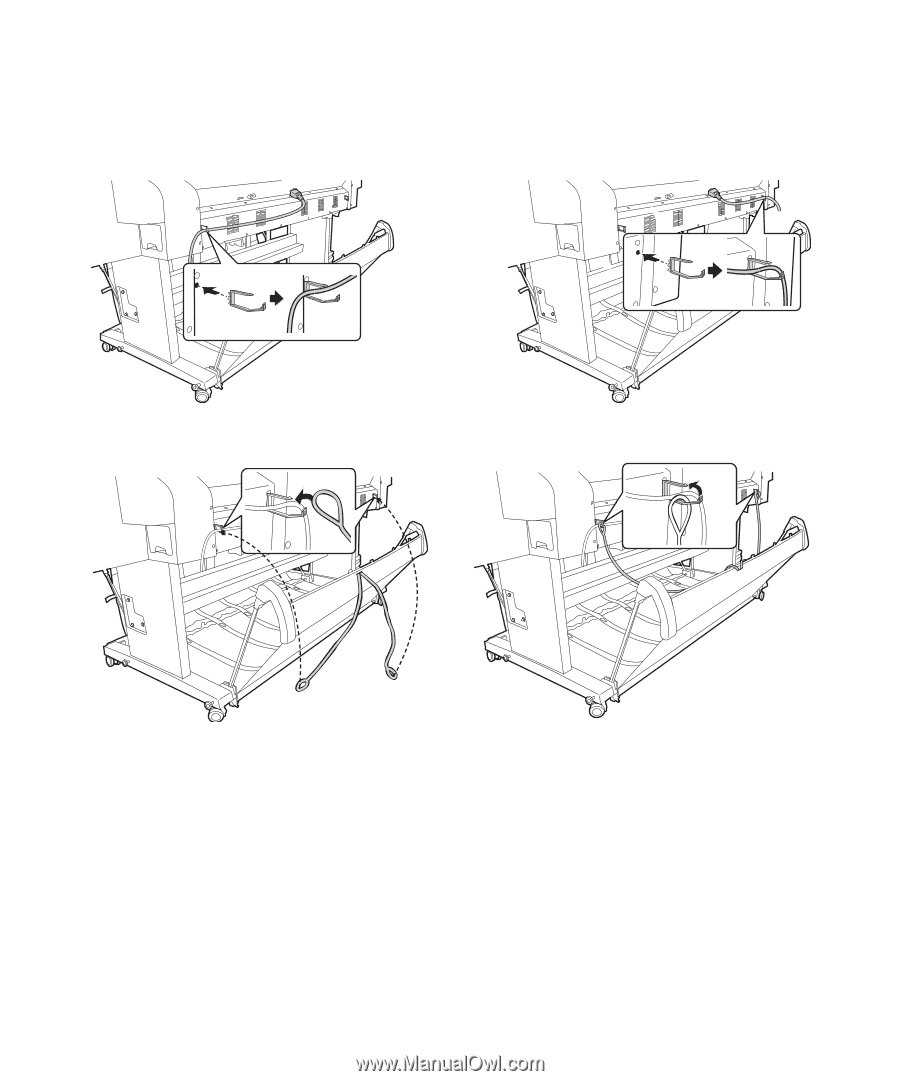
Installing ink | 29 8. Attach the cable guides to the left or right side of the printer back and route the power cord to the side of the printer as shown. Power cord on left side Power cord on right side 9. For the SC-P8000/SC-P9000, attach the loops on the paper basket cords to the cable guides. 10. Plug the power cord into a properly grounded electrical outlet. Caution: Do not use an outlet that is controlled by an automatic timer or wall switch. Otherwise, you may accidentally shut off the printer and cause damage to the print head. Installing ink Use the ink cartridges that came with your printer for initial ink charging. During the initial installation process, it is normal for most of the ink in each cartridge to be used.
-
 1
1 -
2
-
3
-
4
-
5
-
6
-
7
-
8
-
9
-
10
-
11
-
12
-
13
-
14
-
15
-
16
-
17
-
18
-
19
-
20
-
21
-
22
-
23
-
24
-
 25
25 -
 26
26 -
 27
27 -
 28
28 -
 29
29 -
 30
30 -
 31
31 -
 32
32 -
 33
33 -
 34
34 -
 35
35 -
36
-
37
-
38
-
39
-
40
-
41
-
42
-
43
-
44
-
45
-
46
 |
 |
Installing ink
|
29
8.
Attach the cable guides to the left or right side of the printer back and route the power cord to the side
of the printer as shown.
9.
For the SC-P8000/SC-P9000, attach the loops on the paper basket cords to the cable guides.
10.
Plug the power cord into a properly grounded electrical outlet.
Caution:
Do not use an outlet that is controlled by an automatic timer or wall switch. Otherwise, you may
accidentally shut off the printer and cause damage to the print head.
Installing ink
Use the ink cartridges that came with your printer for initial ink charging. During the initial installation
process, it is normal for most of the ink in each cartridge to be used.
Power cord on left side
Power cord on right side