Epson SureColor P7000 Commercial Edition User Manual - Page 33
After installing all of the cartridges
 |
View all Epson SureColor P7000 Commercial Edition manuals
Add to My Manuals
Save this manual to your list of manuals |
Page 33 highlights
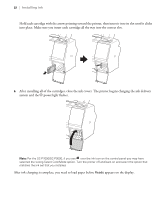
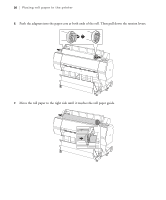
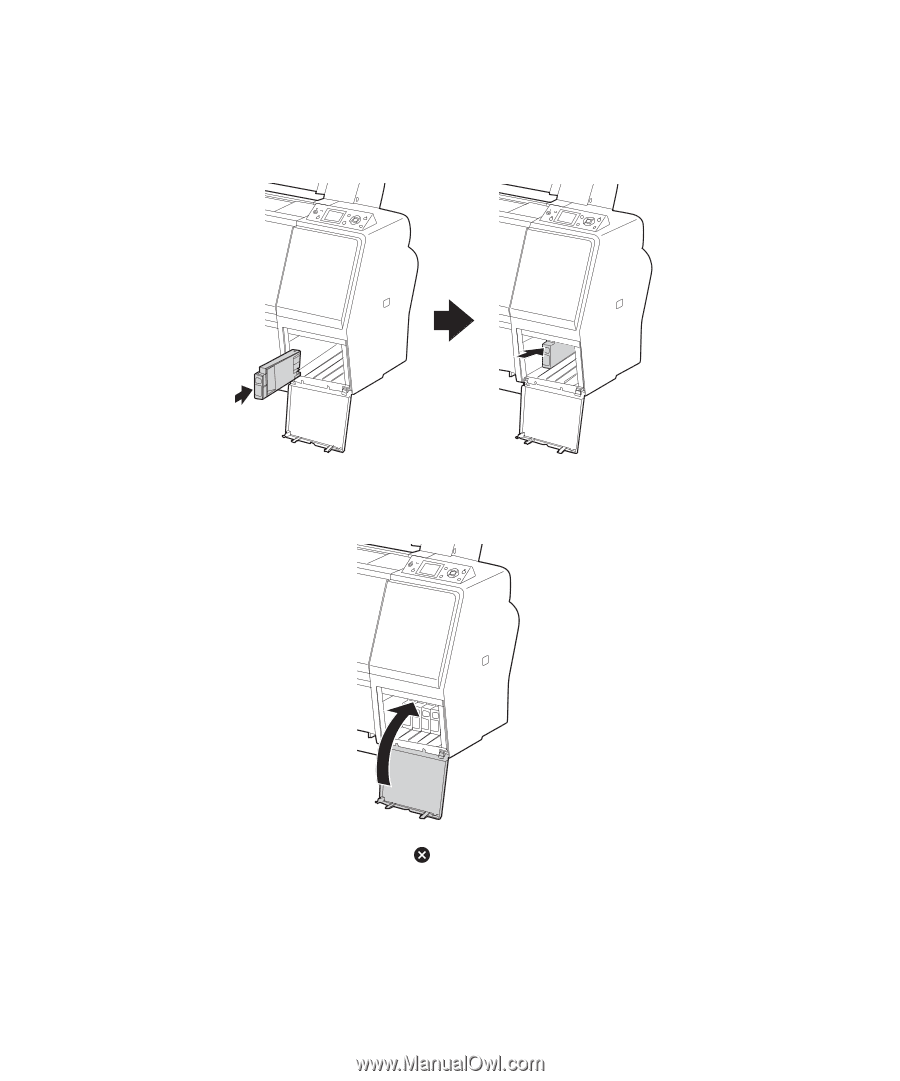
32 | Installing ink Hold each cartridge with the arrow pointing toward the printer, then insert it into its slot until it clicks into place. Make sure you insert each cartridge all the way into the correct slot. 6. After installing all of the cartridges, close the ink covers. The printer begins charging the ink delivery system and the P power light flashes. Note: For the SC-P7000/SC-P9000, if you see over the ink icon on the control panel you may have selected the wrong Select ColorMode option. Turn the printer off and back on and select the option that matches the ink set that you installed. After ink charging is complete, you need to load paper before Ready appears on the display.
-
 1
1 -
2
-
3
-
4
-
5
-
6
-
7
-
8
-
9
-
10
-
11
-
12
-
13
-
14
-
15
-
16
-
17
-
18
-
19
-
20
-
21
-
22
-
23
-
24
-
25
-
26
-
27
-
 28
28 -
 29
29 -
 30
30 -
 31
31 -
 32
32 -
 33
33 -
 34
34 -
 35
35 -
 36
36 -
 37
37 -
 38
38 -
39
-
40
-
41
-
42
-
43
-
44
-
45
-
46
 |
 |
32
|
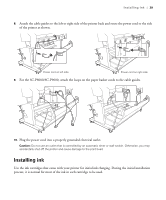
Installing ink
Hold each cartridge with the arrow pointing toward the printer, then insert it into its slot until it clicks
into place. Make sure you insert each cartridge all the way into the correct slot.
6.
After installing all of the cartridges, close the ink covers. The printer begins charging the ink delivery
system and the
P
power
light flashes.
Note:
For the SC-P7000/SC-P9000, if you see
over the ink icon on the control panel you may have
selected the wrong Select ColorMode option. Turn the printer off and back on and select the option that
matches the ink set that you installed.
After ink charging is complete, you need to load paper before
Ready
appears on the display.