Epson TM-U950 Users Manual - Page 11
If necessary, remove the, If it tears
 |
View all Epson TM-U950 manuals
Add to My Manuals
Save this manual to your list of manuals |
Page 11 highlights
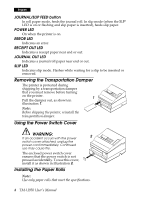
English 4. If paper is caught in the automatic cutter, open the cutter blade by turning the gear in the direction shown in illustration 12. 10 ✄ ✄ 11 12 5. Move the OPEN LOCK OPEN lever on each side of the printer in the direction LOCK shown in illustration 13; the cutter opens automatically. 13 6. Pull the paper out gently. If it tears, remove any pieces. 7. If necessary, remove the print head cover. Loosen the screw on the right as 14 shown in illustration 14. (Replace it by sliding the tab in the slot, and fasten the screw.) 8. After clearing all paper, close and lock the cutter unit (lock both locks), and reinstall the paper rolls. TM-U950 User's Manual 9
-
 1
1 -
2
-
3
-
4
-
5
-
 6
6 -
 7
7 -
 8
8 -
 9
9 -
 10
10 -
 11
11 -
 12
12 -
 13
13 -
 14
14 -
 15
15 -
 16
16 -
17
-
18
-
19
-
20
-
21
-
22
-
23
-
24
-
25
-
26
-
27
-
28
-
29
-
30
-
31
-
32
-
33
-
34
-
35
-
36
-
37
-
38
-
39
-
40
-
41
-
42
-
43
-
44
-
45
-
46
-
47
-
48
-
49
-
50
-
51
-
52
-
53
-
54
-
55
-
56
-
57
-
58
-
59
-
60
-
61
-
62
-
63
-
64
-
65
-
66
-
67
-
68
-
69
-
70
-
71
-
72
-
73
-
74
-
75
-
76
-
77
-
78
-
79
-
80
-
81
-
82
-
83
-
84
-
85
-
86
-
87
-
88
-
89
-
90
-
91
-
92
-
93
-
94
-
95
-
96
-
97
-
98
-
99
-
100
-
101
-
102
-
103
-
104
-
105
-
106
-
107
-
108
-
109
-
110
-
111
-
112
-
113
-
114
-
115
-
116
-
117
-
118
 |
 |

TM-U950 User’s Manual
9
English
4.
If paper is caught in the automatic cutter, open the cutter blade
by turning the gear in the direction shown in illustration
12
.
10
✄
11
✄
12
5.
Move the
OPEN
LOCK
lever on each side of the
printer in the direction
shown in illustration
13
;
the cutter opens
automatically.
OPEN
LOCK
13
6.
Pull the paper out gently.
If it tears, remove any
pieces.
7.
If necessary, remove the
print head cover. Loosen
the screw on the right as
shown in illustration
14
.
(Replace it by sliding the
tab in the slot, and fasten
the screw.)
14
8.
After clearing all paper,
close and lock the cutter
unit (lock both locks), and
reinstall the paper rolls.