Epson r-d1 Product Support Bulletin(s) - Page 6
Use the JOG Dial to select Basic Setup and Press - r d1
 |
View all Epson r-d1 manuals
Add to My Manuals
Save this manual to your list of manuals |
Page 6 highlights
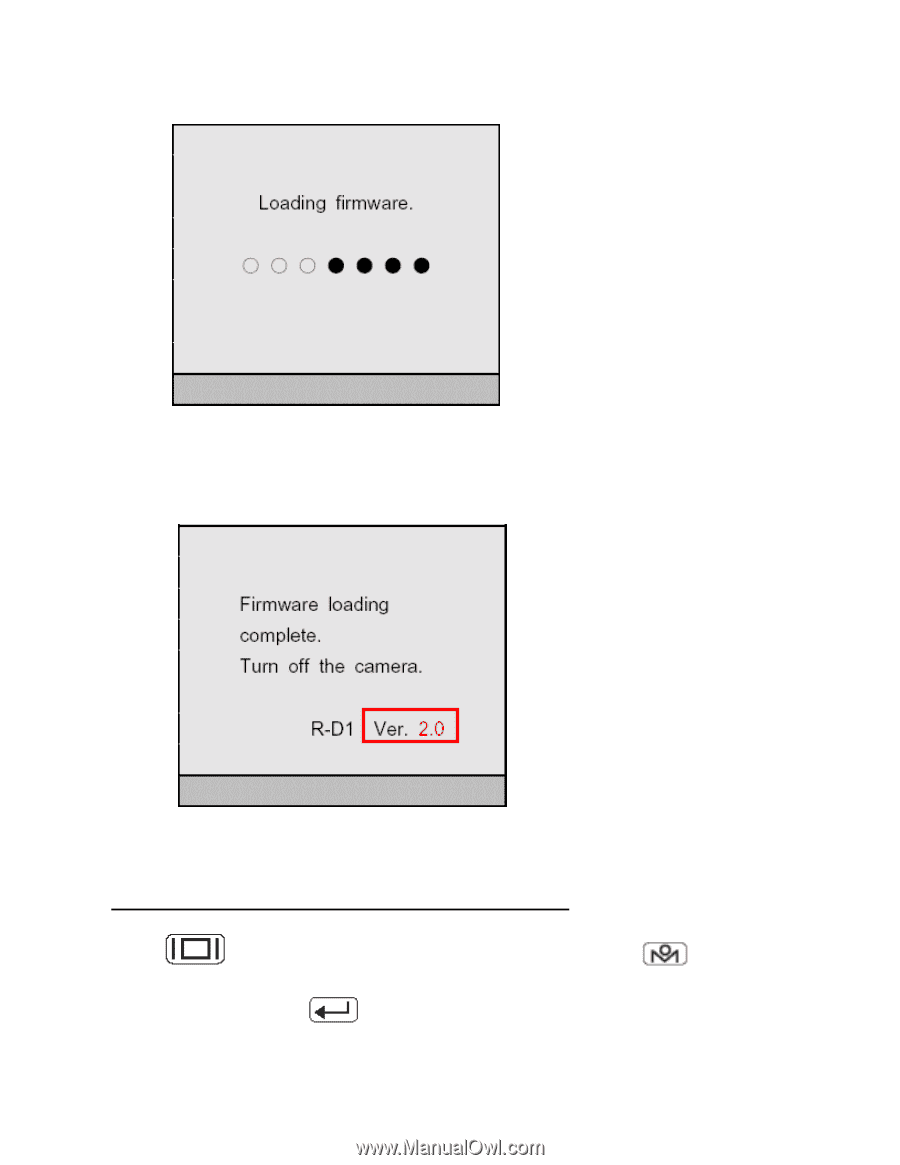
3. The screen below is displayed when the upgrade starts. 4. When the screen below is displayed, the firmware upgrade has successfully completed. Check that the Version is "2.0", and then turn off the camera with the power switch. Confirm that the firmware has been properly upgraded Turn on the R-D1 with the power switch, turn on the LCD display by pressing the LCD Button then bring up the Main Menu with the MENU Button Select "Settings" (you may need to use the JOG Dial if you have images on the SD Card) and press the ENTER Button Use the JOG Dial to select "Basic Setup" and Press the ENTER Button, turn the JOG Dial to select "LCD Brightness" and press the ENTER Page 6 of 9 PSB.2006.06.001
-
 1
1 -
 2
2 -
 3
3 -
 4
4 -
 5
5 -
 6
6 -
 7
7 -
 8
8 -
 9
9 -
 10
10
 |
 |
Page
6 of 9
PSB.2006.06.001
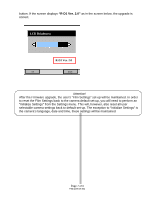
3. The screen below is displayed when the upgrade starts.
4. When the screen below is displayed, the firmware upgrade has successfully
completed. Check that the Version is “2.0”, and then turn off the camera with the
power switch.
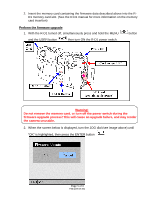
Confirm that the firmware has been properly upgraded
Turn on the R-D1 with the power switch, turn on the LCD display by pressing the LCD
Button
then bring up the Main Menu with the MENU Button
Select
“Settings” (you may need to use the JOG Dial if you have images on the SD Card) and
press the ENTER Button
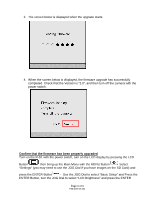
Use the JOG Dial to select “Basic Setup” and Press the
ENTER Button, turn the JOG Dial to select “LCD Brightness” and press the ENTER