Fluke 225C Getting Started Guide - Page 15
Making Cursor Measurements, Triggering
 |
View all Fluke 225C manuals
Add to My Manuals
Save this manual to your list of manuals |
Page 15 highlights
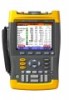
Making Cursor Measurements Cursors allow you to make precise digital measurements on live, on recorded, and on saved waveforms. Display the CURSOR key labels. Select cursor measurement type: measure signal height at one point of time. measure signal height difference of two points of time, and measure the time or the trace RMS value between the cursors. measure signal height at the cursor positions and between cursor positions. measure rise time and fall time. Select the cursor to be moved. Use the blue arrow keys to move. Depending on cursor measurement type: Automatic or manual risetime measurement on a single channel. Reading 2 is time (T), frequency (1/T) , or RMS value. Getting Started Making Cursor Measurements Cursor measurements on trace A, B or M if A and B are on; M if Mathematics... is on, see ScopeReadings and Waveforms on page 6. OFF: Switch cursor measurements off. Triggering Triggering tells the test tool when to begin displaying the waveform. Automatic triggering assures a stable display of virtually any signal: Perform an auto set. AUTO appears at the top right of the screen. Input A is the default trigger source. Now you can take over basic trigger controls such as source, level, slope and delay: Display the trigger key labels A B : trigger on input A or B waveform Ext : trigger on the meter-input signal. Select the trigger slope. 11
-
 1
1 -
2
-
3
-
4
-
5
-
6
-
7
-
8
-
9
-
 10
10 -
 11
11 -
 12
12 -
 13
13 -
 14
14 -
 15
15 -
 16
16 -
 17
17 -
 18
18
 |
 |
