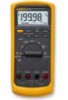
Fluke 83V FE 83V & 87V Users Manual - Page 21
Power-Up Options, Automatic Power-Off, Input Alert™ Feature, Making Measurements
 |
View all Fluke 83V manuals
Add to My Manuals
Save this manual to your list of manuals |
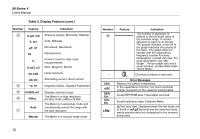
Page 21 highlights
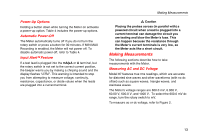
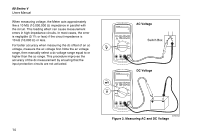
Power-Up Options Holding a button down while turning the Meter on activates a power-up option. Table 4 includes the power-up options. Automatic Power-Off The Meter automatically turns off if you do not turn the rotary switch or press a button for 30 minutes. If MIN MAX Recording is enabled, the Meter will not power off. To disable automatic power-off, refer to Table 4. Input Alert Feature If a test lead is plugged into the mA/µA or A terminal, but the rotary switch is not set to the correct current position, the beeper warns you by making a chirping sound and the display flashes "LEAd". This warning is intended to stop you from attempting to measure voltage, continuity, resistance, capacitance, or diode values when the leads are plugged into a current terminal. Making Measurements W Caution Placing the probes across (in parallel with) a powered circuit when a lead is plugged into a current terminal can damage the circuit you are testing and blow the Meter's fuse. This can happen because the resistance through the Meter's current terminals is very low, so the Meter acts like a short circuit. Making Measurements The following sections describe how to take measurements with the Meter. Measuring AC and DC Voltage Model 87 features true rms readings, which are accurate for distorted sine waves and other waveforms (with no dc offset) such as square waves, triangle waves, and staircase waves. The Meter's voltage ranges are 600.0 mV, 6.000 V, 60.00 V, 600.0 V, and 1000 V. To select the 600.0 mV dc range, turn the rotary switch to mV. To measure ac or dc voltage, refer to Figure 2. 13
-
 1
1 -
2
-
3
-
4
-
5
-
6
-
7
-
8
-
9
-
10
-
11
-
12
-
13
-
14
-
15
-
 16
16 -
 17
17 -
 18
18 -
 19
19 -
 20
20 -
 21
21 -
 22
22 -
 23
23 -
 24
24 -
 25
25 -
 26
26 -
27
-
28
-
29
-
30
-
31
-
32
-
33
-
34
-
35
-
36
-
37
-
38
-
39
-
40
-
41
-
42
-
43
-
44
-
45
-
46
-
47
-
48
-
49
-
50
-
51
-
52
-
53
-
54
-
55
-
56
-
57
-
58
-
59
-
60
 |
 |
